DEathgod65 (talk | contribs) No edit summary |
m (General Fixes, Wikifying, Et cetera, applied used AWB. Problems, questions? Here are your answers!) |
||
| Line 44: | Line 44: | ||
|enemies = [[Russian Army|Russian Ground Forces]], [[Legionnaire Mercenaries]] |
|enemies = [[Russian Army|Russian Ground Forces]], [[Legionnaire Mercenaries]] |
||
|multiplayer = [[Acta Non Verba]] |
|multiplayer = [[Acta Non Verba]] |
||
| − | |image = [[File: |
+ | |image = [[File:Acta Non Verba.png|300px]]}}'''''Acta Non Verba''''' is the second level in the singleplayer campaign of ''[[Battlefield: Bad Company]]''. Bravo-One Charlie is sent on a mission to disrupt enemy munitions before joining the assault on the nearby town of Zabograd, a small city and important harbor near the [[Serdaristan]] border in [[Russia]]. After securing the town, the squad then assaults the nearby harbor held by some of the [[Legionnaire Mercenaries]], and after seeing a gold bar fall out of the rear of an [[M939 truck]] fleeing the harbor, the decide to follow it in pursuit of more of the [[Legionnaire]]'s gold. |
==Synopsis and Walkthrough== |
==Synopsis and Walkthrough== |
||
===Proceed Towards Riverbank=== |
===Proceed Towards Riverbank=== |
||
| − | The level opens with [[Marlowe]] looking out the side of a [[UH-60 Black Hawk]], narrating how the squad decided upon keeping the gold bar they found, splitting the profits from it four ways. [[Haggard]] has the bar in his hands, while [[Sweetwater]] jokes that Haggard may not be able to the "whole truck, but [he] can start with the hubcaps and build from there." Haggard tells him to shut up, while Sweetwater questions [[Redford]] about the mission. Redford says Zabograd is an important harbor that is |
+ | The level opens with [[Marlowe]] looking out the side of a [[UH-60 Black Hawk]], narrating how the squad decided upon keeping the gold bar they found, splitting the profits from it four ways. [[Haggard]] has the bar in his hands, while [[Sweetwater]] jokes that Haggard may not be able to the "whole truck, but [he] can start with the hubcaps and build from there." Haggard tells him to shut up, while Sweetwater questions [[Redford]] about the mission. Redford says Zabograd is an important harbor that is 20 km (12.43 mi) behind enemy lines. He says the [[US Army]] is launching an offensive in the region and how they are going in first. Sweetwater notes that they have the Special Forces to go in first, but Redford says they're too expensive to waste and that the squad is going in before them, to which Sweetwater feels that the Army's logic makes no sense. Haggard then asks if Redford was supposed to be home by now, but Redford tells him that this day is his last, and that he plans to be fighting Blue Marlin the next. Sweetwater agrees that heading to the Caribbean Sea is a great idea for Redford's leave. |
| − | [[File: |
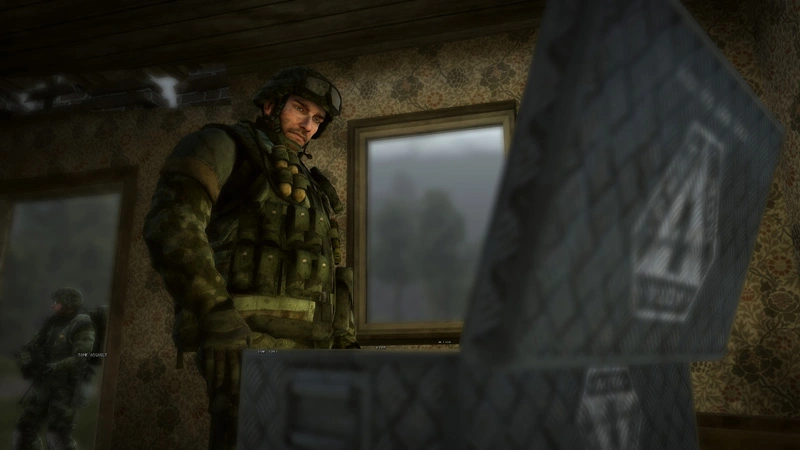
+ | [[File:BFBC Preston Gold Crate - Acta Non Verba.png|thumb|left|The player finds their first gold crate]] |
The helicopter drops the squad off just outside a house with the Legionnaires' motto "acta, non verba" on a sign out front before it heads off. Haggard takes note of the sign, asking Sweetwater if it is the same logo they saw before on the dead mercenaries. Sweetwater confirms this, as Haggard feels they should check out the house as he moves towards it. Sweetwater thinks it could be a trap, to which Haggard feels Marlowe should be the first to investigate the building as the player gains control. They can use the door by knifing or shooting it, or just blow a hole in the house with a [[40mm grenade]]. Inside, they will find the first gold crate in the main room, as well as some [[DTN-4]]. After opening it (unless the player has already opened it on a previous attempt of the mission), the squad will head out towards the riverbank. |
The helicopter drops the squad off just outside a house with the Legionnaires' motto "acta, non verba" on a sign out front before it heads off. Haggard takes note of the sign, asking Sweetwater if it is the same logo they saw before on the dead mercenaries. Sweetwater confirms this, as Haggard feels they should check out the house as he moves towards it. Sweetwater thinks it could be a trap, to which Haggard feels Marlowe should be the first to investigate the building as the player gains control. They can use the door by knifing or shooting it, or just blow a hole in the house with a [[40mm grenade]]. Inside, they will find the first gold crate in the main room, as well as some [[DTN-4]]. After opening it (unless the player has already opened it on a previous attempt of the mission), the squad will head out towards the riverbank. |
||
Revision as of 00:46, 28 October 2011
Acta Non Verba is the second level in the singleplayer campaign of Battlefield: Bad Company. Bravo-One Charlie is sent on a mission to disrupt enemy munitions before joining the assault on the nearby town of Zabograd, a small city and important harbor near the Serdaristan border in Russia. After securing the town, the squad then assaults the nearby harbor held by some of the Legionnaire Mercenaries, and after seeing a gold bar fall out of the rear of an M939 truck fleeing the harbor, the decide to follow it in pursuit of more of the Legionnaire's gold.
Synopsis and Walkthrough
Proceed Towards Riverbank
The level opens with Marlowe looking out the side of a UH-60 Black Hawk, narrating how the squad decided upon keeping the gold bar they found, splitting the profits from it four ways. Haggard has the bar in his hands, while Sweetwater jokes that Haggard may not be able to the "whole truck, but [he] can start with the hubcaps and build from there." Haggard tells him to shut up, while Sweetwater questions Redford about the mission. Redford says Zabograd is an important harbor that is 20 km (12.43 mi) behind enemy lines. He says the US Army is launching an offensive in the region and how they are going in first. Sweetwater notes that they have the Special Forces to go in first, but Redford says they're too expensive to waste and that the squad is going in before them, to which Sweetwater feels that the Army's logic makes no sense. Haggard then asks if Redford was supposed to be home by now, but Redford tells him that this day is his last, and that he plans to be fighting Blue Marlin the next. Sweetwater agrees that heading to the Caribbean Sea is a great idea for Redford's leave.
The player finds their first gold crate
The helicopter drops the squad off just outside a house with the Legionnaires' motto "acta, non verba" on a sign out front before it heads off. Haggard takes note of the sign, asking Sweetwater if it is the same logo they saw before on the dead mercenaries. Sweetwater confirms this, as Haggard feels they should check out the house as he moves towards it. Sweetwater thinks it could be a trap, to which Haggard feels Marlowe should be the first to investigate the building as the player gains control. They can use the door by knifing or shooting it, or just blow a hole in the house with a 40mm grenade. Inside, they will find the first gold crate in the main room, as well as some DTN-4. After opening it (unless the player has already opened it on a previous attempt of the mission), the squad will head out towards the riverbank.
As they move through the fog towards the river, Redford will say that there are Russian soldiers in the area and that they haven't noticed the squad yet. Sweetwater solemnly remarks that if they did, it would't matter as the Army would just send in the next guys to do the job. The soldiers are armed with AEK971's and S20K's. As in previous battles, players should stay in cover and use their LIFE-2 if their health drops to critical ranges. The two-story house closer to the river holds an unshielded KORD HMG turret that should be taken out with hand grenades or the M203/GP-30, depending on their primary weapon. The second gold crate is located in the same house on the second floor by the stairs.
Once the player eliminates all of the soldiers, the squad will regroup at the red smoke and Mike-One-Juliet will give them their next orders to carry out Objective Backfield. Redford informs the squad that a US Armored Division is on the way, but they need cut off supply lines to Zabograd for the Russian Army before they arrive. Redford tells them they will hit the weapons depot first and then the fuel dump first. Sweetwater feels they should hit the fuel dump and then the weapons depot, while Haggard suggests they split into teams and hit each at the same time. Redford sarcastically agrees, adding that he can kill them both and complete the mission with Marlowe if they don't agree with his directive. Sweetwater and Haggard fearfully say they can do it his way instead.
Operation Backfield
Regardless of Redford's decision, the player can choose to hit either the weapons depot or fuel dump first as they are given both objectives at the same time. The player can take a nearby PBL or Vodnik to either; since the weapons depot is closer, it makes sense to head there first. Regardless of their transportation method, the player will find an enemy PBL along the river, to which the squad manning the boat's two XM307 grenade launchers will automatically attack it while they drive. If the player heads to the unmanned PBL on the map, they will find the third gold crate in a ditch under some scaffolding along the shore, as well as some Russian soldiers guarding it - there is also another collectible 870MCS near the crate. The player will know they are close as Haggard says he smells gold. There is also another enemy PBL in the area that will attack the squad.
At the weapons depot, the player must destroy three SAM launchers in the factory. The area is walled off with a brick wall with only a few chain-link fences for easier access. It is also guarded by a multitude of Russian soldiers with their usual armaments. If the player did not take the C4 from earlier, there is some on the other side of the factory at the "X" mark. the one on top of the factory is another M416, but seeing as the player has one by default, it is not required for a collectible weapon. After the player destroys the SAM launchers with C4, a Vodnik with three Russian Specialists will arrive. Unlike the normal Assault and Demolition soldiers armed with AEK's and S20K's the Specialists are armed with silenced AKS74u carbines. The player can take one of their weapons after they kill one of them to use or just as a collectible before moving out.
Across the river towards the fuel dump, there is a Russian soldier and a shielded QLZ-87 turret watching the crossing. The soldier can be dealt with easily, but the QLZ-87 gunner is much more of a problem. If the player has an assault rifle, they can easily just fire back with their 40mm grenades to take the weapon out, or drive close with a PBL, Vodnik, or M939 and take it out up close. They will have to move fast regardless of their method as the multiple grenades in quick succession are very deadly to each of the vehicles and the player themselves. Once it is destroyed, the player can head up to the fuel dump and destroy it. The walled area is guarded by more Russian soldiers, but not any Specialists. The "X" in the barracks is another 870MCS, and the one in the factory is more C4 to destroy the fuel tanks with. The lower three gray fuel tanks and the upper eight red fuel tanks are the objectives to be destroyed. The player should stand clear when destroying them, as they have some decent explosive power.
After moping up the remaining soldiers, the squad will regroup at the smoke near the barracks for their next orders. Miss July will ask Bravo-One Charlie to take out a Russian advance team on the bridge nearby before they can move into Zabograd, as the Russians cannot control the bridge before the attack on the city begins. Redford requests for some air support, but Miss July denies it, telling them to deal with it on their own as Command has nothing to offer at the moment. Just as Redford is about to storm off, Sweetwater notices a Mortar Strike designator along the wall, suggesting they use it against the Russians, to which Haggard agrees.
Secure the Bridge
Marlowe is instructed to take the designator and use it against the Russians on the bridge. The player needs only to grab the designator, point where they want the strike to come in, and press and hold the fire button to call in the strike after a few seconds, which they can do from the window of the barracks. The designator has about a 20 second cooldown before being able to be used again from when the strike is confirmed. Once the player destroys the Russian Vodniks on the bridge, Mike-One-Juliet will call the squad to inform them that the attack has begun and she tells them to head to the city limits and hold for further orders. Haggard says that is fine by him to get there first as he wants to find the gold. Redford responds, saying that isn't their reason for being here. Haggard then says that if Redford wants to sail the Caribbean, he is going to need a yacht.
Objective Offside
The player can grab a Vodnik or M939 to head towards Zabograd. As the bridge is likely destroyed from the mortar barrage, they will have to take the lower river crossing and side road to get back to the main road to the city. On the other side of the river along the road, the player will encounter an enemy Vodnik and more Russian Specialists at the Ruins near the red smoke. Once they are taken out, the player can regroup and await orders. The player can also hear distant explosions as they approach the city. Miss July will tell the squad to complete Objective Offside, which is to take out the Russian defenders on the west side of the city, as three explosions go off and smoke rises from the area. Sweetwater notices Miss July's upset tone and asks if anyone else agrees. Haggard blames Sweetwater for her mood as they start to get into an argument. Redford tells them to listen up and get ready to take out the anti-tank launchers in the west side of town as their tanks are in trouble.
The player must take out four 9M133 Kornet anti-tank missile launchers while traversing through the Russian-held town, filled with soldiers armed with AEK's and S20K's. Destruction will be key in this urban environment as the player can use it to kill enemies on the other sides of walls or to [[wikipedia:Mouse-holing|mouse-hole through the environment towards the objectives. The launchers themselves may or may not be manned, meaning each should be cautioned when approaching as a single missile hit will kill the player. The mortar strike designator will come in handy in clearing out houses from enemies, as will using some of the launchers before destroying them. The "X" mark closest to the entrance to the town is a SCAR with hand grenades on the first floor, while the one across the street int the first launcher's house is some C4 on the second floor. Near the second launcher is an 870MCS, as well as a mounted QLZ-87 turret in the second floor of a house that can really do some damage to the player's cover.
On the way to the third launcher, there is a shielded KORD turret and a BMD-3 that approaches on the road. There is an RPG7 by the KORD on the second floor that can be used to destroy the BMD, unless the player feels playing dangerous and wishes to use C4 that can be found if they back track. It should be noted that the fourth gold crate is in the same building as the shielded KORD. The third Kornet may start attacking the player as they try to take out the BMD. it is located above the light tank in the attic of a two-story building. The player can shoot the operator while dealing with the tank or focus on it first as it can kill the player with one shot, although the tank can prove to be more annoying with its successive 30mm rounds. Once the launcher and tank are destroyed, the player needs only to destroy the fourth Kornet in the two-story on the mini island-like plaza. There is an unshielded KORD defending it, as well as a few foot soldiers in the area. Once it is destroyed, Redford will comment how the town will need a makeover after what they've done to it. The last two "X" marks are a mortar strike designator on the second floor of a house near the wall, and another one under the fourth launcher's location.
Mike-One-Juliet will come on the radio, congratulating the squad on destroying the stationary guns, but adds that things are getting a little hectic for the assault. Sweetwater comments how things are getting a little hectic where they are, to which Miss July says she can hear him, calling him by name. Sweetwater becomes overjoyed by the fact she knows his name, saying that to himself. She tells him to focus and orders them to rendezvous with the Armored Division by the beachhead. Redford orders the squad to regroup at the red smoke, while Sweetwater still cant get over the fact that she knows his name. Haggard then starts to think out-loud about Miss July towards Sweetwater, saying that his cousin has a beautiful voice but a horrible facial appearance. Sweetwater then questions if that was the one Haggard dated. He confirms this, and Sweetwater responds smoothly.
The US Armored Division shows up as the squad regroups. Redford notes that they took long enough, seeing as how they just single-handedly cleared half the town. Haggard asks why they get all the cool toys, referring to the M1A2 Abrams tanks rolling in. Sweetwater says its because they look good in the photo-shoots for the press. Haggard waves at the tanks, as Mike-One-Juliet comes in over the radio again, giving the squad orders to join up with the 32nd Armored Division on the assault on Zabograd, as HMMWV's approach and a Black Hawk flies overhead. Redford responds, hoping that they could get some rest and relaxation, but Miss July says they are low on troops and are committing all assets to taking the city, which includes Bravo-One Charlie.
Protect the Tanks
The player is to keep as many tanks as possible alive for the final assault on Zabograd; there are a total of three that they are responsible for. The pass the Abrams tanks will move through is littered with RPG wielding Demolition troops, making the nearby repair tool a must for this segment of the mission to keep the tanks alive over the RPG that is also there. The player will start out behind the third tank, but it is advised that they move up to the first tank and man its gunner seat to keep it alive, because if they stay in the third tank, at least one will be destroyed. While the tanks roll through the pass at a painstaking pace, the player should keep their eyes on the left and right for enemies, and get out and fix the tank if it is hit.
Each of the tanks will fire at the Russians with their main guns, but they will likely miss as they are not the most accurate shots. The "X" marks along the path are repair tools and RPG's in case the player never took the one earlier, or if they prefer to walk along the tanks and use the mortar strike designator to kill the soldiers and just grab a repair tool along the way. Near the bend in the pass, a couple of BMD-3's will attack the convoy of tanks. They will stop and fire upon the BMD's and take them out quickly, as their main guns are much more powerful and their armor can hold better to the BMD's cannons. After they are destroyed, the tanks will split along the fork, with the first and third tanks going right, and the second going left. If the player needs to repair the other tanks, they should do so quickly, although the first tank will most likely take the brunt of the RPG attacks.
there will be another house along the left side with four or so soldiers, with one having an RPG that hill fire at the rear of the tank, doing more damage. The player should heal the tank quickly after killing the RPG trooper, and keep in mind that the emplacement ahead marked on the map is another Kornet, that will do significant damage to the tank. The player should take it out as soon as possible before it can destroy the tank and fix it up if it was hit. Once the second tank rounds the next bend, they will start to speed up as they clear the pass. If any tank is lost, Redford will alert Marlowe of it and remind him to fix them up if they're hit and watch for RPG's. As they near the graveyard, another RPG troop will be among the mix of soldiers. Once they all reach there, the player will be told to regroup at the red smoke after defending at least one of the tanks successfully. Instead of regrouping immediately, the player may wish to check out the group of sheds on the southeast side of the cemetery, as the fifth and final crate of gold on the level lies there. Back at the first "X" mark is a collectible M249 as well, that the player may wish to backtrack for.
As the squad regroups, Redford congratulates the squad on clearing the pass. Miss July then tells the squad that she's keeping the squad out of the main battle so they can go destroy the Russian command post in Zabograd before they call for reinforcements. She adds that if they do a good job, she might be able to get the rest of the squad out of "Bad Company", seeing as Redford is going home tomorrow. Sweetwater agrees that if they can get out of the unit, then he's all for it. Redford tells her they are up for it and they move towards the command post across the city.
Assault East Zabograd
The east side of the city is littered with Russian soldiers. The M1A2's will roll in through the town, splitting off at the first intersection. The player should wrap around the south side to avoid most of the combat and rush for the command post. The shielded KORD should be focused on the tank by the time the player sees it, allowing them to simply shoot the operator. The player should then move quickly behind the house, killing any Russians along the way. The tanks will keep most of the Russians focused while the player advances up to the command post. A Kornet will be in the southeast corner of the town that the player should take out before hitting the command post.
Once they arrive, they need to kill the Russians Specialist and Demolition soldiers defending the building and destroy the radio equipment inside. The mortar strike will make this a lot easier if the player still has one, as it can either hit the soldiers or the building and take out the equipment. There is C4 by the stairs if the player doesn't have the mortar strike with them.
Unfortunately, no matter how fast the player moves, the Russians will have already called for reinforcements. Miss July will scold the squad this after they regroup, as Redford says they moved as fast as they could. A Mi-24 Hind flies in towards the central square as an explosion interrupts the conversation. Redford asks what it was, as Miss July informs them that the last tank that is in the town got disabled by an RPG and will need a repair crew to come fix it. She tells them to bunker down near the tank and wait for US reinforcements to arrive as they stave off the Russian counterattack. Redford asks if she has any intel of what is coming, but she says she doesn't know and that they will find out soon enough.
Groundhog Down
The player is to move towards the disabled tank in the central square. As they approach, Haggard says it looks fine to him, but Redford tells them all to let the engineers worry about that, as their objective is to defend it until the engineers arrive. Sweetwater notes the building behind the tank looks like a good defensive position. The tank driver will say he is glad to see the squad and that he is in a bit of trouble, while asking them if they have any jumper cables on them.
The multiple "X" marks in the area are all gadgets, including an RPG by the fountain, another RPG on the second floor of the house above the tank, two repair tools and a mortar strike designator near the tank, and an M416 off to the east a bit on the first floor of a house. Next to the RPG behind the tank, there is a shielded KORD looking at the entrance road to the city that the reinforcements will arrive from. There is also a Kornet to the west and in an attic of a two-story near the tank. the other emplacement marked on the map near the M416 is another shielded KORD, but it cannot view the entrance road as well. The player should keep a repair tool handy and man the KORD behind the tank to watch the road.
The reinforcements will first arrive from the right side of town, consisting mainly of Specialist and Assault troops, with one or two RPG wielding Demolition troops in the mix. If the player keeps their finger steady on the trigger and uses short bursts with the cord, they should be able to take out all the infantry without overheating the gun. The infantry will mainly be focused on flanking across the plaza, allowing the player to mow them down. Soon after, a Vodnik will approach the square as more reinforcements come from the left side. The player should focus on the Vodnik first and then the troops, while looking out for RPG's. More Russians will approach again from the right side, and one they are taken out, Redford will say the area is clear, also wondering where the US Army is. The player will have a pause to fix the tank up or heal themselves before the next wave approaches.
Soon after the break, a BMD-3, a Vodnik. and more Russian soldiers will move in. The player should quickly grab the RPG next to the KORD and take out the BMD. Once it is down, the player can hit the Vodnik with an RPG or just man the turret and take it out with that, while taking out more Russian soldiers. The US Army will soon show up, rescuing the tank an the squad from being overrun. The squad will then regroup at thee red smoke near the entrance to the town as the US soldiers and tanks help clear out the remaining Russian forces. Haggard will go off in to a stupor, saying that the squad will be known for defending the tank against an onslaught of Russians.
Mike-One-Juliet gives the squad orders to secure a weapons cache at the harbor as the Russians try to move it out, while reminding them not to screw this up like the command post. Haggard is excited to go to the harbor as he feels that the Mercenaries may be there, which to him means more gold. Redford tells them to move out and head there. The player may wish to grab the mortar strike for the assault on the harbor.
Secure Harbor
The HMMWV will make a good transport to get to the harbor quickly. The player needs only to follow the road there. Along the way, Sweetwater brings up that he feels the squad isn't getting the credit they deserve. He notes how they took most of the town by themselves, as Redford responds that Miss July did say she may be able to get them out of the Company. The road will be out about halfway there, making the squad have to walk the remainder on foot.
Once the squad gets to the overlook, they will see multiple Mark V Patrol Boats and PBL's, as well as an Mi-24, fleeing the harbor. Haggard is saddened by this, while Sweetwater is excited that they completed the mission and could possibly get transferred out, as Redford feels they all deserve it. Sweetwater is ready to head back, as Haggard notices the Legionnaire Mercenaries down by the M939 trucks. Redford confirms this, and haggard believes they should stop the mercenaries and sarcastically adds that they should ask some questions and search them, suggesting he wants to go after the gold. Redford tells him it's their orders to secure the area, but Sweetwater its outraged by this, seeing as how he just wants to be off the front lines and out of this situation, noting that he thought they were all "playing it safe" and adds that Redford is going home tomorrow. Redford says this will only take a minute as they assault the harbor.
The mercenaries perform much like they have in the squad's previous encounter, quick and deadly. The player should seek cover while taking out any mercenaries in the open. The "X" at the top of the hill is a SCAR, in case the player wishes to not alert the enemies of their position, while sacrificing use of 40mm grenades if they have an assault rifle. If the player chooses to pick it up, Haggard will ask if the thing on front of the gun is a silencer, which it is. He then proceeds to say that "silencers are for girls", as he likes the loud noise of explosions and gunfire instead. Despite not being as accurate at range as an assault rifle, the SCAR will help in close quarters battle in the harbor. The mercenaries will be scattered about the area and armed with XM8 assault rifles. If the player has the mortar strike designator, taking out the Legionnaires will be much easier as well. The player must then approach the trucks after the mercenaries are killed.
The trucks will start to pull away as Haggard proceeds to check each dead mercenary for more gold bars. Sweetwater hurries him along and he doesn't find anything. Marlowe asks where the trucks are headed so fast as a gold bar falls out the last truck. They all then get the idea of following the trucks to try and capture the gold as the mission ends.
Related Achievements and Trophies
The following achievements/trophies can be completed on this mission.
| Image | Name | Criteria | Gamerscore | Trophy type |

|
Not even a nugget! | Complete Acta Non Verba on normal | 15 G | Bronze |

|
Action, not words! | Complete Acta Non Verba on hard | 25 G | Bronze |

|
I love gold! | Find one gold bar | 10 G | Bronze |

|
The Hypochondriac | Use Auto Injector 50 times | 20 G | Bronze |

|
Home Wrecker | Destroy 200 walls | 15 G | Bronze |
Trivia
- During the tank defense segment after reinforcements are called, Haggard will say once the Russians start pouring in, "Tonight, we dine in Hell!" making an obvious reference to King Leonidas from the movie 300.
- The name of this objective is colloquially named "Groundhog Down", possibly referencing the novel and movie Black Hawk Down.
- There is a possible glitch that the US tank will become mobile, hostile, and attack the player, who is the only one that can do damage to it at this point. This occurs if a Russian soldier gets too close to the tank and "boards" it. If this happens to the player, they must restart from the last checkpoint and make sure no enemies get anywhere near the tank by fending them off.
- Acta Non Verba is a Latin phrase meaning Action Not Words.
| |||||||||||