No edit summary |
|||
| Line 5: | Line 5: | ||
|game = [[File:Battlefield 1 Icon.jpg|25px]] [[Battlefield 1]] |
|game = [[File:Battlefield 1 Icon.jpg|25px]] [[Battlefield 1]] |
||
|war = [[World War I]] |
|war = [[World War I]] |
||
| + | |teams = {{Faction|US1}} vs. {{Faction|GE}} |
||
| − | |teams = [[File:BF1_United_States_Icon.jpg|25px]] [[United States Army#Battlefield 1|United States]] vs. [[File:BF1 German Empire Icon.jpg|25px]] [[Imperial German Army|German Empire]] |
||
|date = September 26 - October 3, 1918 |
|date = September 26 - October 3, 1918 |
||
|place = Argonne Forest, North-West France |
|place = Argonne Forest, North-West France |
||
| Line 27: | Line 27: | ||
<div class="mw-customtoggle-CPtable wikia-menu-button" style="padding: 0.5em">show/hide</div> |
<div class="mw-customtoggle-CPtable wikia-menu-button" style="padding: 0.5em">show/hide</div> |
||
| + | |||
{| border="0" cellpadding="1" cellspacing="1" class="article-table article-table-selected mw-collapsible mw-collapsed sortable" style="text-align: center; font-size: small" id="mw-customcollapsible-CPtable" |
{| border="0" cellpadding="1" cellspacing="1" class="article-table article-table-selected mw-collapsible mw-collapsed sortable" style="text-align: center; font-size: small" id="mw-customcollapsible-CPtable" |
||
Revision as of 15:42, 26 December 2017
- This item has a Codex entry: Into Argonne Forest
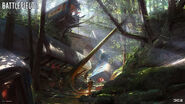
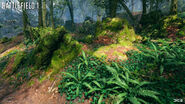
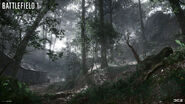
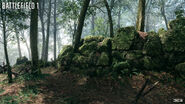
The Argonne Forest is a multiplayer map featured in Battlefield 1. It was first seen in the reveal trailer of the game.[1] This infantry-focused map takes place during the opening phase of the Meuse-Argonne Offensive of late 1918.
Overview
Gameplay
The map itself is covered in thick overhead cover and a multitude of locations that obscure the visions of players. There is a length railroad running through the map, where the Behemoth and objectives are located. The entire map is an infantry-only area, the only exception being the Armored Train. A civilian passenger train has derailed and crashed at the center of the map, and is now the prime battleground for vicious combat.
Behemoth
The Behemoth on this map is the Armored Train. At various points along the map, it is elevated above ground, atop railway bridges.
Control Points
| Control Point | Conquest | Domination | Rush | Operations | Frontlines |
|---|---|---|---|---|---|
| American Deployment | |||||
| Charlottenburg Trench | 1A | ||||
| Schwarzwald Trench | A | 1B | |||
| Death Valley | 2A | ||||
| Howitzer Bunker | B | 2B | A | ||
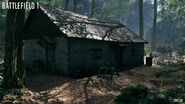
| Hunter's Cabin | 3A | B | |||
| Hellfire Junction Bridge | C |
3B | C | ||
| Creek | 3C | D | |||
| Railroad Depot | B | 4A | |||
| Kaiser's Ridge | D | A | 4B | E | |
| Railroad Clearing | 5A | ||||
| Abbey Ruin | E | C | 5B | ||
| German Deployment | |||||
Conquest
Equipment
Deployments
US Deployment
The US deploys to the west of the map in the forest outside of the Schwarzwald Trench.
German Deployment
The Germans deploy to the east outside Abbey Ruin.
Flags
A - Schwarzwald Trench
The western most flag, its capture area starts outside of the Howitzer Bunker and entails the adjacent trench. The flag servers a barrier with the US deployment. A small "no man's land" can be found between the flag and the nearby forest. To the north of the flag are additional trenches which allow for flanking to the next flag and vice versa. To the south are the railroad tracks which allow the train limited access to the flag.
B - Howitzer Bunker
This flag is located within a bunker that notably separates the north and south side of the map. The bunker is large enough to run from outside of the Schwarzwald Trench and Junction Bride respectively, with the flag located in the center. Defensive against invading forces is relatively easy compared to other flags as the bunker can be entirely locked off with intractable doors and indestructible walls. It should be noted that the room where the flag lies is surrounded by munitions which will create large explosions should they detonated. Outside of the bunker lies numerous howitzer cannons along with the railroad track further south and derailed passenger cars.
C - Hellfire Junction Bridge
The Hellfire Junction Bridge is located in the center of the map and is the center point for all engagements. It is vital a team captures this flag as ownership of it will make it easier to capture adjacent flags. A railway runs through the bridge, subsequently allowing the Armored Trains easy access to the flag. Both ends of the bridge feature heavy machine gun emplacements. Unlike the east side, however, the west machine gun sits on a hill that overlooks the bridge. This hill is also a great vantage point for marksmen. Surrounding the bridge are derailed passenger cars which provides cover for the relatively open forest below. A flametrooper Elite kit can also be found her at the bottom of the bridge.
D - Kaiser's Ridge
This flag sits on a hill with bunkers on the north and south ends of the ridge and a small trench in-between. The surrounding area is accompanied by trenches and barriers.
E - Abbey Ruin
The eastern most flag, Abbey Ruin is found within a destroyed church. The topside of the church has largely been destroyed with plants starting to grow over the rubble. Providing little cover, most of the fighting takes place below where a make shift command center has been created. The bottom features three possible entry ways from the west, north, and south respectively, requiring lookouts when attempting to capture the flag.
Small Game Modes
Domination
Domination takes place in the German half of the map around Kaiser's Ridge, the Railroad Depot, and the Abbey Ruin.
War Pigeons
War Pigeons gamemode takes place in the American sections of the map around Schwarzwald Trench, Howitzer Bunker, and Death Valley.
Rush
Operations
Argonne Forest serves as the second half of "Conquer Hell" on Operations, following the American breakthrough at Ballroom Blitz.
Sector 1
The American Expeditionary Force enter the forest and attacks part of the German Hindenburg trench line at two positions
Sector 2
After pushing the Germans away from the trenches, the Americans must fight and overtake a German bunker.
Sector 3
The Americans must now push back the Germans beyond the Hellfire Junction Bridge where a passenger train has been derailed under the bridge and the armored train can move forward.
Sector 4
Past the Hellfire Bridge, the Americans must seize control of an entrenched pillbox.
Sector 5
The last push puts the Americans against the Abbey Ruin where The retreating Germans must make their last stand within underground bunkers. This is a place in which the Armored Train cannot reach, meaning that it has too be captured on foot. If captured, the Americans win the Operation.
Frontlines
The Frontlines gamemode was added to this map and Amiens with the Nivelle Nights Update.
A five-flag ess layout is used, corresponding to the three central flags in Conquest. The two quarter-way flags divert further from the rail line than in other game modes, following the lowland under the railway.
Gallery
| ||||||||||||||||||||
Trivia
- Argonne Forest appears to be based on the Bourlon Wood found in the Fog of War level in Through Mud and Blood.
- In the game files this map is named MP_Forest.


