No edit summary |
No edit summary |
||
| Line 50: | Line 50: | ||
|faction = [[File:Flag of the United Kingdom.svg|x20px]] [[British Army#Battlefield V|United Kingdom]] |
|faction = [[File:Flag of the United Kingdom.svg|x20px]] [[British Army#Battlefield V|United Kingdom]] |
||
|light = 2 [[Universal Carrier]] |
|light = 2 [[Universal Carrier]] |
||
| − | |half-track = |
+ | |half-track = 2 [[M3 Half-track#Battlefield V|M3]] |
| − | |tank2 = |
+ | |tank2 = 2 [[Staghound T17E1]]/[[Valentine Mk VIII]]/[[Valentine AA Mk I]]/[[Churchill Mk VII]]/[[Churchill Gun Carrier]]/[[Valentine Archer]] |
|plane = 2 [[Spitfire#Spitfire Mk VA|Spitfire Mk VA]]/[[Spitfire#Spitfire Mk VB|Spitfire Mk VB]]/[[Mosquito#Battlefield V|Mosquito Mk II]]/[[Blenheim#Blenheim Mk I|Blenheim Mk I]]/[[Blenheim#Blenheim Mk IF|Blenheim Mk IF]] |
|plane = 2 [[Spitfire#Spitfire Mk VA|Spitfire Mk VA]]/[[Spitfire#Spitfire Mk VB|Spitfire Mk VB]]/[[Mosquito#Battlefield V|Mosquito Mk II]]/[[Blenheim#Blenheim Mk I|Blenheim Mk I]]/[[Blenheim#Blenheim Mk IF|Blenheim Mk IF]] |
||
|emplacement = [[Flak 38#Battlefield V|Flak 38]]}} |
|emplacement = [[Flak 38#Battlefield V|Flak 38]]}} |
||
Revision as of 00:07, 23 February 2019
| This article is a stub. It is short and in need of fortification. Why not help out? |
Arras is a map featured in Battlefield V. It was first seen in the Gamescom trailer.
It takes place during the Battle of Arras on May 21st 1940. With the Germans already having reached the English Channel on May 19th, a Franco-British counterattack spearheaded by armored units was made against the southern flank of the German front, with the intention of halting or otherwise stalling them from completing the encirclement from the southwest. Although initially promising the attack was repulsed within 24 hours. This and other failed counteroffensives ultimately left the majority of the British Expeditionary Force, along with the French First Army, trapped in a pocket centered around the seaside town of Dunkirk.
Overview
In the light of a fine morning in late spring stands the quaint farming community of Arras. The rural village, located centrally on the map, consists of nearly two dozen buildings packed closely together along cobblestone streets, overlooked by a grand stone church. Around the map's periphery, and stretching out of bounds across the horizon, are a series of neatly parcelled canola fields - their vibrant yellow flowers standing waist high, giving the map a striking palette while also offering substantial visual cover for infantry. The fields are separated by modest hedgerows or islands of forestry, as well as rural roads and pathways that circle the village exterior, connecting farmhouses and agricultural outbuildings standing otherwise isolated from the central block. The terrain is undulating, with the village standing on a slight hill, with the surrounding open fields rising and dipping at random. Ditches line the dirt road sides, and in the south a shallow river cuts across the map's waist.
Despite its visual splendour, Arras has already been scarred by war with shell craters, tank wrecks and scorched fields around the eastern edge. Set against a backdrop of German tanks roaming the adjacent hills en masse, Arras may well arrive at the same fate as nearby towns, uniformly devoured by smoke, as the entire village area can be effectively levelled in the course of a game.
In aesthetics and layout, Arras intends to evoke Soissons from Battlefield 1, or Harvest Day from Battlefield: Bad Company.[2]
Flag Layout
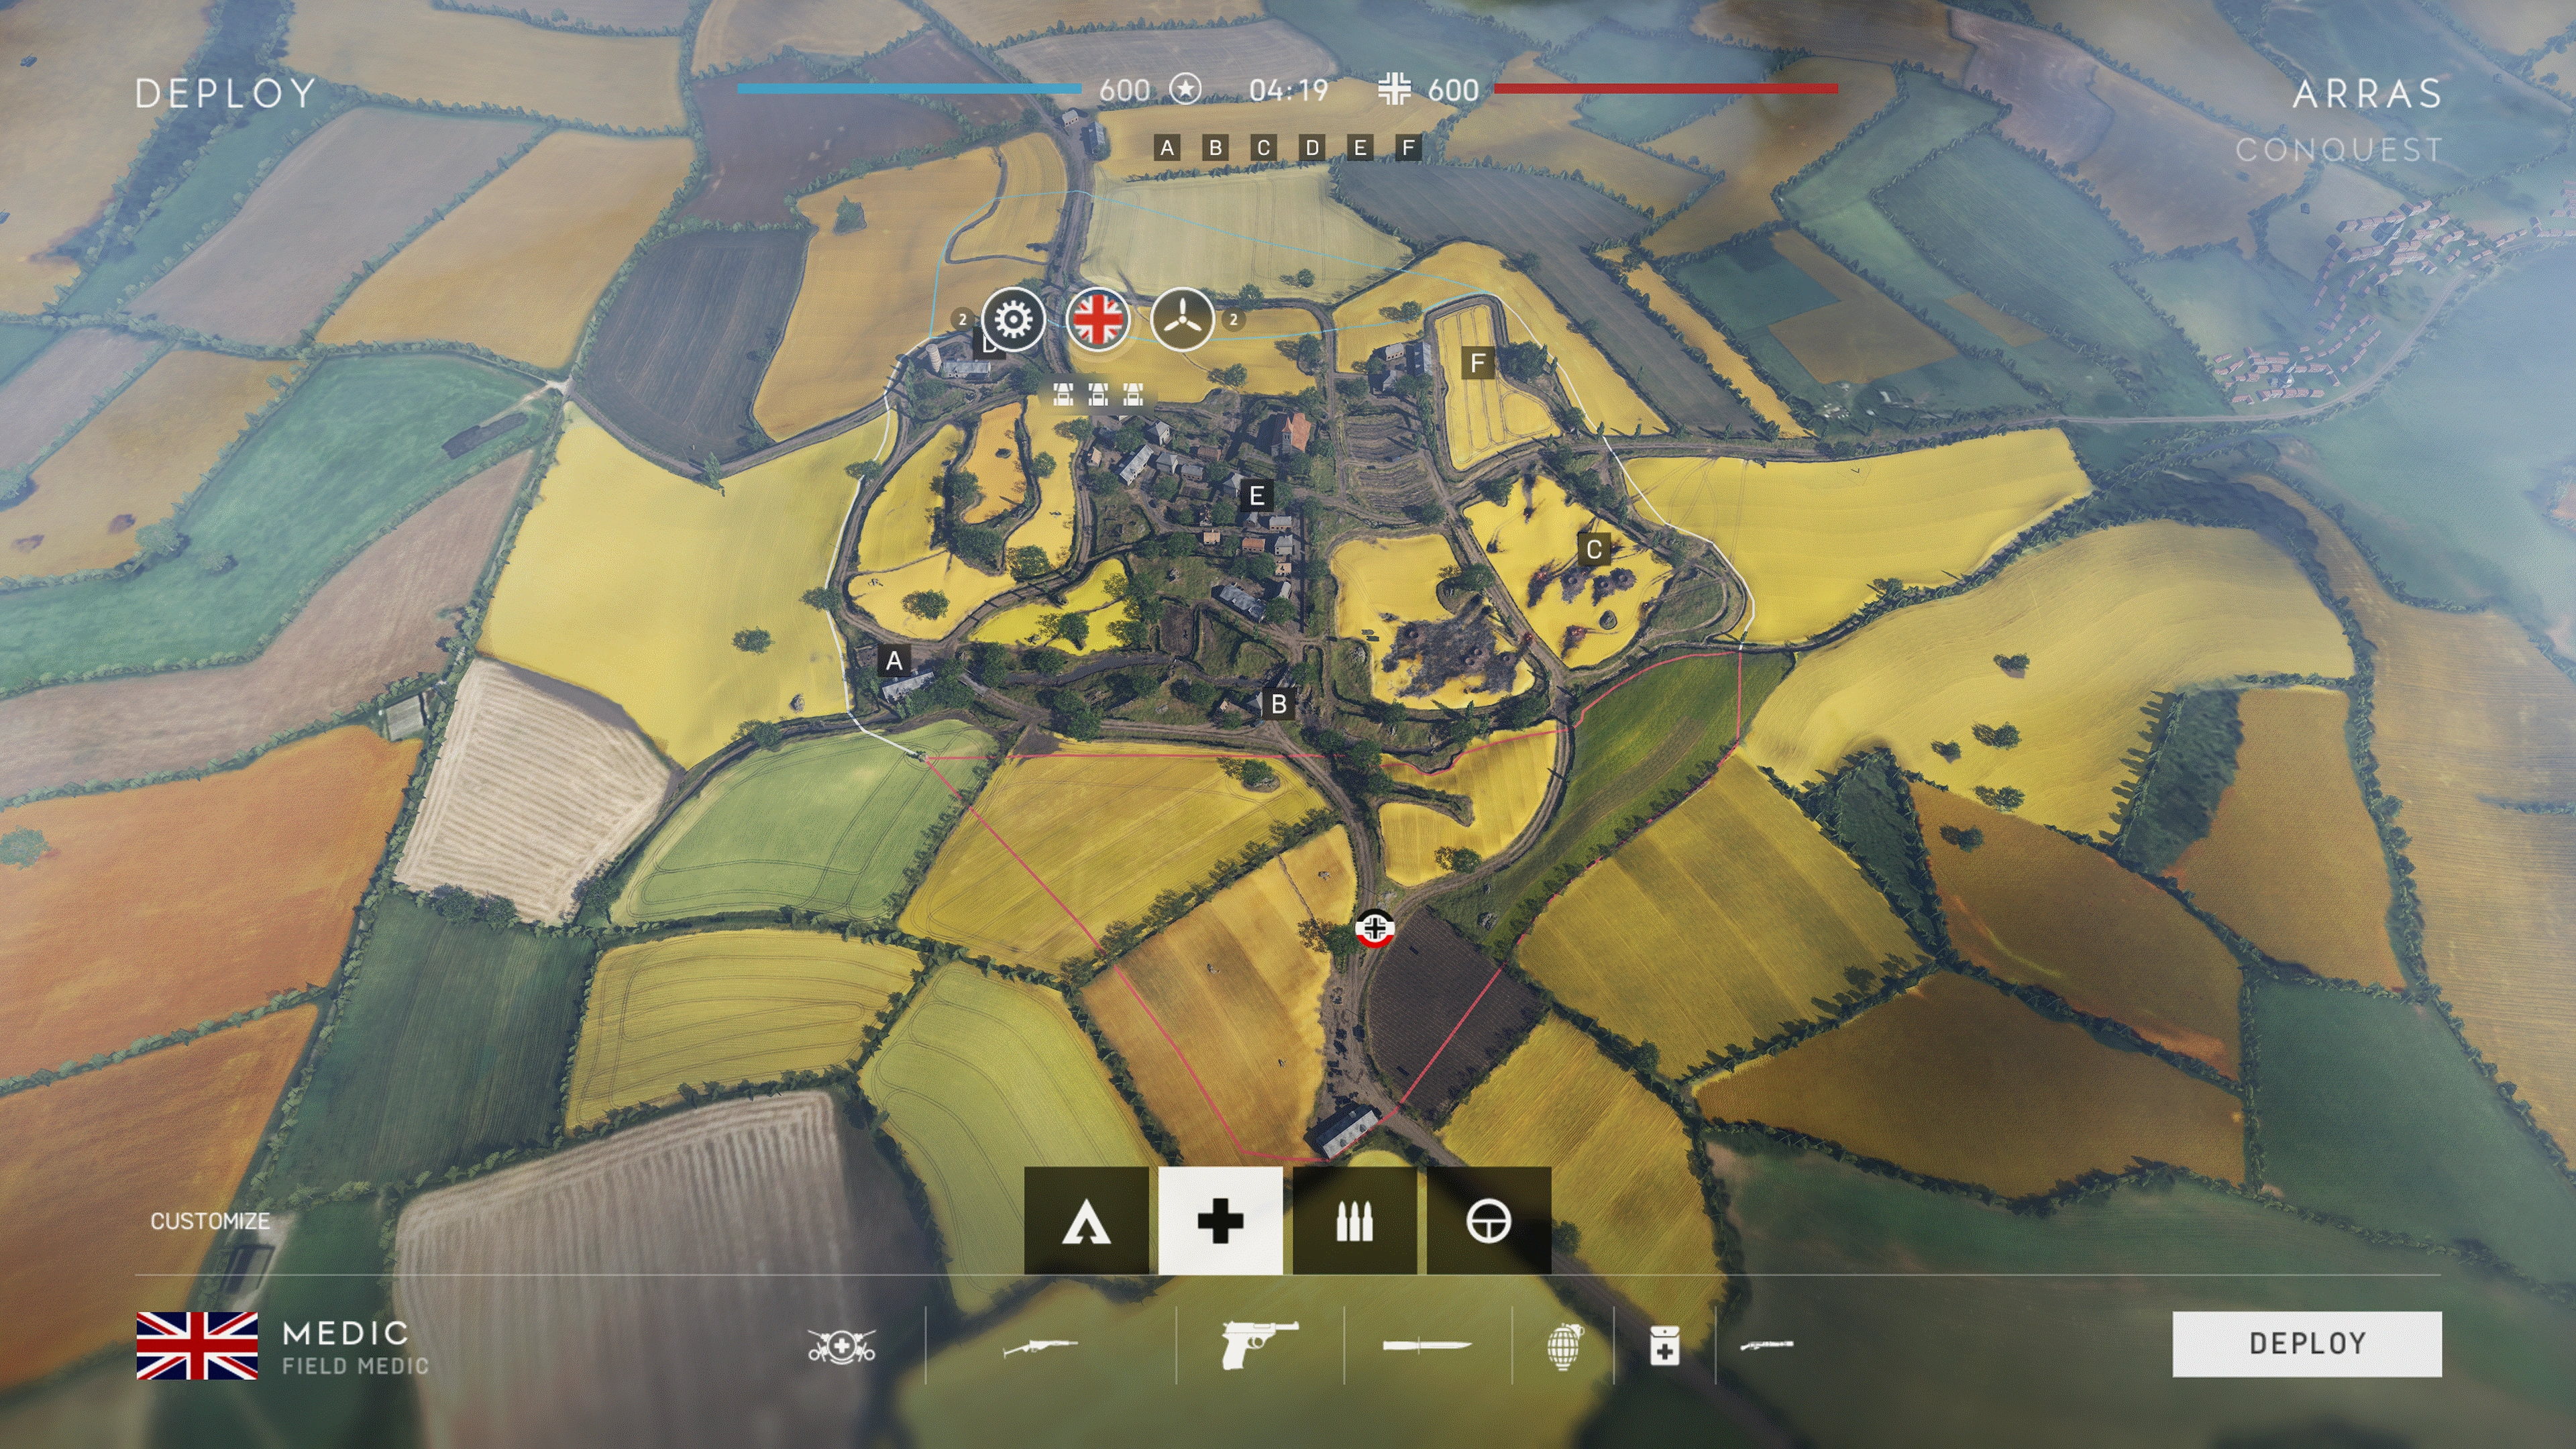
Conquest

In Conquest, Arras is divided into six flags, arranged into three groups of two, forming three lanes across the width of the battlefield. The peripherally located A, B, C, D and F flags stand around the centrally located Village flag of E. Around these former objectives, combat can occur at a variety of ranges - long sight lines across the open canola fields, which are generally free of obstacles and supported by an unrestricted road network, encourage vehicular combat and sniping, although steep elevation changes, thickets of vegetation and isolated structures can force engagements at closer ranges. Even when inside the Village, combat is generally at close quarters but the high ground surrounding the church and its belltower extend this somewhat. The constricted nature of the town does generally deter vehicles, however aircraft have free range over the map.
++TICKETS++ The mode supports one tank and two gun carrier call-ins of the Squad Reinforcement system.[3]
Equipment
| Light vehicle(s) | |
| Half-track(s) | |
| Tank(s) |
2 Panzer 38t/Panzer IV/Flakpanzer IV/Tiger I/Sturmgeschütz IV |
| Fixed-wing aircraft | |
| Emplacement(s) | |
| Light vehicle(s) | |
| Half-track(s) |
2 M3 |
| Tank(s) |
2 Staghound T17E1/Valentine Mk VIII/Valentine AA Mk I/Churchill Mk VII/Churchill Gun Carrier/Valentine Archer |
| Fixed-wing aircraft |
2 Spitfire Mk VA/Spitfire Mk VB/Mosquito Mk II/Blenheim Mk I/Blenheim Mk IF |
| Emplacement(s) | |
| Neutral | |
| Light vehicle(s) | |
Deployments
Both teams have only a single spawn point. The Germans deploy from a fork in the road in the far south, with the left bearing taking them to the nearest capture point of Bridge, the other curving northeast towards Tank Wrecks. Opposing them are the British, who deploy from a similarly arranged three-point junction on the northern edge - their roads take them west, south and east towards Hill Farm, the Village, and Field, respectively.
A: Water Mill
Water Mill is found in the map's southwest corner, and consists of a farming compound next to a shallow river. A single, large structure houses the eponymous mill and overlooks the open, muddy yard from the south. The flag is found in the middle of the yard, which is mostly devoid of cover save for some agricultural equipment and a perimeter wall of dry stone, although the position can be reinforced with fortifications.
B: Bridge
A Bridge over the stream is found east of Water Mill, and is the closest capture point to the German HQ. Consisting of little more than a narrow stone arched bridge and an accompanying house, the area is fairly sparse. Players can hide in the riverbank and capture the flag in defilade from the southern roadway, and the bridge itself can be destroyed to hinder enemy movement.
C: Tank Wrecks
The aftermath of a significant armored clash in found in the open fields along the map's east side, where dozens of smouldering tank hulks litter the heavily cratered farmland. Although the wrecks and numerous they are somewhat spread out, and concentrated around the field's eastern edge - as they provide the majority of cover, players on foot will have to move tactically in order to reach the capture zone. Furthermore, the flag's location at the map center is at a lower elevation than the surrounding perimeter, granting superior fighting positions on the edges of the radius.
D: Hill Farm
Located directly outside the British spawn in the northwest corner, Hill Farm is another isolated farming homestead, consisting of two houses and a grain silo. The position sits atop a slight hillock that descends to the north and south, the latter of which giving way to open fields cuts across by trenches. These excavated positions provide a covered route partway to Village or Water Mill.
E: Village
The centerpiece of the map, the Village, consists of a dozen single and multistorey houses intersected by main roads. Structures are overgrown with vines and packed tightly together amongst varying elevations of partitioned gardens, resulting in close-quarters fighting. The flag itself is found on the northeast side of the settlement at an open cobblestone junction, opposite a large church. Players can fight from the interior of this building as well as the belltower, the tallest point on the map, which can in turn by toppled by shellfire. Fortifications can be erected on the roads to block vehicle movement into the town, and new infantry routes through buildings created by knocking down walls.
F: Field
The northeast side of the map is comprised of a vast network of trenches dug in amongst the canola blooms. The flag itself is in the middle of this field, which is bordered to the west by a number of barnyard structures.
Grand Operations
Arras is the second map in the Battle for France Grand Operation, following Twisted Steel, as well as the Battle of Hannut Grand Operation added with Lightning Strikes during which it comes after Panzerstorm. In Battle for France, day three uses a unique version of the Frontlines game type while in Battle of Hannut it is Rush Large. For both operations, day four uses the same layout for Final Stand.
Frontlines
In the Battle for France, the third day of Operations uses the Frontlines game type. At this time, each team has access to two planes and two transport vehicles, with an additional one tank and two gun-carrying halftracks available as Squad Reinforcements.
Rush
In the Battle of Hannut, day three uses 64 player Rush as its ruleset.
Final Stand
Should the battle reach a stalemate, a fourth day of fighting occurs during which each team makes their Final Stand.
Breakthrough
The attackers are allocated two transport vehicles at all stages.
Sector 1
The attackers begin the fight with two tanks, although these are removed from play in sectors two and three.
Sector 2
Sector 3
Frontlines
Vehicular loadout for each side consists of one tank and transport vehicle. Another tank and two gun carrier halftracks can be brought in with reinforcement points.
Squad Conquest
Arras is available in Squad Conquest alongside Rotterdam and Hamada from January 17th to 30th, 2019, and will be made permanent if the feedback is positive.
The layout for Arras is completely triangular, with bigger open ground, and is limited to the southwest portion only. A single tank is available for both teams.
Deployments
German Deployment
The Germans deploy near the Bridge.
British Deployment
The British deploy in the fields heading for the Water Mill.
Flags
A: Bridge
The entire house and its yard are the capture zones. This is the closest objective to the Germans.
B: Ruins
This objective sits west of the village, and is the central zone for this mode. A health and ammo pickup can be built.
C: Water Mill
This objective capture zone is similar to Conquest.
Developer Notes
Make your way to center to fight over the ever-contested village and climb up the tower of the church to get a good overview of the action. Or jump in your tank and drive across the fields and take control over the eastern open areas. If you find yourselves in the middle of the canola fields, just crouch down among the flowers and disappear from enemy view. Arras features both tanks and planes as well as jeeps and bikes." — Battlefield V Launch Notes
Gallery
")
")
")
")
| ||||||||||||||||||||||||||