| This article is a stub. It is short and in need of fortification. Why not help out? |
- This item has a Codex entry: Russia's Entry into the War
— News Article - Battlefield.com
Brusilov Keep is a map featured in the Battlefield 1: In the Name of the Tsar expansion, named after the Brusilov Offensive, one of the most lethal offensives in world history.
Overview
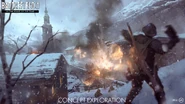
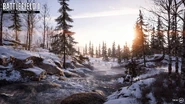
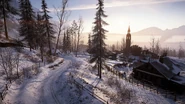
Combat on Brusilov Keep takes place along the eastern slope of a snow-capped mountain, which houses the small town of Kolomea, itself comprised of several dozen buildings of wood and stone. The town is situated at the junction of the Samara River, which flows downhill across the width of the map, forming a shallow valley that splits the settlement into two. On the East Bank of the river are a series of fortifications on the outskirts of town, as well as a cluster of buildings closer to the bank itself. The West Bank contains the larger half of the settlement, with the key feature being a conspicuous bell tower that overlooks much of the riverside area, including a view straight down Bercheza Bridge, one of three such bridges that span the valley floor. Other features of the area include a rail line and main road, that run vertically across the western edge of the slope, initially parallel to one another before branching at the river.
The area can, at times, be subject to a snowfall of varying degrees of intensity.
Behemoth
The Modified Armored Train appears along the railway line on the map's western edge.
Control Points
| Control Point | Conquest | Domination | Operations | Rush |
|---|---|---|---|---|
| Russian Deployment | File:BF1 White Army Icon.jpg | |||
| Hilltop Battery | A | 1B | 1B | |
| Bercheza Bridge | B | 2A | ||
| Samara River (Samara Lookout) |
C | 2B | 3B | |
| Supply Depot | D | 4B | 4A 4B | |
| Austro-Hungarian Deployment | ||||
| Railway Pit | 1A | 1A | ||
| Kuty Inn (Samara Trail) |
A | 2A | 2B | |
| Richka Railway | B | |||
| Chekhova Ruin | 3A | |||
| Galicia Overlook | 4A | |||
| East Bank | C | 3A | ||
Conquest
Conquest is fought among four flags, two along the river, and one near each deployment. Most action is expected to take place at the river, as the town on the west side and the trench lines on the east make for a difficult advance on foot. Cover is initially plentiful, as most houses in town start the battle intact, with a burning building and the church being the few notable exceptions - further ruin can brought upon the town with infantry-based and mechanized artillery, allowing players to turn garrisoned positions into matchwood.
Both teams have access to the Artillery Truck, Putilov-Garford Armored Truck, and Cavalry units.
Equipment
| File:BF1 White Army Icon.jpg Russian Empire | |
| Light vehicle(s) |
2 Horses |
| Tank(s) | |
| Light vehicle(s) |
2 Horses |
| Tank(s) | |
| Neutral | |
| Self-propelled artillery |
Modified Armored Train (Behemoth) |
| Emplacement(s) | |
| Battle pickup(s) | |
Deployments
Russian Deployment
The Russians start on the southern extremities of the map, on the forested mountainside slopes outside the town of Kolomea, and at one end of the railway line. Their route north takes them directly to the fortifications of Hilltop Battery, while the rail track and main road lead to Bercheza Bridge.
Austro-Hungarian Deployment
The Austro-Hungarians deploy from a similarly rural area, amongst foothills at the northern end of the railway. The main road can be followed downhill to Kolomea's north-end, the Supply Depot.
Flags
Hilltop Battery
The Hilltop Battery is adjacent to the rail line in the map's southern sector, atop a hill overlooking the town and the Rail Pit to the west. The capture zone itself consists of an artillery dugout with a number of unusable field guns in firing position, although the area itself is surrounded by a trench network around the perimeter of the plateau. Pine trees dot the slopes, and along with a few scattered boulders, make up the majority of cover along the objective's approaches. Athough this flag is equidistant from Bercheza Bridge as the Supply Depot, Hilltop Battery is somewhat isolated in its position up a steep hill from the valley objectives. A mountain trail leads north-east towards the Samara River objective.
Bercheza Bridge
The largest of the four capture points, Bercheza Bridge includes two of the three bridges spanning the Samara. The Rail bridge to the west, and the sturdy Stone Bridge connecting to the main road, form much of the perimeter of this objective. The capture zone expands to the river bed, which is mostly devoid of cover save for a few rocks and fallen trees. While vulnerable to fire from the houses and elevated positions from both sides of the riverbank, those seizing the objective may do so from behind the support pillars of either bridge. Due to its positioning, the Armored Train can directly influence the capture progress of this flag.
An MG 08/15 Sentry kit can be picked up from the south bank, behind the second house to the east of the Stone Bridge - a building known in Operations as the Kuty Inn.
Samara River
A more ramshackle river crossing upstream from the rest of the map forms the Samara River objective. Small cliffs block view of the area from the town. This third bridge, built mostly from wood and rope, sits amongst small cliffs that block view of the area from the south bank of the settlement. The route north to this objective is mostly exposed, with hills overlooking the open valley floor and river bed.
Supply Depot
The Supply Depot lies on the northern-most part of Kolomea, and consists of a cluster of four buildings, three of which are contained within the flag's capture zone. The objective can be approached from many different directions - the ridge overlooking the area to the east, Kolomea's town center to the south, or the railway line to the south-west. However, its proximity to Austria-Hungary's deployment can deter potential attackers.
An FK 96 field gun is found on the edge of the capture zone by the southwest house, protecting the main road and rail routes to the flag. A Flametrooper Kit is located down the road by a small wooden cottage southeast of the objective, directly opposite the Chekhova Ruin.
Operations
Brusilov Keep is the second and final map of the Brusilov Offensive operation. It sees the Russian Empire attack the Austro-Hungarian stronghold of Kolomea, high in the Carpathian mountains.
Sector 1
The initial phase of the assault in against the parallel aligned positions of the Railway Pit and the Hilltop Battery, separated from each other by a steep climb and the rail line. The advance over the most open part of the map should be made cautiously and swiftly, while defenders should be mindful of their flanks, such as the lip of the ridge to the west and the higher mountain pathway to the east.
The attackers are allocated two armored trucks, and two horses.
Sector 2
The next objectives are on the outskirts of the town. Objective A is the row of houses on the West Bank of the river, close to the stone bridge, nicknamed the Kuty Inn. Objective B is across the valley to the northeast, and is centred around the wooden bridge and watchtowers of the Samara Lookout. The two objectives are spread out on open terrain, while the Austro-Hungarians may command strong positions on the cliffs and in the houses of the opposite bank.
The Russians retain hold of their armor and cavalry.
Sector 3
The third sector contains a single objective, Chekhova Ruin, the wrecked church in the middle of the town. The capture zone is shifted towards the rear of the building, and only encompasses a small portion of the ruin's interior, as well as some outer walls and ledges cut into the northern side of the hill. The belltower, while being outside the capture zone, can be used to pick off attackers as they approach, and can be demolished should this present a problem. The extreme east and western flanks can present opportunities for pincer attacks against this hill objective.
By this stage the Russian team loses all its vehicles, and is forced to continue the assault on foot.
Sector 4
The final stage is in the far north of the map. As with the first sector, the two objective lie on either side of the rail track. Objective A, the Galicia Overlook, is a significant artillery base with a large capture zone, encompassing much of the outer defenses and the battlements therein. The approaches have little cover, with the Austro-Hungarians spawning up a hill overlooking the Overlook itself. Objective B is the Supply Depot. Contrary to its Conquest counterpart, the capture radius for this objective is absurdly small, barely covering the interior of a single bungalow on the north-eastern limit of the settlement. Fighting for this objective invariable consists of intense close quarters battle, with opposing teams struggling for control not of trenches or fields, but mere rooms.
Should the Russians persevere and claim victory, Brusilov's Offensive can be declared a success, and the Austro-Hungarians driven from the Carpathians and back towards their own land.
Rush
Rush pits Russian attackers against Austro-Hungarian defenders, in a four-stage struggle for control of the mountain stronghold.
Sector 1
The Russian Empire strikes at the trench lines near Hilltop Battery. Objective A is west of the railway, in the trench line known as the Rail Pit, while B within the battery dugout itself.
The Russians have a Sentry with them for the initial assault.
Sector 2
The Russians advance upon the town, attacking Austro-Hungarian telegraphs at the West Bank of the river. Objective A is in the southern complex, by a cottage west of the main road, and Objective B in the building on the east side, near the Kuty Inn.
The Russian's Sentry kit is moved closer to the frontline in this phase.
Sector 3
Austro-Hungarian forces are pushed back across the river and attempt to hold the West Bank. Objective A is easily accessible from the riverside near the railway. Objective B is inside another building close to the river, up the cliff north-west of the rickety bridge at Samara River.
The Sentry kit is now found by buildings on the south bank.
Sector 4
The Austro-Hungarian Empire is forced all the way back to their own Supply Depot. Objective B is in a building closer to town, while Objective A is near the Supply Depot.
In the final assault, the Russian Sentry may be opposed by an Austro-Hungarian Flame Trooper.
Supply Drop
Supply Drop on Brusilov Keep concentrates the map boundaries to the river and its adjacent buildings, with crates falling around the bridges, the riverbed and the Chekhova Ruins. The Russian Team have their two spawns behind the row of houses on the south bank, or under the rail bridge further west. The Austro-Hungarians deploy from the Supply Depot and a fenced cottage uphill to the east.
Each team has only a single horse for mobile support.
Domination
Domination takes place within the town of Kolomea, with both sides of the river being accessible.
Samara Trail
The objective is on the south side of one building of the row on the West Bank, similar in location to the Operations objective of Kuty Inn, but with a much smaller capture radius.
Richka Railway
Located in the river bed, underneath the rail bridge. The capture zone extends a significant way downstream to the west, something which is not immeadiately noticeable due the flagpole itself being placed on the periphery of the capture area.
East Bank
In a clearing north of some houses, located somewhat confusingly on the West Bank of the river, is the so-called East Bank objective. Positioned opposite the Chekhova Ruins, the church belltower provides a dominant firing position over this and the railway objective, as long as it is standing.
Team Deathmatch
Team Deathmatch takes place exclusively on the west bank of the Samara. The Supply Depot, hilltop bungalow and railway line north of the bridge are included, but the Galicia Overlook, the Samara Lookout, the river bed and the bridges themselves are cut off from the play area.
War Pigeons
War Pigeons takes place in the same area as Team Deathmatch.
Gallery
| ||||||||||||||||||||
Trivia
- The internal name for this map in Community Test Environment is MP_Bridge.
- The bell within the tower reacts to gunfire and melee attacks.
- According to a briefing at the beginning of Brusilov Offensive operation, the map is set in Kolomea (translated also as Kolomyia), a small city in Ukrainian part of Carpathian Mountains. During World War I, major part of Kolomea was destroyed in effect of several skirmishes between Russian and Austro-Hungarian forces.
- A conversation from characters from the animation series Battlefield Friends is hidden on the map as an easter egg.[1]
- Like other cold maps in Battlefield 1, the breath of player characters can be seen condensing.

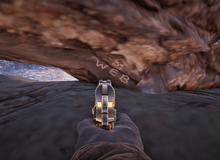
- At the south west river end, there's a tree trunk with the word "WEB" and skull symbol (similar to the symbol found on Tsaritsyn, Volga River, Łupków Pass and Galicia).


