| This article is a stub. It is short and in need of fortification. Why not help out? |
— DLC Overview - Battlefield.com
Caporetto is a map featured in the Battlefield 1: Apocalypse expansion.[1]
Overview
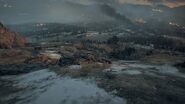
Caporetto takes place amidst the snow-dusted mountains and pine forests that overlook the west side of the Isonzo river valley. The map boundaries form a steady curve that wraps around a titanic mountain range - at one end of the curve, in the map's western extremities, a narrow mountain pass formed at the borders of two neighbouring summits steeply descends towards the map center. The slope continues in a arc before reaching the banks of the river itself along the map's north and eastern end. The alpine landscape is coarse and uneven, scarred by crevaces cut into the rock by streams, and covered throughly with boulders and outcroppings. Even at its most level points, such as the plaeau ledge of the Isonzo Overlook, the few rudimentary roads in the area are forced to hairpin around the geological obstacles, at points necessitating bridges across the steepest gullies. In between these are several trenches and fortifications, isolated from each other by sheer drops and stretches of rough terrain.
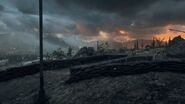
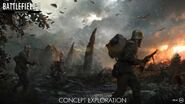
A flurry of light snow is carried across the map from the gusty peaks, as forest fires sweep black clouds across a sky washed orange by a low winter sun. Points of interest on the map include the ruined bastion of Castello di Solkan in the south, and the collapsed viaduct, formerly spanning the shallow river, in the north.
Behemoth
Instead of a Behemoth, four elite kits are made available in the Austro-Hungarian HQ if the defenders achieve a significant lead, consisting of Sentry, Sentry SMG, Flame Trooper and Tank Hunter pickups.
Control Points
Conquest Assault
In Conquest Assault, the Austro-Hungarians must descend upon the Italian frontline from their headquarters high atop the mountain pass in the map's northwestern section before breaking out onto the rocky Isonzo plain. The attackers posess a starting ticket lead of 300 points whilst the defenders begin with all flags under their control.
The Italians are advised to keep their dominance in objectives for as long as possible, holding the onrushing Imperials back in their spawn to close the gap in tickets. The Austrian-Hungarians must overcome their lack of cover by quickly capturing the frontline sector, or bypass the heaviest defenses using their highly mobile motorized and cavalry units to attack the rear areas. Momentum in the downhill assault can be bolstered with gas attacks and air support.
Equipment
| Light vehicle(s) | |
| Fixed-wing aircraft |
2 Albatros D.III/Rumpler C.I/Hansa-Brandenburg G.I/Ilya-Muromets |
| Fixed-wing aircraft | |
Deployments
The Austro-Hungarian assault is launched from the highest accessible part of the mountainside to the northwest. A road twists eastwards down the slope, bypassing Aurora Lookout before reaching the base of the hill, where it links to the main road outside the fortress ruins of Castello Di Solkan. The infantry's path forward is bottlenecked by high mountain faces, and is sparse in cover, requiring troops to bound between rocky outcroppings and ditches in the initial downhill dash. The mountain pass gradually widens past Aurora Lookout, permitting players to branch out to other objectives in the map's north and east or continue trekking downhill to the plateau.
The attackers have a Gaswurfminen launcher located in their spawn that can be used to bombard enemy troops at Aurora Lookout. Upon seizing an objective, another Gaswurfminen will spawn there, aimed at the next alphabetical objective, allowing a follow-on assault. Once spawned, however, the launcher can be used by any team.
The Italians can deploy their aircraft from the northeastern end of the river, but have no ground headquarters to spawn from in Conquest Assault.
Flags
Aurora Lookout
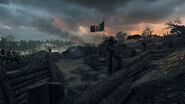
Aurora Lookout is a set of three defensive lines emplaced halfway up the mountain pass in the map's southwest. The fighting positions, reinforced with stone walls and log bunkers, are dug in amongst a cluster of boulders and outcroppings that surround a clearing dotted with shell craters. The area is intersected with a pair of climbing trails that lead through the gully from the top of the mountain, continuing north towards around the mountain face towards Blood Creek. Cover here is plentiful--aside from the purpose-built defenses, the top of and the narrow gaps between rocks provide adequate shooting positions. However, most of the cover is directional, leaving those in its protection vulnerable to flank attacks, such as the elevated ground to the sides of the objective. Additionally, the approaches are fairly open with less consealment, making transit to this flag difficult from either side.
The Gaswurfminen installation and its controls are located directly next to the flag itself, in between trench lines in the middle of the clearing.
Castello Di Solkan
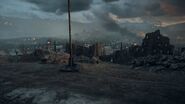
The Castello Di Solkan is an old, ruined castle at the base of the south slope, built upon a plateau the overlooks decending plains that stretch to the river. Most of the outer wall is demolished, permitting easy access to the grounds. Of the interior buildings, only the back wall of the great hall and the two guard towers beside the main gate are left standing, although several pillars and orphaned walls stand amidst the sea of rubble. South of the castle is an outdoor leisure area known as the Isonzo Overlook, identified by a bench and adjacent gramaphone. On the north side is the remains of a subuilding called the Solkan Ruins. Between it and the great hall is a paved square lined with statues, used as the emplacement point for the Austo-Hungarian's Gaswurfminen. The capture zone encompasses much of the inner sanctum of the Solkan Castello, and the destruction provides much in the way of visual cover, although the lower foundations and debris piles of the hall ruins grant strong fighting positions that must be won in close quarters battle. Additionally, the watch towers and Solkan Ruin point can be used to watch over the exposed ground to the north and west.
A team specific motorcycle and armored car spawn on the road west of the ruins, while a scout car can be aquired from the square near the Gaswurfminen launchers.
A Flame Trooper kit can be found around the Isonzo Overlook south of the flag.
Nearby emplacements include a QF 1 AA gun found downhill to the southeast, close to the map edge, an FK 96 overlooking the stream and main road to the north, and a heavy machine gun set up facing uphill along the drystone wall bordering the Isonzo Overlook area.
Blood Creek
Blood Creek is a large fissure in the mountainside that starts near the Austro-Hungarian deployment and extends downhill across much of the map's width. The main feature of the capture point is a stone bridge that crosses a wider section of the creek in the map center. The long, narrow capture zone encompasses the main road and bridge at the top of the hill, but also underneath the bridge as well as a significant portion of the creek bed as it spreads eastwards. The bridge may be destroyed in the fighting.
A pair of horses is provided by this flag.
A QF 1 AA gun is located halfway between Blood Creek and Trama Redoubt. The controls for this flag's Gaswurfminen battery can be found adjacent to the road on the south end of the bridge, while an MG can be used from the north end.
Trama Redoubt
The Trama Redoubt is a circle of trenches standing astride the banks of the Isonzo, the destroyed viaduct, and termination point of Blood Creek, in the northeastern sector of Caporetto. As at Aurora Lookout, the area consists of several trenches and log bunkers that are bordered on most sides by rock shelves. These obscure the flag somewhat, as it lies at the lowest ground of any objective and is consequently one of the more exposed. Alongside the main bank of trenches in the middle of the clearing is the position for the final Gaswurfminen. Another stone bridge over the creek sits nearby, taking the main road through the flag and under the viaduct towards Capello Grove.
A Sentry kit can be retrieved from an MG nest underneath one of the arches of the viaduct, shortly northeast of the flag.
Capello Grove
Capello Grove is an artillery firebase, built in two defensive lines, occupying the riverside farmland of the map's northernmost point. The fortifications here are more robust than anywhere else on the map, featuring wide, timber-lined trenches topped with barbed wire entanglements and scrap wood dug in as makeshift barricades. The forward line, parallel to the viaduct and rail line, is outside the capture zone but offers strong overwatch positions against those approaching from the high ground to the south, and contains an array of stationary weapons including heavy artillery. The rear line is more expansive, accomodating more heavy guns and piles of spent shell casings, and represents the final Italian stronghold west of the river. Both of these defensive lines are vulnerable to flanking by troops skirting the water's edge to the northeast.
Three Horses can be deployed from this objective. In addition, when controlled by the Italians, the flag spawns one neutral MC 18J Sidecar, F.T Armored Car and M30 Scout on the road directly east of the flag itself, near the riverbank.
Of the handful of artillery guns emplaced at Capello Grove, two BL 9.2 Siege Guns are operational, one in each line, for fire support against the adjacent objectives of Trama Redoubt and Blood Creek. In addition to the pair of siege guns, two FK 96 field guns and two QF 1 AA guns are located outside the south side of the flag's capture zone.
Rush
In Rush, the Austro-Hungarians are tasked with leaving their positions high in the mountains and attacking downhill across into the Isonzo valley, destroying Italian communication posts along the way. They start from their usual Conquest HQ at the top of the map's south slope.
Sector 1
The first set of objectives are located within the trench line of Aurora Lookout. Objective A is on the north side of the line, in the creek bed, while B is close to the central boulder cluster by the mountain trail.
The attackers recieve a pair of horses and a Flame Trooper kit to force the breakthrough.
Sector 2
Continuing downhill, the second set of telegraphs are located near the base of the slope west of the main road, overlooked to the east by Castello Di Solkan. Once again, objective A is within the creek bed, while B is in a trench line further south.
Sector 3
The third phase sees the attacking Austro-Hungarians pushing through the ruined castle and its surrounding areas. Objective A is located west of the road near the Domination objective of Trama Trail. Objective B is inside the castle walls, on the flat ground directly opposite the hall ruins.
The defenders have access to an FK 96 emplaced near the road north of Castello Di Solkan, capable of defending against assaults against objective A. A machine gun is posted within the Isonzo Overlook to watch over the southern approach to Objective B.
Sector 4
The attackers draw closer to the river in stage four, advancing towards Blood Creek and its nearby objectives. The first target is in a trench line overlooking the creek bed from the south side, while the second is further southeast, across the plain from Castello Di Solkan, placed within the material remains of a small stone structure on the edge of the castle grounds.
The defenders have another field gun at the ready, installed between the two objective to protect against advances along the main road.
Sector 5
The final set of objectives are forward of the Capello Grove firebase, and are interred along the railway line connected to the destroyed viaduct. Objective A is to the west atop a ridge. Objective B is underneath the viaduct itself, tucked inbetween arches alongside the under-crossing road.
The Italian emplacements in this last phase include a field gun set up close to Objective A, as well as a BL 9.2 Siege Gun found within the first defensive line of Capello Grove.
Domination
Domination takes place around the Castello Di Solkan at the base of the south slope. Its boundaries extend some ways up the hill but exclude Aurora Lookout, and continue downhill past the road south of the castle to the edge of the plateau.
Isonzo Overlook
Isonzo Overlook is the park area on the southern end of the castle grounds. It is somewhat consealed by castle foundations and the high back wall of the great hall.
Trama Trail
Trama Trail is located a short distance from the main road to the west of the castle. The location is mostly devoid of cover apart from a few scattered rocks, bushes and some light fortifications, but also has the largest capture zone and is the most isolated of the three objectives, potentially complicating seizure attempts.
Solkan Ruins
Solkan Ruins is on the north side of the castle interior, adjacent to the statue square, and appears to be the ruins of a seperate outbuilding. A cluster of half-standing walls and extensive debris piles offer the majority of cover in the area, although gaps in the perimeter allow it to be infiltrated from virtually all sides.
Team Deathmatch
Team Deathmatch takes place within the same area as Domination.
War Pigeons
War Pigeons uses the same map boundaries of Domination and Team Deathmatch.
Gallery
| ||||||||||||||||||||
Trivia
- The internal name for this map in Community Test Environment is MP_River.
- This map along with with other maps from Apocalypse were publicly trialed in the Community Test Environment with a "white box" prototype texture like the one seen in Operation Outbreak in Battlefield 4 and four maps from Battlefield 1: Turning Tides.
- Similarly to the case of River Somme, certain flags have indirect references about the Battle of Caporetto:
- Flag B (Castello di Solkan) refers to Solkan, a Slovene village close to Caporetto, destroyed during the Battles of the Isonzo.
- Flag E (Capello Grove) refers to Luigi Capello, the Italian general who commanded (among others) the troops active along the Isonzo front.
- A phonograph can be found on the map. Interacting with the phonograph will cause it to play the Battlefield 1942 theme song or "Dawn of a New World" from the Battlefield 1 soundtrack.[2]
- By whacking on the phonograph with the Wine Bottle then interacting with the screws on the phonograph in a set order, the phonograph will play Battlefield 1 developers and Neebs from the animation series Battlefield Friends humming the theme song and conversing.[3]
- Originally, any Ilya-Muromets heavy bombers spawned by the Austro-Hungarian Empire immeadiately recieved impact damage as they deployed too close to the ground of the mountain pass. This was corrected in the Easter 2018 update.[4]
- In the first sector of Rush, the Austro-Hungarian deployment icon indicates motorcycles are available for use, however none spawn.
References
|


