Tag: rte-source |
No edit summary |
||
| (8 intermediate revisions by 2 users not shown) | |||
| Line 16: | Line 16: | ||
Conquest on this map, due to the abundance of land and air vehicles, is a highly mobile variant of combined arms gameplay. The open terrain coupled with the appreciable distance between flags makes movement by vehicle a more favourable choice, when the myriad of available sniping spots on the map are considered, although the occasional sandstorms can assist in concealment significantly. |
Conquest on this map, due to the abundance of land and air vehicles, is a highly mobile variant of combined arms gameplay. The open terrain coupled with the appreciable distance between flags makes movement by vehicle a more favourable choice, when the myriad of available sniping spots on the map are considered, although the occasional sandstorms can assist in concealment significantly. |
||
| − | There are a total of three objectives in Conquest and five in Conquest Large. Deployment equipment is almost for both game modes, save for the addition of Armored SUVs on Conquest Large. |
+ | There are a total of three objectives in Conquest and five in Conquest Large. Deployment equipment is almost for both game modes, save for the addition of [[Intervention SUV|Armored]] [[Armored SUV|SUVs]] on Conquest Large. |
===Flag Layout=== |
===Flag Layout=== |
||
| Line 51: | Line 51: | ||
|light = [[Squad Car]]<br>[[Police Interceptor]]<br>2 [[Offroad Patrol Bike]] |
|light = [[Squad Car]]<br>[[Police Interceptor]]<br>2 [[Offroad Patrol Bike]] |
||
|apc= [[Mobile Command Post]] |
|apc= [[Mobile Command Post]] |
||
| − | |ifv = |
+ | |ifv = [[Intervention SUV]] |
|tank = |
|tank = |
||
|helicopter = [[UH-60 Black Hawk#Battlefield Hardline|Transport Helicopter]]<br>[[Patrol Helicopter]] |
|helicopter = [[UH-60 Black Hawk#Battlefield Hardline|Transport Helicopter]]<br>[[Patrol Helicopter]] |
||
| Line 59: | Line 59: | ||
|light = [[Sports Sedan]]<br>[[Muscle Car]]<br>2 [[Dirt Bike]] |
|light = [[Sports Sedan]]<br>[[Muscle Car]]<br>2 [[Dirt Bike]] |
||
|apc = [[Syndicate Crew Cab]] |
|apc = [[Syndicate Crew Cab]] |
||
| − | |ifv = |
+ | |ifv = [[Armored SUV]] |
|tank = |
|tank = |
||
|helicopter = [[Executive Helicopter]]<br>[[Rogue Chopper]] |
|helicopter = [[Executive Helicopter]]<br>[[Rogue Chopper]] |
||
| Line 65: | Line 65: | ||
{{Equipment |
{{Equipment |
||
|faction = Neutral |
|faction = Neutral |
||
| + | |ligth = [[The American Dream]] |
||
| − | |emplacement = |
||
| + | }} |
||
| − | |boat = |
||
| − | |plane = }} |
||
| − | |||
===Deployments=== |
===Deployments=== |
||
====Undercover's Deployment==== |
====Undercover's Deployment==== |
||
The Undercover police force spawn on a straight of dirt road on the eastern edge of the map, with a police command truck providing the only distinct visual indicator of their spawn location. Following it west towards the map centre, the road splits into two, with one path winding north-west past a scrapyard north of the Mine, and another joining the highway and passing the mine in the south. |
The Undercover police force spawn on a straight of dirt road on the eastern edge of the map, with a police command truck providing the only distinct visual indicator of their spawn location. Following it west towards the map centre, the road splits into two, with one path winding north-west past a scrapyard north of the Mine, and another joining the highway and passing the mine in the south. |
||
| + | |||
| + | <gallery> |
||
| + | Dust Bowl 28.png| |
||
| + | </gallery> |
||
====Banger's Deployment==== |
====Banger's Deployment==== |
||
| − | The Bangers start on another dirt road by a cluster of trees in the far west of the map. Similarly to the police, their starting road divides north-west and south, with each path taking you past the |
+ | The Bangers start on another dirt road by a cluster of trees in the far west of the map. Similarly to the police, their starting road divides north-west and south, with each path taking you past the water tower north of the Gas Station or onto the highway to its south, respectively. |
| + | |||
| + | <gallery> |
||
| + | Dust Bowl 25.png| |
||
| + | </gallery> |
||
===Flags=== |
===Flags=== |
||
| Line 80: | Line 86: | ||
The Radio Antennae is the southern-most flag, found across the highway from the motel atop a rocky ridge. The flag itself is located by a dirt road that cuts through the capture zone and just north of the point's namesake. South of the road, there is a hut that can act as cover. The flag capture area encompasses this. Boulders scattered about the uneven terrain can be used as line-of-sight breakers and cover positions on this relatively exposed objective, while the elevated position of the hill makes it a popular overwatch position against adjacent objectives. |
The Radio Antennae is the southern-most flag, found across the highway from the motel atop a rocky ridge. The flag itself is located by a dirt road that cuts through the capture zone and just north of the point's namesake. South of the road, there is a hut that can act as cover. The flag capture area encompasses this. Boulders scattered about the uneven terrain can be used as line-of-sight breakers and cover positions on this relatively exposed objective, while the elevated position of the hill makes it a popular overwatch position against adjacent objectives. |
||
| − | There is a [[Zipline]] gun in the little hut just a little north west of the tower itself. |
+ | There is a [[Zipline]] gun in the little hut just a little north west of the tower itself. An [[Offroad Patrol Bike]]/[[Dirt Bike]] also spawns parallel with the radio tower. |
| + | |||
| + | <gallery> |
||
| + | Dust Bowl 32.png| |
||
| + | Dust Bowl 33.png| |
||
| + | Dust Bowl 34.png| |
||
| + | </gallery> |
||
====Motel==== |
====Motel==== |
||
This flag is located out in the parking lot of a disused two-storey motel complex--two buildings of accommodations enclose the car park from the north-west and north-east, while an auxiliary reception building sits centrally, adjacent to the flag itself. The expansive capture zone means the objective can be seized from anywhere within these buildings, the parking lot, or the alleyways behind each structure, making it somewhat difficult to root out hostiles from the area. The balconies and windows of the second floor of enclosed rooms are strong defensive positions compared to the open ground of the car lot, which has only a few vans and shipping containers for directional cover. There are several doors all around the motel buildings that can be opened or closed. |
This flag is located out in the parking lot of a disused two-storey motel complex--two buildings of accommodations enclose the car park from the north-west and north-east, while an auxiliary reception building sits centrally, adjacent to the flag itself. The expansive capture zone means the objective can be seized from anywhere within these buildings, the parking lot, or the alleyways behind each structure, making it somewhat difficult to root out hostiles from the area. The balconies and windows of the second floor of enclosed rooms are strong defensive positions compared to the open ground of the car lot, which has only a few vans and shipping containers for directional cover. There are several doors all around the motel buildings that can be opened or closed. |
||
| − | A |
+ | A [[Fuel Tanker]] spawns in the car park facing the highway. To the north of the flag, situated between the Motel and the Meth Compound, a two-storey building yields a [[zipline]] and a [[Grappling Hook]] on the ground and roof floors, respectively. |
| + | |||
| + | <gallery> |
||
| + | Dust Bowl 22.png| |
||
| + | Dust Bowl 23.png| |
||
| + | Dust Bowl 42.png| |
||
| + | Dust Bowl 43.png| |
||
| + | </gallery> |
||
====Meth Compound==== |
====Meth Compound==== |
||
The Meth Compound consists of a two-storey villa and a detached bungalow building with a garage, surrounded by a shoulder-high wall. The compound is situated on a slight hill on the north side of the map. The flag itself is located out in front of the garage. Stairways in the villa provide both roof access and a pathway to the basement, an area that can also be reached through the utility room of the bungalow. The quite extensive basement is littered with explosives that can be used to open up new routes into the underground area. The capture zone extends to everywhere within the walls of the compound, and the flag can be contested from inside the buildings, the basement, and the courtyard just east of the house. There are covers on all of the windows in the house, but they can be destroyed by shooting them or beating them with a melee weapon, opening up new sightlines to the surroundings. |
The Meth Compound consists of a two-storey villa and a detached bungalow building with a garage, surrounded by a shoulder-high wall. The compound is situated on a slight hill on the north side of the map. The flag itself is located out in front of the garage. Stairways in the villa provide both roof access and a pathway to the basement, an area that can also be reached through the utility room of the bungalow. The quite extensive basement is littered with explosives that can be used to open up new routes into the underground area. The capture zone extends to everywhere within the walls of the compound, and the flag can be contested from inside the buildings, the basement, and the courtyard just east of the house. There are covers on all of the windows in the house, but they can be destroyed by shooting them or beating them with a melee weapon, opening up new sightlines to the surroundings. |
||
| − | A Zipline spawns outside the north-east wall of the Villa while a Grappling Hook is found on the roof. Depending on the team, a Sedan or a |
+ | A [[Zipline]] spawns on the patio outside the north-east wall of the Villa building while a [[Grappling Hook]] is found on the roof. Depending on the team, a [[Sports Sedan]] or a [[Squad Car]] spawns on the driveway north of the compound in addition to a [[Offroad Patrol Bike]]/[[Dirt Bike]]. |
| + | |||
| + | <gallery> |
||
| + | Dust Bowl 45.png| |
||
| + | Dust Bowl 46.png| |
||
| + | Dust Bowl 47.png| |
||
| + | Dust Bowl 48.png| |
||
| + | Dust Bowl 49.png| |
||
| + | Dust Bowl 50.png| |
||
| + | Dust Bowl 51.png| |
||
| + | Dust Bowl 52.png| |
||
| + | </gallery> |
||
====Mine==== |
====Mine==== |
||
The Mine is found close to the south-east edge of the map near the Police deployment, and consists of a derelict mining facility. The flag itself is found within a green, corrugated iron structure found in the middle of the complex, with a metal fence serving as the perimeter to the capture zone. The main building has an upper floor that can be reached using a ladder on the interior. The closed-off nature of this objective in addition to its smaller capture zone and isolated position combine to make it a somewhat difficult point to attack compared to the other, more open objectives of the map--combat around this flag is decidedly close range, however those on the roof of the green building have a high ground advantage over the surrounding area. |
The Mine is found close to the south-east edge of the map near the Police deployment, and consists of a derelict mining facility. The flag itself is found within a green, corrugated iron structure found in the middle of the complex, with a metal fence serving as the perimeter to the capture zone. The main building has an upper floor that can be reached using a ladder on the interior. The closed-off nature of this objective in addition to its smaller capture zone and isolated position combine to make it a somewhat difficult point to attack compared to the other, more open objectives of the map--combat around this flag is decidedly close range, however those on the roof of the green building have a high ground advantage over the surrounding area. |
||
| − | Within the complex, an M240B spawns on the upper floor of the green building. A [[FIM-92 Stinger]] spawns in a bungalow across a road to the north of the flag itself. Further north-east, a SMAW and an MG36 spawn in separate houses along the road leading towards the Meth Compound. |
+ | Within the complex, an [[M240B]] spawns on the upper floor of the green building. A [[FIM-92 Stinger]] spawns in a bungalow across a road to the north of the flag itself. Further north-east, a [[SMAW]] and an [[MG36]] spawn in separate houses along the road leading towards the Meth Compound. |
| + | |||
| + | <gallery> |
||
| + | Dust Bowl 36.png| |
||
| + | Dust Bowl 37.png| |
||
| + | Dust Bowl 38.png| |
||
| + | Dust Bowl 39.png| |
||
| + | </gallery> |
||
====Gas Station==== |
====Gas Station==== |
||
The Gas Station is found off of the highway in the south-eastern portion of the map. As the name suggests, the objective consists of a forecourt area complete with gas pumps, in addition to a smaller garage lying adjacent to the service building, and an annex of garages and workshops across an alley on the north side. The capture zone is mostly restricted to the southern fuelling station and the service buildings, which provide the majority of substantial cover when seizing the objective. A ladder in the north alley allows players to reach the roof of said building. |
The Gas Station is found off of the highway in the south-eastern portion of the map. As the name suggests, the objective consists of a forecourt area complete with gas pumps, in addition to a smaller garage lying adjacent to the service building, and an annex of garages and workshops across an alley on the north side. The capture zone is mostly restricted to the southern fuelling station and the service buildings, which provide the majority of substantial cover when seizing the objective. A ladder in the north alley allows players to reach the roof of said building. |
||
| − | + | An [[Offroad Patrol Bike]] or [[Dirt Bike]] spawns on the forecourt of the Gas Station. Further away from the flag, a [[FIM-92 Stinger|Stinger missile]] spawn can be found in a house north-east of gas station, parallel with the Last Chance Diner. A Water tower overlooking the flag to north-west provides a notable vantage point, and spawns a [[zipline]] on the upper deck. A [[Grappling Hook]], useful for reaching the top of the water tower, is found in a house opposite a junction north of the Gas Station. Additional battle pickups include a [[SMAW]] and an [[MG36]] in different buildings further north-east of the Gas Station, and south-west of the Meth Compound. |
|
| + | |||
| + | <gallery> |
||
| + | Dust Bowl 55.png| |
||
| + | Dust Bowl 56.png| |
||
| + | Dust Bowl 57.png| |
||
| + | Dust Bowl 58.png| |
||
| + | </gallery> |
||
| + | |||
==Heist== |
==Heist== |
||
In the Heist mode of this map, the Bangers are attempting to seize from storage two duffel bags full of drugs produced at the Meth Compound, while their Undercover Police opponents, in the process of raiding the address, intend to stop their escape with deadly force. |
In the Heist mode of this map, the Bangers are attempting to seize from storage two duffel bags full of drugs produced at the Meth Compound, while their Undercover Police opponents, in the process of raiding the address, intend to stop their escape with deadly force. |
||
| − | Battle pickup and ambient vehicle spawns on this map are identical to Conquest, with the exception of the |
+ | Battle pickup and ambient vehicle spawns on this map are identical to Conquest, with the exception of the [[Fuel Tanker]], which does not appear in this mode. |
===Equipment=== |
===Equipment=== |
||
| Line 112: | Line 157: | ||
|light = [[Squad Car]]<br>[[Police Interceptor]]<br>2 [[Offroad Patrol Bike]] |
|light = [[Squad Car]]<br>[[Police Interceptor]]<br>2 [[Offroad Patrol Bike]] |
||
|apc= [[Mobile Command Post]] |
|apc= [[Mobile Command Post]] |
||
| − | |ifv = |
+ | |ifv = [[Intervention SUV]] |
| − | |tank = |
+ | |tank = [[Armored Rescue Vehicle]] |
|helicopter = [[UH-60 Black Hawk#Battlefield Hardline|Transport Helicopter]]<br>[[Patrol Helicopter]] |
|helicopter = [[UH-60 Black Hawk#Battlefield Hardline|Transport Helicopter]]<br>[[Patrol Helicopter]] |
||
|emplacement = }} |
|emplacement = }} |
||
| Line 120: | Line 165: | ||
|light = [[Sports Sedan]]<br>[[Muscle Car]]<br>2 [[Dirt Bike]] |
|light = [[Sports Sedan]]<br>[[Muscle Car]]<br>2 [[Dirt Bike]] |
||
|apc = [[Syndicate Crew Cab]] |
|apc = [[Syndicate Crew Cab]] |
||
| − | |ifv = |
+ | |ifv = [[Armored SUV]] |
|tank = [[Hardened Attack Truck]] |
|tank = [[Hardened Attack Truck]] |
||
|helicopter = [[Executive Helicopter]]<br>[[Rogue Chopper]] |
|helicopter = [[Executive Helicopter]]<br>[[Rogue Chopper]] |
||
| Line 127: | Line 172: | ||
===Deployments=== |
===Deployments=== |
||
====Undercover's Deployment==== |
====Undercover's Deployment==== |
||
| − | For a short time after the round begins, the police team may deploy on foot at a junction a short distance to the south-west of the Stage One objective, in line with the two-storey building between the Compound and the Motel. |
+ | For a short time after the round begins, the police team may deploy on foot at a junction a short distance to the south-west of the Stage One objective, in line with the two-storey building between the Compound and the Motel. |
Their spawn for the remainder of the match is located at their conquest spawn area, much further east. Their vehicle loadout is identical to the criminals, granting neither team a particular vehicular advantage. |
Their spawn for the remainder of the match is located at their conquest spawn area, much further east. Their vehicle loadout is identical to the criminals, granting neither team a particular vehicular advantage. |
||
====Banger's Deployment==== |
====Banger's Deployment==== |
||
| − | The Criminal's initial deployment is symmetrical to that of their opponents, starting south-west of the compound along the same horizontal axis as their police enemies' initial deployment. |
+ | The Criminal's initial deployment is symmetrical to that of their opponents, starting south-west of the compound along the same horizontal axis as their police enemies' initial deployment. |
After the safe room is broken into, their deployment shifts to that of their Conquest position, with the team gaining access to their arsenal of vehicles. |
After the safe room is broken into, their deployment shifts to that of their Conquest position, with the team gaining access to their arsenal of vehicles. |
||
| − | === |
+ | ===Break-In=== |
| + | [[File:Dust Bowl 59.png|thumb|200px|right]] |
||
The Bangers must first breach the Meth Compound being raided by the Cops to gain access to their contraband, which has been hidden in a safe room in the basement of the bungalow. To retrieve it, either the floor of the garage or a false wall in the basement must be blasted open using timed demolition charges, revealing both bags of meth inside. The battle for the bags is frantic, as the enclosed buildings and basements force gunfights to occur at extremely close range, while the overhead cover and exterior perimeter walls prevent the NARC squad from brining their heavy vehicles directly into the fray. |
The Bangers must first breach the Meth Compound being raided by the Cops to gain access to their contraband, which has been hidden in a safe room in the basement of the bungalow. To retrieve it, either the floor of the garage or a false wall in the basement must be blasted open using timed demolition charges, revealing both bags of meth inside. The battle for the bags is frantic, as the enclosed buildings and basements force gunfights to occur at extremely close range, while the overhead cover and exterior perimeter walls prevent the NARC squad from brining their heavy vehicles directly into the fray. |
||
| − | === |
+ | ===Escape=== |
| − | Once the drugs are secured, the Bangers must escape two of several possible extraction points. Two random points are activated upon seizing the loot. Once one of the bag is secured, only one will be active. If a pick-up is aborted or the Undercover police manage to force the escape helicopter away, a different extraction point will randomly be selected. |
+ | Once the drugs are secured, the Bangers must escape to two of several possible extraction points. Two random points are activated upon seizing the loot. Once one of the bag is secured, only one will be active. If a pick-up is aborted or the Undercover police manage to force the escape helicopter away, a different extraction point will randomly be selected. |
====Escape A==== |
====Escape A==== |
||
| + | [[File:Dust Bowl 10.png|thumb|200px|right]] |
||
| − | Escape Point A is on the driveway of a home, a short distance up a street north-east of the water tower. Fairly close to the Villa's vault, the pickup point exists at a slight downhill curve in the road, which assists somewhat in hiding escapees. Nearby cover positions include two directly adjacent houses, a tin roofed shack standing close to the driveway, and the aforementioned water tower. |
+ | Escape Point A is on the driveway of a home, a short distance up a street north-east of the water tower. Fairly close to the Villa's vault, the pickup point exists at a slight downhill curve in the road, which assists somewhat in hiding escapees. Nearby cover positions include two directly adjacent houses, a tin roofed shack standing close to the driveway, and the aforementioned water tower. |
====Escape B==== |
====Escape B==== |
||
| + | [[File:Dust Bowl 08.png|thumb|200px|right]] |
||
Escape B is positioned on the forecourt of the Gas Station far to the south-west of the Meth Compound. One of the more secluded escapes, the location offers strong fighting positions for those who get there first, including overhead cover inside the service building and roof access. Criminals will find the escape difficult to reach without a vehicle, as the route requires the crossing of many exposed roads. |
Escape B is positioned on the forecourt of the Gas Station far to the south-west of the Meth Compound. One of the more secluded escapes, the location offers strong fighting positions for those who get there first, including overhead cover inside the service building and roof access. Criminals will find the escape difficult to reach without a vehicle, as the route requires the crossing of many exposed roads. |
||
====Escape C==== |
====Escape C==== |
||
| + | [[File:Dust Bowl 09.png|thumb|200px|right]] |
||
Escape C is found in the middle of the map, within the parking lot of the Motel. This escape point does not lend itself particularly well to those on foot, despite being a relatively short sprint from the vault. Upon arrival, those at the escape point can potentially face assault from almost all directions--the raised balconies of the accommodation buildings being the most obvious. The closest overhead shelter to the helicopter rendezvous point is the check-in office in the middle of the car park, otherwise players will have to duck into one of the hotel rooms. |
Escape C is found in the middle of the map, within the parking lot of the Motel. This escape point does not lend itself particularly well to those on foot, despite being a relatively short sprint from the vault. Upon arrival, those at the escape point can potentially face assault from almost all directions--the raised balconies of the accommodation buildings being the most obvious. The closest overhead shelter to the helicopter rendezvous point is the check-in office in the middle of the car park, otherwise players will have to duck into one of the hotel rooms. |
||
====Escape D==== |
====Escape D==== |
||
| + | [[File:Dust Bowl 07.png|thumb|200px|right]] |
||
| − | Escape D is located on the hill along with the Radio Antennae in the southern area of the map. As it is the furthest escape point from the Safe Room, the criminals will be put at greater risk trying to reach this point. However, its isolation can also throw pursuers off if the escape point changes quickly, and the distance can be covered quickly by a well organised team in a car or helicopter. The hill partially obscures sightlines to players waiting to make their escape, but ultimately this point provides little by the way of hiding spots except for the few boulders and the small hut on the ridgeline. |
+ | Escape D is located on the hill along with the Radio Antennae in the southern area of the map. As it is the furthest escape point from the Safe Room, the criminals will be put at greater risk trying to reach this point. However, its isolation can also throw pursuers off if the escape point changes quickly, and the distance can be covered quickly by a well organised team in a car or helicopter. The hill partially obscures sightlines to players waiting to make their escape, but ultimately this point provides little by the way of hiding spots except for the few boulders and the small hut on the ridgeline. |
====Escape E==== |
====Escape E==== |
||
| − | Escape Point E is along a road near the eastern Stinger missile spawn, around the same area as the Undercover's initial deployment. The point is surrounded by bungalows with windows looking out onto the fairly exposed capture zone, which provide ideal ambush positions against foot mobiles. |
+ | Escape Point E is along a road near the eastern Stinger missile spawn, around the same area as the Undercover's initial deployment. The point is surrounded by bungalows with windows looking out onto the fairly exposed capture zone, which provide ideal ambush positions against foot mobiles. |
| + | |||
==Hotwire== |
==Hotwire== |
||
| Line 163: | Line 214: | ||
===Objective Layouts=== |
===Objective Layouts=== |
||
| + | {| style="text-align: center;" class="article-table" |
||
| + | ! style="text-align: center;" scope="col" | Vehicle |
||
| + | ! style="text-align: center;" scope="col" | Objective |
||
| + | ! style="text-align: center;" scope="col" | Location |
||
| + | |- |
||
| + | |[[Fuel Tanker]] |
||
| + | |A |
||
| + | |North of Meth Compound |
||
| + | |- |
||
| + | |[[Utility Van]] |
||
| + | |B |
||
| + | |In Garage behind Gas Station |
||
| + | |- |
||
| + | |[[Utility Van]] |
||
| + | |C |
||
| + | |Mine |
||
| + | |- |
||
| + | |[[Sports Sedan]] |
||
| + | |D |
||
| + | |Driveway of house, west of the Two-Storey, near water tower |
||
| + | |- |
||
| + | |[[Sports Sedan]] |
||
| + | |E |
||
| + | |Between three houses, east of the Two-Storey |
||
| + | |} |
||
| + | |||
===Equipment=== |
===Equipment=== |
||
{{Equipment |
{{Equipment |
||
| Line 178: | Line 255: | ||
|helicopter = [[Executive Helicopter]] |
|helicopter = [[Executive Helicopter]] |
||
|emplacement =}} |
|emplacement =}} |
||
| + | |||
| + | <gallery> |
||
| + | Dust Bowl 19.png|A |
||
| + | Dust Bowl 21.png|B |
||
| + | Dust Bowl 20.png|C |
||
| + | Dust Bowl 17.png|D |
||
| + | Dust Bowl 18.png|E |
||
| + | </gallery> |
||
| Line 187: | Line 272: | ||
|faction = {{Faction|LE}} |
|faction = {{Faction|LE}} |
||
|light = [[Squad Car]]<br/>[[Police Interceptor]]<br/>2 [[Offroad Patrol Bike]]s |
|light = [[Squad Car]]<br/>[[Police Interceptor]]<br/>2 [[Offroad Patrol Bike]]s |
||
| − | | |
+ | |apc = [[Mobile Command Post]] |
| + | |ifv =[[Intervention SUV]] |
||
|tank =[[Armored Rescue Vehicle]] |
|tank =[[Armored Rescue Vehicle]] |
||
| − | |helicopter = [[Transport Helicopter]]<br/>Patrol Helicopter |
+ | |helicopter = [[Transport Helicopter]]<br/>[[Patrol Helicopter]] |
|emplacement = }} |
|emplacement = }} |
||
{{Equipment |
{{Equipment |
||
|faction = {{Faction|CR}} |
|faction = {{Faction|CR}} |
||
|light = [[Sports Sedan]]<br/>[[Muscle Car]]<br/>2 [[Dirt Bike]]s |
|light = [[Sports Sedan]]<br/>[[Muscle Car]]<br/>2 [[Dirt Bike]]s |
||
| − | | |
+ | |apc = [[Syndicate Crew Cab]] |
| + | |ifv =[[Armored SUV]] |
||
|tank =[[Hardened Attack Truck]] |
|tank =[[Hardened Attack Truck]] |
||
| − | |helicopter = [[Executive Helicopter]]<br/>Rogue Chopper |
+ | |helicopter = [[Executive Helicopter]]<br/>[[Rogue Chopper]] |
|emplacement =}} |
|emplacement =}} |
||
| Line 210: | Line 297: | ||
===Vaults=== |
===Vaults=== |
||
====Undercover's Vault==== |
====Undercover's Vault==== |
||
| + | [[File:Dust Bowl 16.png|thumb|200px|right]] |
||
The Law Enforcer's vault is designated to be the living room of a run-down house on the opposite side of a street, west of the Mine. |
The Law Enforcer's vault is designated to be the living room of a run-down house on the opposite side of a street, west of the Mine. |
||
| + | |||
| + | <gallery> |
||
| + | Dust Bowl 15.png| |
||
| + | Dust Bowl 14.png| |
||
| + | </gallery> |
||
====Banger's Vault==== |
====Banger's Vault==== |
||
| − | The Criminal's vault is found on the floor of the Last Chance Diner across the road from the Gas Station. |
+ | The Criminal's vault is found on the floor of the Last Chance Diner across the road from the Gas Station. |
| + | |||
| + | <gallery> |
||
| + | Dust Bowl 16.png| |
||
| + | Dust Bowl 13.png| |
||
| + | </gallery> |
||
===Money Pile=== |
===Money Pile=== |
||
The money pile is located in the two-storey located in the middle of the map--specifically on the second floor to the left of the stairs. As the main route up to the money is a single staircase, the enclosed building is easy to defend in close quarters. However, players can alternatively grapple up to the roof and get in from above. |
The money pile is located in the two-storey located in the middle of the map--specifically on the second floor to the left of the stairs. As the main route up to the money is a single staircase, the enclosed building is easy to defend in close quarters. However, players can alternatively grapple up to the roof and get in from above. |
||
| + | |||
| + | <gallery> |
||
| + | Dust Bowl 12.png| |
||
| + | Dust Bowl 11.png| |
||
| + | </gallery> |
||
| + | |||
==Rescue== |
==Rescue== |
||
| − | Rescue on Dust Bowl restricts the play area to the south-west corner of the map, and consists of the area around the Diner and the Gas Station. The opposing team's spawns are separated by a road that serves as a "no-mans-land" between objectives. |
+ | Rescue on Dust Bowl restricts the play area to the south-west corner of the map, and consists of the area around the Diner and the Gas Station. The opposing team's spawns are separated by a road that serves as a "no-mans-land" between objectives. |
The Undercover rescue team start on the road behind the Diner on the east side, while the Bangers hostage-takers spawn on one of two points behind a wall on the west side of the Gas Station. Both hostages are interred inside separate buildings within the service station--Hostage 1 is located in the western-most garage in the alley behind the service building to the north, whereas Hostage 2 is found in the workshop directly adjacent to the service building to the west. The escape vehicle is found on the same road that the Police start on. |
The Undercover rescue team start on the road behind the Diner on the east side, while the Bangers hostage-takers spawn on one of two points behind a wall on the west side of the Gas Station. Both hostages are interred inside separate buildings within the service station--Hostage 1 is located in the western-most garage in the alley behind the service building to the north, whereas Hostage 2 is found in the workshop directly adjacent to the service building to the west. The escape vehicle is found on the same road that the Police start on. |
||
| + | |||
| + | <gallery> |
||
| + | Dust Bowl 06.png|Rescue boundaries |
||
| + | Dust Bowl 01.png|Extraction Vehicle |
||
| + | Dust Bowl 02.png|Hostage 1 |
||
| + | Dust Bowl 03.png|Hostage 2 |
||
| + | </gallery> |
||
| + | |||
==Crosshair== |
==Crosshair== |
||
| − | Crosshair on Dust Bowl takes place in the map centre, with map boundaries comprising the motel and the two-storey to the north. The Undercover and the VIP start behind the Check-in office on the southern side of the Motel's parking lot. The Bangers' Hit Squad start near the extraction points behind the two-storey to the east (point A) and a bungalow further west (point B). |
+ | Crosshair on Dust Bowl takes place in the map centre, with map boundaries comprising the motel and the two-storey to the north. The Undercover and the VIP start behind the Check-in office on the southern side of the Motel's parking lot. The Bangers' Hit Squad start near the extraction points behind the two-storey to the east (point A) and a bungalow further west (point B). The VIP starts a short distance from their [[Battle Pickup#Weapon Locker|weapon locker]], which is on the ground floor of the eastern motel building. |
| + | |||
| ⚫ | The protection team must cross the highly exposed roadway between the Motel and the residential buildings. Either side has access to elevated overwatch positions from either the second floor windows of the motel or the two-storey that can effect the course of the game. Alternatively, a crossing can be made undetected through the western alley by using a stationary truck parked at the junction to break line of sight. Otherwise, smoke grenades are highly recommended to make the crossing. |
||
==Team Deathmatch== |
==Team Deathmatch== |
||
| + | Team Deathmatch is set within the map centre, comprising the Motel, the Two-Storey and the Meth Compound as well as a row of bungalows lining the east and western limits. Battle pickups are present in their standard Conquest locations, and the dust storm can also effect the map. |
||
| Line 242: | Line 356: | ||
Dustbowl_2.jpg |
Dustbowl_2.jpg |
||
Dustbowl_3.jpg |
Dustbowl_3.jpg |
||
| + | Dust Bowl 04.png| |
||
| + | Dust Bowl 24.png| |
||
| + | Dust Bowl 26.png| |
||
| + | Dust Bowl 27.png| |
||
| + | Dust Bowl 29.png| |
||
| + | Dust Bowl 30.png| |
||
| + | Dust Bowl 31.png| |
||
| + | Dust Bowl 35.png| |
||
| + | Dust Bowl 40.png| |
||
| + | Dust Bowl 41.png| |
||
| + | Dust Bowl 44.png| |
||
| + | Dust Bowl 53.png| |
||
| + | Dust Bowl 54.png| |
||
</gallery> |
</gallery> |
||
| Line 253: | Line 380: | ||
*The [[Wikipedia:Dust Bowl|Dust Bowl]] was a period of severe drought in the midwest United States during the 1930s that was accompanied by several severe dust storms during the decade. |
*The [[Wikipedia:Dust Bowl|Dust Bowl]] was a period of severe drought in the midwest United States during the 1930s that was accompanied by several severe dust storms during the decade. |
||
*"Joad", the name of the fictional town the map is set in, is a reference to John Steinbeck's novel ''[[Wikipedia:The Grapes of Wrath|The Grapes of Wrath]]'', which follows the Joad family as they travel to California during the Dust Bowl. |
*"Joad", the name of the fictional town the map is set in, is a reference to John Steinbeck's novel ''[[Wikipedia:The Grapes of Wrath|The Grapes of Wrath]]'', which follows the Joad family as they travel to California during the Dust Bowl. |
||
| − | *Dust Bowl was one of three maps featured in ''Hardline's'' open Beta, the others being [[Downtown]] and [[Bank Job]]. |
+ | *Dust Bowl was one of three maps featured in ''Hardline's'' open Beta, the others being [[Downtown]] and [[Bank Job]]. |
| − | *Dust Bowl is the only map that features [[The American Dream]] drivable couch, spawning in three random locations throughout the map. |
+ | *Dust Bowl is the only map that features [[The American Dream]] drivable couch, spawning in three random locations throughout the map. |
| + | *In the game files this map is named mp_desert05. |
||
{{Maps/BFHL}} |
{{Maps/BFHL}} |
||
Revision as of 15:56, 30 July 2018
| This article is a stub. It is short and in need of fortification. Why not help out? |
— Official Website Description
Dust Bowl is a map featured in Battlefield Hardline. It takes place in a small desert town named Joad in Cormack County, California, where Law Enforcement is cracking down on a Criminal meth trafficking ring in the area.
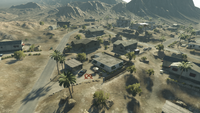
Overview
The backdrop of this map is that of a run-down, isolated settlement situated off a highway running through a mountainous portion of desert. The town itself, found on the north side of the highway, is comprised mostly of rows of ramshackle, one-storey residences lining the dilapidated streets in addition to a number of larger, more distinct structures such as the compound in the far north and the motel in the map centre--these taller buildings can contribute powerful elevated shooting positions against those on lower ground. It is the smaller, more plentiful structures that provide most of the protection for players moving on foot between objectives. South of the highway, a radio tower adorns a hill overlooking the town. Much of the exterior of the town is characterised by uneven, rocky terrain that is generally unsuitable for off-road driving.
Conquest
Conquest on this map, due to the abundance of land and air vehicles, is a highly mobile variant of combined arms gameplay. The open terrain coupled with the appreciable distance between flags makes movement by vehicle a more favourable choice, when the myriad of available sniping spots on the map are considered, although the occasional sandstorms can assist in concealment significantly.
There are a total of three objectives in Conquest and five in Conquest Large. Deployment equipment is almost for both game modes, save for the addition of Armored SUVs on Conquest Large.
Flag Layout
| Flag | Conquest | Conquest Large |
|---|---|---|
| Radio Antenna | A | |
| Motel | B | |
| Meth Compound | C | |
| Mine | D | |
| Gas Station | E |
Equipment
| Light vehicle(s) | |
| Armored personnel carrier(s) | |
| Infantry fighting vehicle(s) | |
| Helicopters(s) | |
| Light vehicle(s) | |
| Armored personnel carrier(s) | |
| Infantry fighting vehicle(s) | |
| Helicopters(s) | |
| Neutral |
Deployments
Undercover's Deployment
The Undercover police force spawn on a straight of dirt road on the eastern edge of the map, with a police command truck providing the only distinct visual indicator of their spawn location. Following it west towards the map centre, the road splits into two, with one path winding north-west past a scrapyard north of the Mine, and another joining the highway and passing the mine in the south.
")
Banger's Deployment
The Bangers start on another dirt road by a cluster of trees in the far west of the map. Similarly to the police, their starting road divides north-west and south, with each path taking you past the water tower north of the Gas Station or onto the highway to its south, respectively.
")
Flags
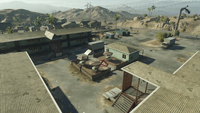
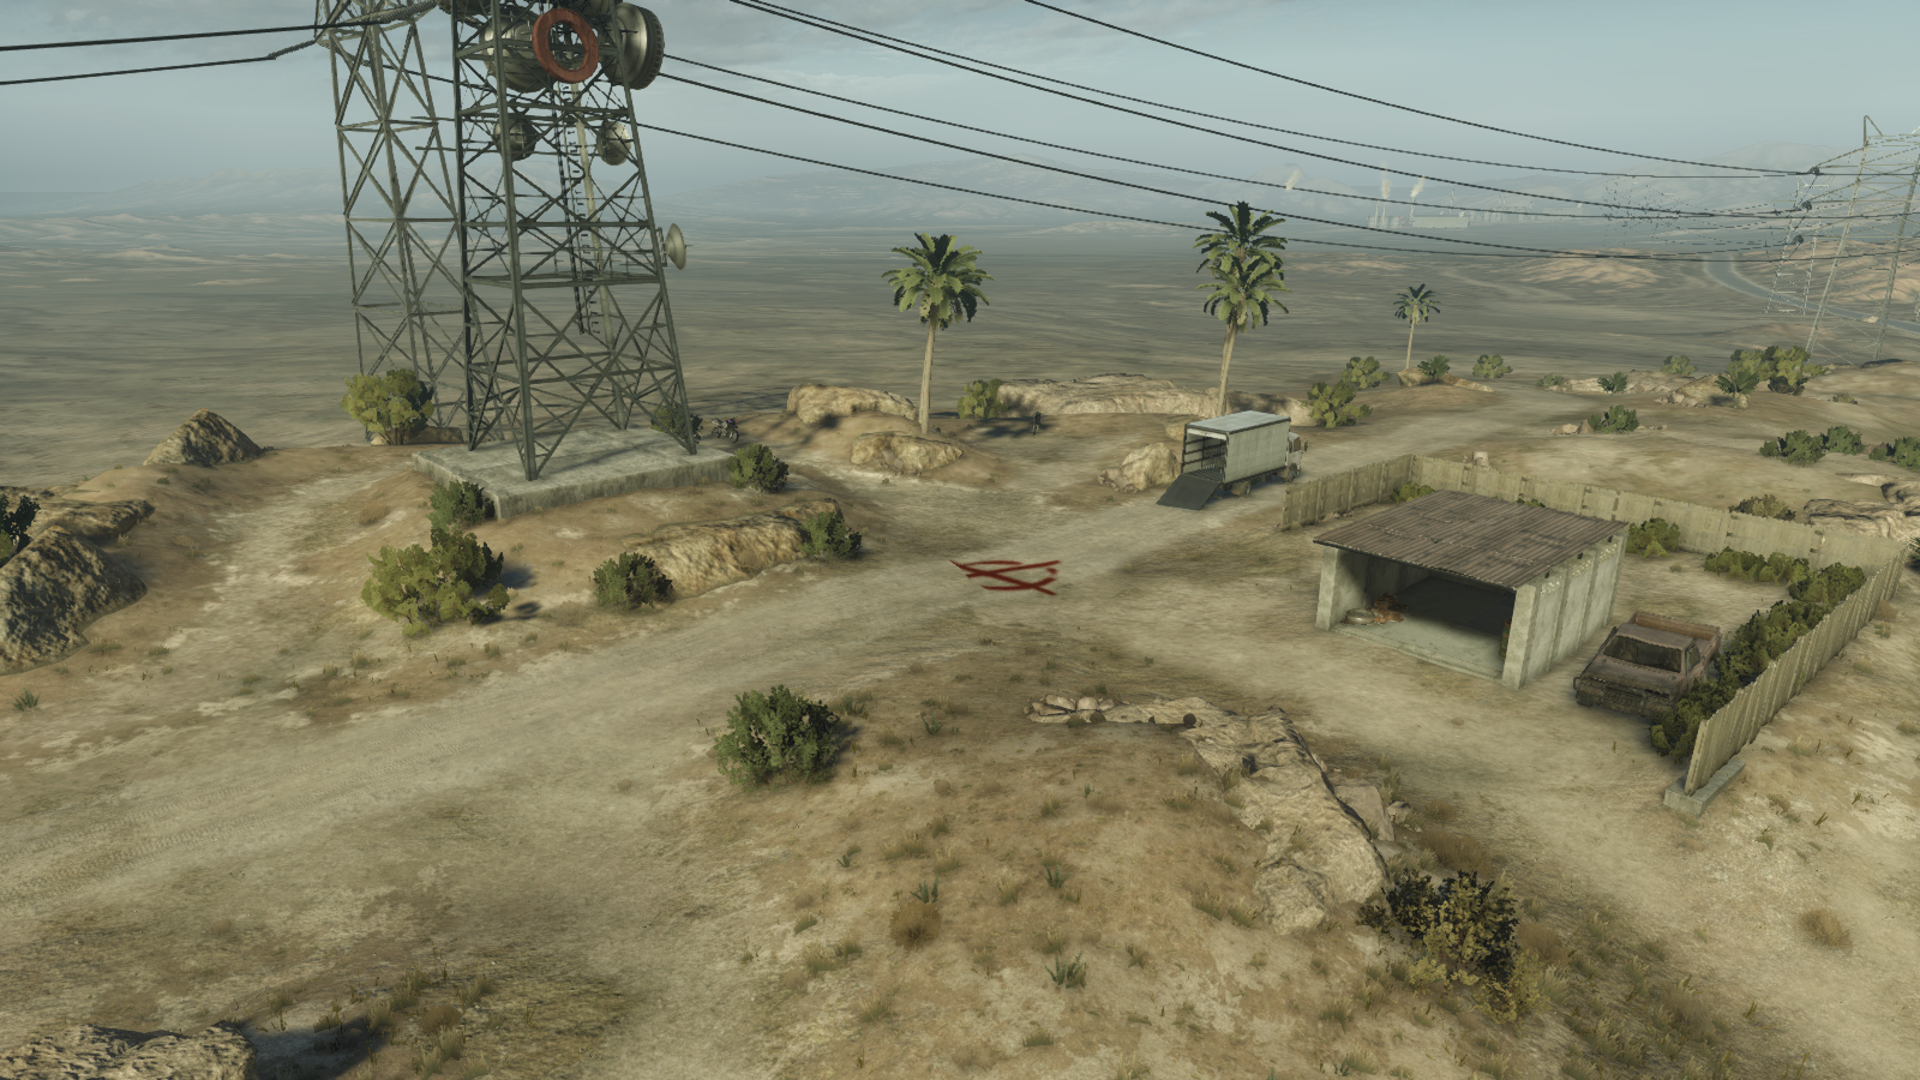
Radio Antennae
The Radio Antennae is the southern-most flag, found across the highway from the motel atop a rocky ridge. The flag itself is located by a dirt road that cuts through the capture zone and just north of the point's namesake. South of the road, there is a hut that can act as cover. The flag capture area encompasses this. Boulders scattered about the uneven terrain can be used as line-of-sight breakers and cover positions on this relatively exposed objective, while the elevated position of the hill makes it a popular overwatch position against adjacent objectives.
There is a Zipline gun in the little hut just a little north west of the tower itself. An Offroad Patrol Bike/Dirt Bike also spawns parallel with the radio tower.
")
")
")
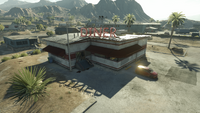
Motel
This flag is located out in the parking lot of a disused two-storey motel complex--two buildings of accommodations enclose the car park from the north-west and north-east, while an auxiliary reception building sits centrally, adjacent to the flag itself. The expansive capture zone means the objective can be seized from anywhere within these buildings, the parking lot, or the alleyways behind each structure, making it somewhat difficult to root out hostiles from the area. The balconies and windows of the second floor of enclosed rooms are strong defensive positions compared to the open ground of the car lot, which has only a few vans and shipping containers for directional cover. There are several doors all around the motel buildings that can be opened or closed.
A Fuel Tanker spawns in the car park facing the highway. To the north of the flag, situated between the Motel and the Meth Compound, a two-storey building yields a zipline and a Grappling Hook on the ground and roof floors, respectively.
")
")
")
")
Meth Compound
The Meth Compound consists of a two-storey villa and a detached bungalow building with a garage, surrounded by a shoulder-high wall. The compound is situated on a slight hill on the north side of the map. The flag itself is located out in front of the garage. Stairways in the villa provide both roof access and a pathway to the basement, an area that can also be reached through the utility room of the bungalow. The quite extensive basement is littered with explosives that can be used to open up new routes into the underground area. The capture zone extends to everywhere within the walls of the compound, and the flag can be contested from inside the buildings, the basement, and the courtyard just east of the house. There are covers on all of the windows in the house, but they can be destroyed by shooting them or beating them with a melee weapon, opening up new sightlines to the surroundings.
A Zipline spawns on the patio outside the north-east wall of the Villa building while a Grappling Hook is found on the roof. Depending on the team, a Sports Sedan or a Squad Car spawns on the driveway north of the compound in addition to a Offroad Patrol Bike/Dirt Bike.
")
")
")
")
")
")
")
")
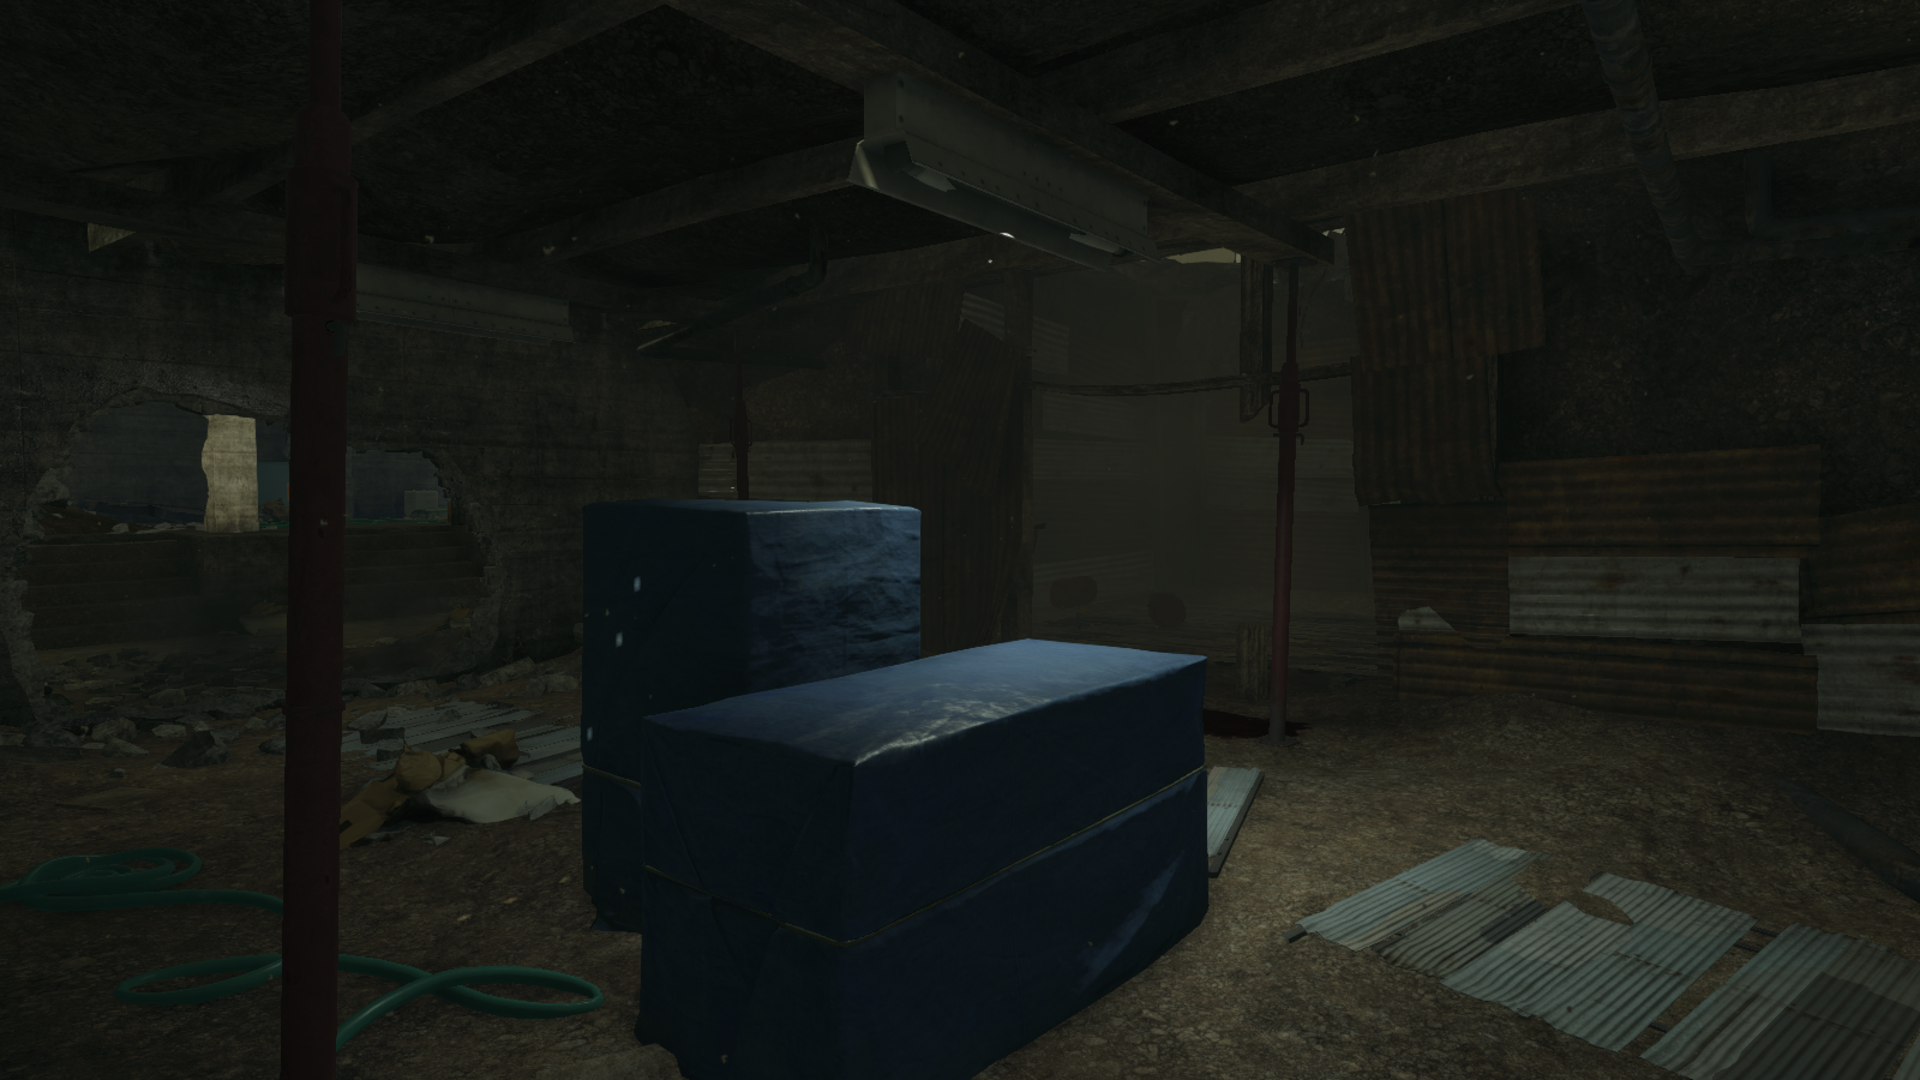
Mine
The Mine is found close to the south-east edge of the map near the Police deployment, and consists of a derelict mining facility. The flag itself is found within a green, corrugated iron structure found in the middle of the complex, with a metal fence serving as the perimeter to the capture zone. The main building has an upper floor that can be reached using a ladder on the interior. The closed-off nature of this objective in addition to its smaller capture zone and isolated position combine to make it a somewhat difficult point to attack compared to the other, more open objectives of the map--combat around this flag is decidedly close range, however those on the roof of the green building have a high ground advantage over the surrounding area.
Within the complex, an M240B spawns on the upper floor of the green building. A FIM-92 Stinger spawns in a bungalow across a road to the north of the flag itself. Further north-east, a SMAW and an MG36 spawn in separate houses along the road leading towards the Meth Compound.
")
")
")
")
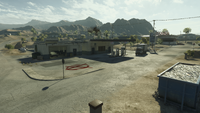
Gas Station
The Gas Station is found off of the highway in the south-eastern portion of the map. As the name suggests, the objective consists of a forecourt area complete with gas pumps, in addition to a smaller garage lying adjacent to the service building, and an annex of garages and workshops across an alley on the north side. The capture zone is mostly restricted to the southern fuelling station and the service buildings, which provide the majority of substantial cover when seizing the objective. A ladder in the north alley allows players to reach the roof of said building.
An Offroad Patrol Bike or Dirt Bike spawns on the forecourt of the Gas Station. Further away from the flag, a Stinger missile spawn can be found in a house north-east of gas station, parallel with the Last Chance Diner. A Water tower overlooking the flag to north-west provides a notable vantage point, and spawns a zipline on the upper deck. A Grappling Hook, useful for reaching the top of the water tower, is found in a house opposite a junction north of the Gas Station. Additional battle pickups include a SMAW and an MG36 in different buildings further north-east of the Gas Station, and south-west of the Meth Compound.
")
")
")
")
Heist
In the Heist mode of this map, the Bangers are attempting to seize from storage two duffel bags full of drugs produced at the Meth Compound, while their Undercover Police opponents, in the process of raiding the address, intend to stop their escape with deadly force.
Battle pickup and ambient vehicle spawns on this map are identical to Conquest, with the exception of the Fuel Tanker, which does not appear in this mode.
Equipment
| Light vehicle(s) | |
| Armored personnel carrier(s) | |
| Infantry fighting vehicle(s) | |
| Main battle tank(s) | |
| Helicopters(s) | |
| Light vehicle(s) | |
| Armored personnel carrier(s) | |
| Infantry fighting vehicle(s) | |
| Main battle tank(s) | |
| Helicopters(s) | |
Deployments
Undercover's Deployment
For a short time after the round begins, the police team may deploy on foot at a junction a short distance to the south-west of the Stage One objective, in line with the two-storey building between the Compound and the Motel.
Their spawn for the remainder of the match is located at their conquest spawn area, much further east. Their vehicle loadout is identical to the criminals, granting neither team a particular vehicular advantage.
Banger's Deployment
The Criminal's initial deployment is symmetrical to that of their opponents, starting south-west of the compound along the same horizontal axis as their police enemies' initial deployment.
After the safe room is broken into, their deployment shifts to that of their Conquest position, with the team gaining access to their arsenal of vehicles.
Break-In
The Bangers must first breach the Meth Compound being raided by the Cops to gain access to their contraband, which has been hidden in a safe room in the basement of the bungalow. To retrieve it, either the floor of the garage or a false wall in the basement must be blasted open using timed demolition charges, revealing both bags of meth inside. The battle for the bags is frantic, as the enclosed buildings and basements force gunfights to occur at extremely close range, while the overhead cover and exterior perimeter walls prevent the NARC squad from brining their heavy vehicles directly into the fray.
Escape
Once the drugs are secured, the Bangers must escape to two of several possible extraction points. Two random points are activated upon seizing the loot. Once one of the bag is secured, only one will be active. If a pick-up is aborted or the Undercover police manage to force the escape helicopter away, a different extraction point will randomly be selected.
Escape A

Escape Point A is on the driveway of a home, a short distance up a street north-east of the water tower. Fairly close to the Villa's vault, the pickup point exists at a slight downhill curve in the road, which assists somewhat in hiding escapees. Nearby cover positions include two directly adjacent houses, a tin roofed shack standing close to the driveway, and the aforementioned water tower.
Escape B

Escape B is positioned on the forecourt of the Gas Station far to the south-west of the Meth Compound. One of the more secluded escapes, the location offers strong fighting positions for those who get there first, including overhead cover inside the service building and roof access. Criminals will find the escape difficult to reach without a vehicle, as the route requires the crossing of many exposed roads.
Escape C

Escape C is found in the middle of the map, within the parking lot of the Motel. This escape point does not lend itself particularly well to those on foot, despite being a relatively short sprint from the vault. Upon arrival, those at the escape point can potentially face assault from almost all directions--the raised balconies of the accommodation buildings being the most obvious. The closest overhead shelter to the helicopter rendezvous point is the check-in office in the middle of the car park, otherwise players will have to duck into one of the hotel rooms.
Escape D

Escape D is located on the hill along with the Radio Antennae in the southern area of the map. As it is the furthest escape point from the Safe Room, the criminals will be put at greater risk trying to reach this point. However, its isolation can also throw pursuers off if the escape point changes quickly, and the distance can be covered quickly by a well organised team in a car or helicopter. The hill partially obscures sightlines to players waiting to make their escape, but ultimately this point provides little by the way of hiding spots except for the few boulders and the small hut on the ridgeline.
Escape E
Escape Point E is along a road near the eastern Stinger missile spawn, around the same area as the Undercover's initial deployment. The point is surrounded by bungalows with windows looking out onto the fairly exposed capture zone, which provide ideal ambush positions against foot mobiles.
Hotwire
Hotwire on Dust Bowl features five objectives. The conquest spawns of Meth Compound, Mine and Gas Station have corresponding vehicle spawns in this mode. The additional two objectives are found on opposite sides of the two-storey house between the compound and Motel.
The lack of deterrent to air vehicles, notably the combination of a lack of tall buildings and the general openness of the map, means the single helicopters available to each team can be quite effective when operated by a coordinated crew, marking an additional threat drivers will need to be aware of. Meanwhile, down on the ground, that same openness can make laying ambushes predictively difficult, as the many streets of the map interior offer alternate routes. However, the main highway and roads running around the town perimeter are still popular hotspots for wheelmen.
Objective Layouts
| Vehicle | Objective | Location |
|---|---|---|
| Fuel Tanker | A | North of Meth Compound |
| Utility Van | B | In Garage behind Gas Station |
| Utility Van | C | Mine |
| Sports Sedan | D | Driveway of house, west of the Two-Storey, near water tower |
| Sports Sedan | E | Between three houses, east of the Two-Storey |
Equipment
| Light vehicle(s) | |
| Helicopters(s) | |
| Light vehicle(s) | |
| Helicopters(s) | |
")
")
")
")
")
Blood Money
Blood Money on Dust Bowl takes place in a smaller area than Conquest, with the map boundaries compressed to comprise the middle of the town centre, cutting off the Radio Antennae and the Meth Compound. As Battle pickup locations remain the same as Conquest, this means some are only available to one side, as they fall within the protected spawn boundaries of each team.
Equipment
| Light vehicle(s) | |
| Armored personnel carrier(s) | |
| Infantry fighting vehicle(s) | |
| Main battle tank(s) | |
| Helicopters(s) | |
| Light vehicle(s) | |
| Armored personnel carrier(s) | |
| Infantry fighting vehicle(s) | |
| Main battle tank(s) | |
| Helicopters(s) | |
Deployments
As the map is more constricted in Blood Money, the opposing teams' spawn points are much closer together than in Conquest. Despite this, each team's helicopters spawn at their usual Conquest Deployment points.
Undercover's Deployment
The Undercover team start at the mining facility on the south-eastern end of the town, with their vehicles spawning under the overpass for mine carts.
Banger's Deployment
The Bangers start in the gas station on the south-west side of the town, with their vehicles lined up out in the desert some distance away to the west.
Vaults
Undercover's Vault

The Law Enforcer's vault is designated to be the living room of a run-down house on the opposite side of a street, west of the Mine.
")
")
Banger's Vault
The Criminal's vault is found on the floor of the Last Chance Diner across the road from the Gas Station.
")
")
Money Pile
The money pile is located in the two-storey located in the middle of the map--specifically on the second floor to the left of the stairs. As the main route up to the money is a single staircase, the enclosed building is easy to defend in close quarters. However, players can alternatively grapple up to the roof and get in from above.
")
")
Rescue
Rescue on Dust Bowl restricts the play area to the south-west corner of the map, and consists of the area around the Diner and the Gas Station. The opposing team's spawns are separated by a road that serves as a "no-mans-land" between objectives.
The Undercover rescue team start on the road behind the Diner on the east side, while the Bangers hostage-takers spawn on one of two points behind a wall on the west side of the Gas Station. Both hostages are interred inside separate buildings within the service station--Hostage 1 is located in the western-most garage in the alley behind the service building to the north, whereas Hostage 2 is found in the workshop directly adjacent to the service building to the west. The escape vehicle is found on the same road that the Police start on.
")
")
")
")
Crosshair
Crosshair on Dust Bowl takes place in the map centre, with map boundaries comprising the motel and the two-storey to the north. The Undercover and the VIP start behind the Check-in office on the southern side of the Motel's parking lot. The Bangers' Hit Squad start near the extraction points behind the two-storey to the east (point A) and a bungalow further west (point B). The VIP starts a short distance from their weapon locker, which is on the ground floor of the eastern motel building.
The protection team must cross the highly exposed roadway between the Motel and the residential buildings. Either side has access to elevated overwatch positions from either the second floor windows of the motel or the two-storey that can effect the course of the game. Alternatively, a crossing can be made undetected through the western alley by using a stationary truck parked at the junction to break line of sight. Otherwise, smoke grenades are highly recommended to make the crossing.
Team Deathmatch
Team Deathmatch is set within the map centre, comprising the Motel, the Two-Storey and the Meth Compound as well as a row of bungalows lining the east and western limits. Battle pickups are present in their standard Conquest locations, and the dust storm can also effect the map.
Levolution
At a random point later in the match, a dust storm will come in to engulf the map in dust. Therefore, the range at which the player can see is reduced and most sounds will be harder to hear. After a few minutes, the dust storm will stop and the conditions go back to normal.
In the basement of the house (where the Meth Complex flag is), there is a large amount of explosive barrels right by the south part of the house. Shooting these will blow open a hole down into the basement and into the northern part of the house. A pile of dirt near the explosive barrels has some canisters that can be shot at, causing a secondary cave in within a small shack.
Gallery
")
")
")
")
")
")
")
")
")
")
")
")
")
")
")
")
Videos
")
")
Trivia
- The Dust Bowl was a period of severe drought in the midwest United States during the 1930s that was accompanied by several severe dust storms during the decade.
- "Joad", the name of the fictional town the map is set in, is a reference to John Steinbeck's novel The Grapes of Wrath, which follows the Joad family as they travel to California during the Dust Bowl.
- Dust Bowl was one of three maps featured in Hardline's open Beta, the others being Downtown and Bank Job.
- Dust Bowl is the only map that features The American Dream drivable couch, spawning in three random locations throughout the map.
- In the game files this map is named mp_desert05.
| ||||||||||||||||||||