No edit summary |
No edit summary |
||
| Line 1: | Line 1: | ||
| + | |||
{{See|''For other versions of the map, see [[Iwo Jima (Disambiguation)]]''}} |
{{See|''For other versions of the map, see [[Iwo Jima (Disambiguation)]]''}} |
||
| Line 9: | Line 10: | ||
|game = [[Battlefield V]] |
|game = [[Battlefield V]] |
||
|war = [[World War II]] |
|war = [[World War II]] |
||
| − | |teams = [[United States#Battlefield V| |
+ | |teams = [[File:U.S. flag, 48 stars.svg|20px]] [[United States#Battlefield V|USA]] Vs. <br />[[File:Japan Flag.png|20px]] [[Imperial Japanese Army#Battlefield V|Japan]] |
|date = February 19 – March 26, 1945 |
|date = February 19 – March 26, 1945 |
||
| + | |location = Iwo Jima, Japanese Volcano Islands |
||
| − | |battle = }} |
||
| + | |terrain = Coastal, Mountainous |
||
| + | |combat = Amphibious, Combined Arms |
||
| + | |weather = Overcast |
||
| + | |modes = [[Breakthrough]]<br />[[Conquest]] |
||
| + | }} |
||
'''Iwo Jima''' is a map of ''[[Battlefield V]]'' set to be introduced on October 31st, 2019 within the fifth chapter of [[Tides of War]], [[War in the Pacific]]. It was first revealed in [[Battlefield V - Chapter 4: Defying the Odds Trailer]]. |
'''Iwo Jima''' is a map of ''[[Battlefield V]]'' set to be introduced on October 31st, 2019 within the fifth chapter of [[Tides of War]], [[War in the Pacific]]. It was first revealed in [[Battlefield V - Chapter 4: Defying the Odds Trailer]]. |
||
| + | Attacked in February 1945 to secure bases in preparation for the planned {{w|Operation Downfall|Invasion of the Japanese Home Islands}}, the five week battle for island of Iwo Jima was characterised as one of the bloodiest of the Pacific War. Heavily fortified defensive positions including over 18km of tunnels allowed the [[Japan|Japanese]] to inflict heavy casualties on the [[United States|American]] attackers. However, as the Japanese were significantly outnumbered with no chance of reinforcement, resupply or retreat, the battle was a foregone conclusion. In the aftermath, a photograph taken of six [[USMC|Marines]] raising the flag on the summit of Mount Suribachi would become an iconic image of [[World War II]]. |
||
| + | |||
| + | ==Overview== |
||
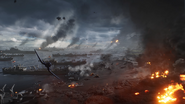
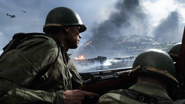
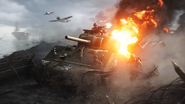
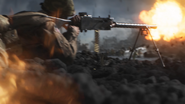
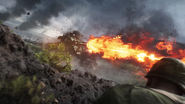
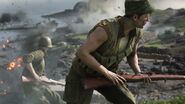
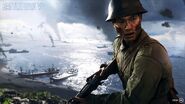
The map takes place over the thinner part of the island, featuring environments from the black ashen beaches, light jungle, and cave tunnels winding throughout Mount Suribachi.<ref>https://www.ea.com/en-gb/games/battlefield/news/all-you-need-to-know-chapter-5-war-in-the-pacific</ref> |
The map takes place over the thinner part of the island, featuring environments from the black ashen beaches, light jungle, and cave tunnels winding throughout Mount Suribachi.<ref>https://www.ea.com/en-gb/games/battlefield/news/all-you-need-to-know-chapter-5-war-in-the-pacific</ref> |
||
| + | |||
| + | ==Conquest== |
||
| + | ===Equipment=== |
||
| + | ===Deployments=== |
||
| + | ====US Deployment==== |
||
| + | ====Japanese Deployment==== |
||
| + | ===Flags=== |
||
| + | ====A: ==== |
||
| + | ====B: ==== |
||
| + | ====C: ==== |
||
| + | ====D: ==== |
||
| + | ====E: ==== |
||
| + | ====F: ==== |
||
| + | |||
| + | ==Breakthrough== |
||
| + | ===Sector 1=== |
||
| + | ===Sector 2=== |
||
| + | ===Sector 3=== |
||
| + | ===Sector 4=== |
||
| + | ===Sector 5=== |
||
| + | ===Sector 6=== |
||
Revision as of 22:28, 29 October 2019
| This article is a stub. It is short and in need of fortification. Why not help out? |

|
Incoming! The subject of this article is a recent or unreleased addition to a Battlefield game. It may contain speculation or errors. Have new, relevant information to add? Why not help out? |
Iwo Jima is a map of Battlefield V set to be introduced on October 31st, 2019 within the fifth chapter of Tides of War, War in the Pacific. It was first revealed in Battlefield V - Chapter 4: Defying the Odds Trailer.
Attacked in February 1945 to secure bases in preparation for the planned Invasion of the Japanese Home Islands, the five week battle for island of Iwo Jima was characterised as one of the bloodiest of the Pacific War. Heavily fortified defensive positions including over 18km of tunnels allowed the Japanese to inflict heavy casualties on the American attackers. However, as the Japanese were significantly outnumbered with no chance of reinforcement, resupply or retreat, the battle was a foregone conclusion. In the aftermath, a photograph taken of six Marines raising the flag on the summit of Mount Suribachi would become an iconic image of World War II.
Overview
The map takes place over the thinner part of the island, featuring environments from the black ashen beaches, light jungle, and cave tunnels winding throughout Mount Suribachi.[1]
Conquest
Equipment
Deployments
US Deployment
Japanese Deployment
Flags
A:
B:
C:
D:
E:
F:
Breakthrough
Sector 1
Sector 2
Sector 3
Sector 4
Sector 5
Sector 6
Gallery
| ||||||||||||||||||||||||||

