(added proper tense) |
No edit summary |
||
| Line 12: | Line 12: | ||
|teams = [[File:U.S. flag, 48 stars.svg|20px]] [[United States#Battlefield V|USA]] vs. <br />[[File:Japan Flag.png|20px]] [[Imperial Japanese Army#Battlefield V|Japan]] |
|teams = [[File:U.S. flag, 48 stars.svg|20px]] [[United States#Battlefield V|USA]] vs. <br />[[File:Japan Flag.png|20px]] [[Imperial Japanese Army#Battlefield V|Japan]] |
||
|date = February 19 – March 26, 1945 |
|date = February 19 – March 26, 1945 |
||
| − | | |
+ | |place= Iwo Jima, Volcano Islands, Japanese Empire |
|terrain = Coastal, Mountainous |
|terrain = Coastal, Mountainous |
||
|combat = Amphibious, Combined Arms |
|combat = Amphibious, Combined Arms |
||
Revision as of 19:04, 10 November 2019
| This article is a stub. It is short and in need of fortification. Why not help out? |

|
Incoming! The subject of this article is a recent or unreleased addition to a Battlefield game. It may contain speculation or errors. Have new, relevant information to add? Why not help out? |
— Official Battlefield Blog[1]
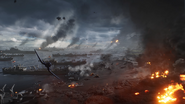
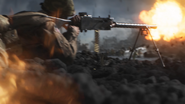
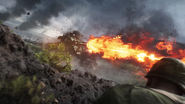
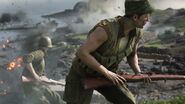
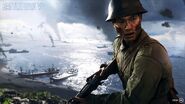
Iwo Jima is a map of Battlefield V which was introduced on October 31st, 2019 within the fifth chapter of Tides of War, War in the Pacific. It was first revealed in Battlefield V - Chapter 4: Defying the Odds Trailer.
Attacked in February 1945 to secure bases in preparation for the planned Invasion of the Japanese Home Islands, the five week battle for island of Iwo Jima was characterised as one of the bloodiest of the Pacific War. Heavily fortified defensive positions including over 18km of tunnels allowed the Japanese to inflict heavy casualties on the American attackers. However, as the Japanese were significantly outnumbered with no chance of reinforcement, resupply or retreat, the battle was a foregone conclusion. In the aftermath, a photograph taken of six Marines raising the flag on the summit of Mount Suribachi would become an iconic image of World War II.
Overview
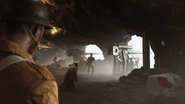
The map takes place over the thinner part of the island, featuring environments from the black ashen beaches, light jungle, and cave tunnels winding throughout Mount Suribachi.[2]
Flag Layout
| Control Point | Conquest | Breakthrough | Squad Conquest | |
|---|---|---|---|---|
| American Deployment | ||||
| Beachhead Red | 1A | |||
| Rallying Point | 2A | |||
| Beachhead Command Post | F | 2B | C | |
| Motoyama Checkpoint | B | |||
| Observation Tower | A | |||
| Coastal Artillery | E | |||
| Munitions Depot | D | 3A | ||
| The Last Stop | C | 4B | ||
| Lava Cave | 4A | |||
| Chi-Ha Assembly Station | B | 5A | ||
| Suribachi Artillery | A | 5B | ||
| Suribachi Summit | 6A | |||
| Japanese Deployment | ||||
Conquest
Conquest is fought between six flags, three of which are on the Headlands of the island towards the east, while the rest are on the west side either in the vicinity of or directly inside Mount Suribachi. In the former areas, the windswept coastal plains lend themselves both to long-range combat between hills and short range fighting in the numerous trench systems, pillboxes, bunkers and the objectives associated with them. The area is also ideal terrain for tanks, allowing engagements over largely unobstructed sightlines. West of Bloody Gulch however the sharply sloping terrain, combined with the highly restrictive tunnel network running throughout the heights, generally means combat in and around the mountain takes place on foot.
Each team starts the battle with 500 tickets.
Equipment
| Light vehicle(s) | |
| Tank(s) | |
| Fixed-wing aircraft |
3 Zero |
| Emplacement(s) |
2 40mm AA |
| Light vehicle(s) |
2 GPW |
| Tank(s) | |
| Fixed-wing aircraft | |
| Boat(s) |
4 LCVP |
| Emplacement(s) |
2 40mm AA |
Deployments
US Deployment
The US spawn points are located around the island's southern coast, in the vicinity of Beachhead Red, which is out-of-bounds to the enemy team. Players have the choice of deploying directly onto the beach via a landed LST, which is the spawn point for the team's ground vehicles including tanks, and houses a 40mm AA piece on the bow for protecting the beachhead. They can also spawn on the Yorktown-class carrier out to sea to the west of Beachhead Red, which allows for the deployment of aircraft and four LCVPs. As the nearest point of Beachhead Command Post is also very close to the Japanese spawn, and may be subject to correspondingly heavy fighting early on in the match, the landing craft can be used gain quick access to the flags around the western end of the island within Mt. Suribachi by landing up the beach from the initial spawn.
The beach next to the grounded LST is used as the spawn point for the team's light vehicles, and further contains a Vehicle Supply Station, Health and Ammo caches, and an M2 Flamethrower Battle Pickup.
Japanese Deployment
Japan's singular spawn point is found within the massive Motoyama Airbase towards the northern edge of the playable area. The location has direct access to the island's meager road network which links not only to the nearby Command Post flag but also grants easy vehicle access to the adjacent Munitions Depot and Last Stop objectives. The base is protected by a number of outlying fortifications to deter spawn-campers, augmented by two 40mm AA guns in concrete casemates on the perimeter.
In addition to Health, Ammo and Vehicle Resupply Stations, there is provision for an M2 Flamethrower pickup.
Flags
A: Suribachi Artillery
The artillery guns at Mount Suribachi are created to deter the American invasion by targeting them via the waters; this flag is located to the west of the cave networks. Three Type 10 guns are available for use, with a nearby Ammo and Health Resupply station. Four passageways take players through the caves, with one as an exit to the caves, allowing entry to the high ground, however the capture zone is within the inside of the cave, out of reach for artillery and flying bombs, as well as tanks, unless the guns are destroyed.
B: Chi-Ha Assembly Station
Two Chi-Ha tanks are being assembled, with the turret not yet in place; this flag is located directly east of the artillery guns, and is one of the entrances to the cave networks of the mountain. Players can also flank via a second entrance, as well as a natural slope allowing access to the high ground. The tanks can be used as cover as well, and can fit a tank within the entrance to the objective. As with the artillery, the capture zone is confined to the cave only. An Ammo station is located beside the slope, and a Health station is to the left of the slope.
Within the caves, a Katana and Flamethrower can be found within the caves.
C: The Last Stop
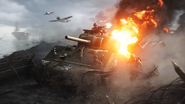
An American plane that has crashed with nose art of the same name within a hill of the island, The Last Stop is centered within the plane itself, with access to the interior for cover. Black sand mounds are available as well, with anti-aircraft mounds carrying Ammo and Health stations. Players can use the high ground or take a detour through the black sand coast to reach the flag, with two Sherman tank wrecks available for cover.
A Katana can be found east of the flag, located in the separated tailend of the crashed plane.
D: Munition Depot
Located dead center within the island itself, the Munition Depot not only houses Ammo, but also Health and anti-aircraft defenses within its trenches. A cave is also part of the flag's capture zone, with a Battle Pickup available inside the cave itself, as well as a Health station inside. Players can use the cave to flank the trenches.
E: Coastal Artillery
The artillery targeting the coast down south is also designed by the Japanese to deter an invasion. This flag is centered within a trench of coastal batteries, with a Health and Ammo resupply station directly located in the flag itself. Two Type 10 guns face the coast, available for use should any American deploying from the waters are present.
F: Beachhead Command Post
The command center for the beachhead defenses is situated on a flag earth shelf at the top of the beach, overlooking the final line of fortifications ahead of the Japanese airbase. The flag is directly connected to Motoyama via the main road, and the area consists of a large pillbox orientated towards the beach approach, behind which is an open staging area for supply trucks adjacent to the roadway. A short stretch of trenches runs along the capture zone on its east side, while the whole area is bordered to the north and east by the Motoyama Checkpoint ridge and associated trench network, and the Rallying Point hill containing buildable anti-aircraft guns, respectively.
The flag lies about 200m south of the Japanese spawn and 300m uphill from the American spawn, and is the closest flag for either team starting off. As a result, the it is expected to be hotly contested early on in the match, especially considering the flag generates an extra tank spawn for whichever team holds it, in addition to a light vehicle, Health and Ammo resupplies, and a Katana.
Breakthrough
In Breakthrough, US forces are tasked with making an amphibious landing on Iwo Jima, securing the island and its airbase by rooting out the Japanese defenders. While the Americans can count on vehicular superiority, the determined defenders can count on a significant, multi-layered belt of fortifications, including pillboxes, gun positions and tunnels, each of which must be overtaken in turn. While the ultimate goal of the US is to scale and capture the strategic high ground of Mt. Suribachi, Japan must make any such attempt at victory as costly as humanly possible.
The attackers are allocated 400 tickets at match start. Although a long Breakthrough map at six sectors, Iwo Jima is notable for its smooth difficulty curve that has earlier stages favor the attackers before ramping up the strength of the opposition as the match progresses, culminating in a brutal, point-blank attritional fight to reenact history on the mountain summit itself.
Sector 1
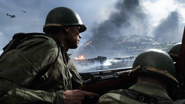
The battle begins with the amphibious stage of the operation, where the US Armed Forces must assault the island in landing craft to establish a beachhead for their push inland. The main thrust of the offensive is concentrated on a strip of beach known as Beachhead Red - the sole objective for capture in sector one. The area is situated near an already beached Landing Ships which, along with the wrecks of tanks and other debris scattered along the shoreline, suggests a previous landing attempt that failed, with the US team's attack being the second wave.
The American assault is made from a Landing Ship out in the Open Waters to the southwest of the beach, which can deploy two LVTs and four LCVPs for use by the disembarking infantry. Players can also deploy from the aircraft carrier alongside the ship to the west which carries extra LCVPs and is used to launch two F4Us allotted to the Americans at this and all subsequent stages. The Japanese have no vehicles to support them, but are reinforced on the beach itself with several 6 Pounder anti-tank guns and Type 93 HMGs, with 40mm AA guns located just behind the frontline.
The terrain around the beach itself consists of several berms, one just short of the waterline and another further back housing a row of dragon's teeth, a long buildable trench line and many shell craters that can also be reinforced with cover. The objective radius, although stretching from this first ridge to encompass much of the first defensive line, is generally favorable to attackers with the land providing decent directional cover. Therefore, to stall the US as long as possible at this stage, the Japanese must conduct an active defense, moving forward to clear any personnel from the berm or putting it in defilade by firing along the beach. Stationary weapon gunners, although limited in fields of fire, are advised to focus on naval transports and amphibious tanks to stem the tide of infantry actually setting foot on the beach. The US team can counter this by avoiding the AT guns' sightlines and landing up the coast, by getting armor and air assets to priorities destroying these gun positions, or by using speed and massed force to overwhelm the defenders before they get a chance to properly establish themselves.
Sector 2
With a toehold on the island having been achieved, the US must fan out to consolidate their fragile beachhead, falling upon the second Japanese defensive line as they move up the beach to the north. Closest to the shore is the objective A, the Rallying Point, situated behind the third ridge and the concrete pillboxes built within it. The area consists of a shallow ring of trenches cut into the rock, overlooked by a large mound. US players can reach the area by scaling the ridge or by blasting holes in the outward facing pillbox walls. Objective B is the Beachhead Command Post, across a stretch of open grassland atop the back shore to the west. It is comprised of a large bunker adjoined to a concrete seawall, behind which is an open pit used to house several cargo trucks.
The US LVTs are discarded in favor of two Sherman tanks at this stage, deployed from the landed LST, as well as a mobile 40mm AA gun towed behind an MB Jeep.
Sector 3
Having successfully widened their beachhead, the American attack shifts westward across the Headlands towards the heights. At this stage, they have one objective - the Munitions depot.
Sector 4
With the halfway point of the assault bypassed, the US advance upon the foot of Mt. Suribachi. The two objectives at this stage are located at the mouth of the cave tunnels running throughout the rock, and are positioned in close proximity and direct line of sight with one another. Objective A is the Lava Cave, while objective B is The Last Stop.
Sector 5
Fighting continues within the body of the mountain itself, both teams fighting a desperate close quarters battle for control of the defensive holdouts therein - the Chi-Ha Assembly Station and the Suribachi Artillery.
Sector 6
During this final, climactic stage the US must reach the Summit of Mount Suribachi, wresting control of the heights and the volcanic crater beyond away from the Japanese defenders and leaving them nowhere to go. The singular flagpole is positioned to overlook the landing beaches from the mountain crest, with a Katana available for pickup within the flag itself, to cater to close combat.
If the attackers persevere and take control of the flag, the battle is theirs. With yet another Japanese airbase firmly in US hands, their four year long island hopping campaign is nearing its completion - but the ever increasing fierceness of the enemy as they approach their home islands is foreboding of even greater bloodshed in the near future.
Squad Conquest
Squad Conquest takes place towards the eastern end of the larger play area, between the two team's Conquest spawns. Objectives are placed throughout this hilly, largely exposed area of the Headlands, with the two outlying flags separated by a large ridge housing an extensive trench network, which may facilitate covered movement between them.
Deployments
US Deployment
The US Deployment is at the Trench Line at the foot of the cliffs housing Beachhead Command Post. While their initial spawn is in direct line of sight to the bunker objective, the team can make use of spawn protection to bypass the area via the eastern flank.
Japanese Deployment
The Japanese team deploy from the east side of the Motoyama Airbase, across the main road exiting the base from the nearby flag of Observation Tower. Their spawn area is amongst a mass of tents, crates and supply trucks that hides the team from direct view, except from those occupying the Tower itself.
Flags
A: Observation Tower
The Observation Tower is located within the inner perimeter of the Airbase on its west side, with point corresponding to a stumpy bowl-like mound between two concrete casemates, with a sandbag wall around the crest. Although outside the capture area, the airfield's control Tower is on the north side of the mound. The slight elevation of the area allows defenders to spot enemies approaching from the southern hillside, with players on upper deck of the tower even able to see into the vicinity of Beachhead Command Post. North still of the tower are two camouflaged concrete hangars for aircraft that can be used both as a cover position to hold the flag or to hide Spawn Beacons.
Health and Ammo can be retrieved from the base of the tower, along with a Katana battle pickup.
B: Motoyama Checkpoint
Motoyama Checkpoint is located to the west center of the play area, outside the main Motoyama Base cordon. Located in a 20m long pit connected to the trenches, the Checkpoint consists of a green tent covering stacks of supply boxes and a wooden watchtower, the perimeter consisting of tall sandbag walls. The below-ground location of the objective area combined with the surrounding wall means those inside the capture zone are mostly blind to the surrounding areas. While the watchtower can be climbed to remediate this, they will be in direct line of sight with anyone using the elevated positions at the two adjacent flags.
The point contains a Health Station and an M2 Flamethrower battle pickup.
C: Beachhead Command Post
The Beachhead Command Post has the largest of the three capture zones, based around the cliff bunker directly south of the Airbase. As in Conquest it covers both the interior of the bunker and the area immediately around it including the adjacent main road. Aside from the bunker the area is decided lacking in cover, especially against the main line of approach to the north. Using Fortifications a large perimeter wall of sandbags can be put up, with further cover positions capable of emplacement on the roof of the bunker itself. The roof position can be used to gain greater visibility against the overlooking ridge.
An Ammo cache is found within the bunker, with Health and a Katana can be picked up from the outside yard.
Team Deathmatch
Team Deathmatch takes place in and around Mount Suribachi. While Bloody Gulch and the Lava Caves are cut off to the east, players can roam freely about the caves and tunnels between the Artillery and Chi-Ha Assembly areas and scale the southern face of the mountain up to the summit. The Type 10 Guns at the top of the cave complex are still operational in this gamemode.
Trivia
- The size of the map was noted by designers to be 70% of the actual size of the real island, with the play area larger than Hamada. This is also the reason why the entire map is not available compared to past versions of the map.
- A tiny red house, also found on the map Arras and the map Rupture from Battlefield 1, can be found in a cave in the map.
Gallery
| ||||||||||||||||||||||||||

