- This item has a Codex entry: Battle of Malmaison
— In-game description
Nivelle Nights is a map added to Battlefield 1: They Shall Not Pass during the June Update.
On October 31, DICE announced Nivelle Nights will be made available to all Battlefield 1 players.[1] As of the November 2017 update, the map is now in base rotation.
Overview[]
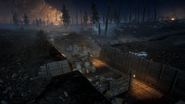
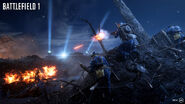
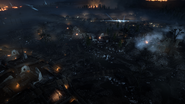
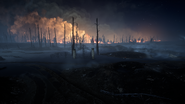
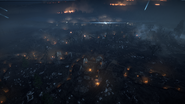
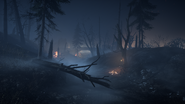
Nivelle Nights is the first multiplayer map focusing primarily on trench combat, as well as the first map set at night.
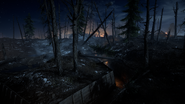
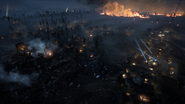
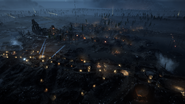
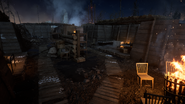
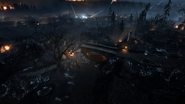
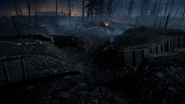
What would otherwise be a flat field is now excavated with a network of trenches and shell craters. The Germans have heavily fortified their defenses, creating complex trenches reinforced with concrete pillboxes and searchlights, along with installing interior electric lighting. The French, on the other hand, are sorely ill-prepared for the battle - although deep and similarly labyrinthine they lack the fortifications of the German trenches, instead relying on the husks of houses for overhead cover, and with only fire pits for light. Many prior attacks have also failed, as evidenced by the wrecks of many French tanks.
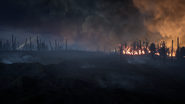
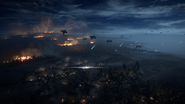
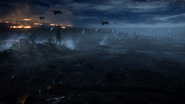
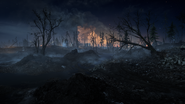
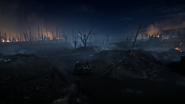
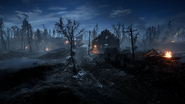
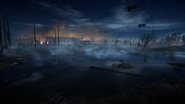
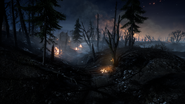
All peacetime structures have long been obliterated by barrages. Across no-man's-land, the terrain has been transformed into a bog out of which stands many tall ridges and depressions of thrown up dirt. Widespread flooding on the periphery has swallowed structures and former trench lines, with only buildings on the high ground of the map center still recognizable. Artillery fire, flares, searchlights, and even infantry running into a burning forest can be seen in the distance. Rats may be seen scurrying about the landscape. The moonlit dark is occasionally broken by lanterns, open fires, muzzle flashes, and searchlight beams. Being set in early winter and at night, light snow (also seen in Prise de Tahure) may fall during battle, and a light layer of frost covers the muddied floors of the trenches.
Control Points[]
| Control Point | Frontlines | Conquest | Domination | Rush | |
|---|---|---|---|---|---|
| French Deployment | |||||
| Peltier Trench | E | 6A 6B | |||
| Royere Hospital | A | 5A 5B | |||
| Chemin Frontline | D | B | 4A 4B | ||
| Dead Steel | C | A | 3B | ||
| Panthéon Farm (No Man's Bridge) | C | B | 3A | ||
| Saint Berthe (Church Ruins) | D | C | |||
| Danzig Trench | B | E | 2A 2B | ||
| Salzbourg Battery | F | ||||
| Salzbourg Trench | A | 1A 1B | |||
| German Deployment | |||||
Conquest[]
Flag layout is symmetric and triangular, similar to St. Quentin Scar. Both teams start with their two closest flags already captured and usable for infantry spawns, a design choice possibly not seen since Battlefield 2142. This leaves the central flags C and D ready for contest.
The two elite kits, the Trench Raider and Flame Trooper appear around the center of the map.
Equipment[]
Each team has one Cavalry unit and one heavy armor spawn.
Illumination flares[]
Illumination flare emplacements for temporary lighting can be found near the center flags. There are four flare emplacements, two to each side of B (Chemin Frontline) for France, and two more to each side of E (Danzig Trench) for Germany. The two flare emplacements for each side aim towards one of the two No Man's Land points, C or D. They are only available when their target point is neutral or under enemy control. When ready to use, a red signal lamp will light up the emplacement. The player has to hold Enter/Exit vehicle in order to fire the flares.
Using a flare will launch it into the sky, and it will explode after a short moment, creating a burst of light that lights up the environment while also spotting enemies on the map like the Spotting Flare does.[2]
Deployments[]
French Deployment[]
The French deploy from Peltier Trench, in the map's far north behind the French frontline trenches. It is a zig-zag trench emplaced in a wooded area that stretches across the entire width of the map, with communication trenches dug at intervals connecting to the forward fortifications. Log bridges and dirt tracks facilitate the movement of tanks past this area.
At the start of the battle, the French may also deploy from either Royere Hospital to the southeast or Chemin Frontline to the direct south.
German Deployment[]
The Germans deploy from Salzbourg Trench, located behind a ridge on which the German front is constructed on the south side of the map. The area is partially hidden from view by the ridgeline, with the trenches working forward uphill towards Danzig Trench and eastwards to the battery. Two roads crest the hill at opposite ends of Danzig Trench.
The two closest flags, Danzig Trench and the more isolated Salzbourg Battery to the northwest are available for spawning as long as the Germans can keep their hold of them.
Flags[]
Royere Hospital[]
An aid station located partway along one of three French communication trenches between the first and second lines. The small capture zone conforms to the interior of the box trench, which is split into two by a split level partition and contains several side chambers and additional corners dug into the walls.
The French Illumination Flare launcher is to the southwest, between this flag and Chemin Frontline.
Chemin Frontline[]
Trenchwork on the French side of the map that converges amongst the ruins of a few houses. Severed walls stand at each corner of the square dugout, which raises on the south side to give a better view of the approaches from no-man's-land, and the trench line immediately in front of the position. Another Illumination Flare battery is to the direct west.
Dead Steel[]
Site of a failed mobile offensive, with destroyed tank hulls and assorted pieces of scrap metal resting in a large crater in a partially flooded section of the battlefield. An abandoned Char 2C tank is located stranded on an "island" in the center of the flag, providing a large amount of cover for the occupying team. Climbing on top of the Char 2C tank also provides a viable vantage point over the surrounding area, allowing players to spot and possibly dispatch incoming forces. The adjacent ridges of the crater edge obscure line of sight to surrounding areas.
A Flame Trooper kit is found to the west, in a ruined structure at the east end of the bridge over the creek.
Saint Berthe[]
Saint Berthe is a destroyed church located to the south of the map. Suffering severe damage from bombing, almost nothing of the church remains except its columns. The center of the church features a makeshift road running through it, separating the church to the north and south with the flag sitting toward the center. The south end of the church is largely exposed compared to the north, with only stone columns remaining. Compared to the north, however, it features higher ground due to built up debris, allowing for a better vantage point against the north end. The north end of the church is largely undamaged in comparison, with the roof having been destroyed.
A Trench Raider kit is located downhill towards map center, on a grave on the west end of the creek bridge.
Danzig Trench[]
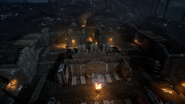
A German position marked by a trio of searchlights scanning for aircraft, the objective is a bunker housing generators and banks of electrical equipment, protected by the elements by a log roof. The capture zone is concentrated around the central pit where the generators are, but also extends northwards to include the central parapet housing the spotlights, and the reverse slope at the bottom of which is the frontline trench.
The German Illumination Flare launcher is along the trenches to the east, outside the middle of the three pillboxes constructed about the area. Another is found along the front trenches to the west.
Salzbourg Battery[]
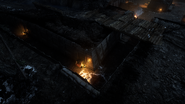
The Salzbourg Battery is a German artillery line somewhat isolated behind the front in the southwest corner of the map. The position has several elevations, with ramps and staircases up from the pit bottom to the ground-level earthworks around the perimeter of the bunker. Empty artillery shell casings completely cover the northern slope into this objective.
Frontlines[]
The Frontlines gamemode makes extensive use of the map's trenches during the flag capture phase, with large sections of all four of the major trench lines acting as the capture zones for the off-center flags.
Combat starts around the central bridge at Panthéon Farm, and the low-lying area surrounding it between the ruined church and the tank graveyard. Each team has access to one Cavalry unit.
Each team's A telegraph is located in a "ring" section (large yard with a central raised area) at their respective deployment. Telegraph B is located along a communication trench a short ways away.
German Base[]
The German telegraphs are located at the southern extent of their trench network. Objective A is in a side shelter in the northeast corner of a square bunker, with objective B a distance along the westernmost communication trench.
When deploying from this objective, the Germans spawn by a Y-intersection of trenches amidst some ruins directly adjacent to the large bunker.
Salzbourg Trench[]
The trench line closest to the German Deployment, at the foot of the ridge housing Danzig Trench. The area consists of a recessed bunker with three entrances, with the capture zone extending along these support trenches from the central redoubt for a short distance. Log walls inside the bunker create corners in which players can wait in ambush.
Danzig Trench[]
The electrical generators inward of Danzig Trench are another objective.
Panthéon Farm[]
The central objective concerns the destroyed buildings and bridge over a creek bed in the middle of the map between Dead Steel and Saint Berthe. The surrounding lower-ground terrain is littered with craters and marred trees, with the farmhouse ruins on the raised ground at either end of the bridge.
Chemin Frontline[]
The observation post within devastated structures on the French side of the line.
Peltier Trench[]
The trench line closest to the French Deployment, behind Chemin Frontline. The rectangular bunker was intended to be a rest area for troops, with chairs and supplies located behind wooden partitions.
French Base[]
The French Base is in a similar layout to the German's, albeit on the extreme opposite side of the map. The A telegraph is in a side shelter to the French's bunker, with objective B at a 90° corner in the trench to the east.
The French have only a short stretch of trench to the north to spawn in.
Rush[]
Sector 1[]
In the first phase, the Germans must attack out of their southern deployment through the communication trenches leading to Salzbourg Trench. One objective is found at a crossroads of four trenches, to the west of the Salzbourg Trench bunker. The other is in the bunker itself, underneath the log roof in the back corner of the fortification.
The Germans bring along a Flame Trooper in the attack.
Sector 2[]
The next assault is made to the west of Danzig Trench. One objective is in a square bunker west of the left pillbox, in the second line of front trenches. The other is close to the searchlights at Danzig.
A Trench Raider assists in the ridge assault.
Sector 3[]
In phase three, the attack continues into no-man's-land. Specifically, around the remains of Panthéon Farm and the nearby bridge over the creek, as well as at the adjacent tank graveyard of Dead Steel. Objective A is underneath the stone bridge in the creek bed, while objective B is in the southwest side of the crater interring the Char 2C.
Sector 4[]
The assault continues into the French frontline to the east of Chemin. Objective A is situated in a dead-end trench, constructed around the foundations of a ruined house a short distance directly southeast of the Conquest location of Chemin Frontline. Objective B can be reached by following the zipper trench a ways east, where it is located at the intersection of the first and second line.
The French begin to receive elite kits at this point, starting with a Trench Raider.
Sector 5[]
The attack shifts eastwards to the French field dressing station of Royere Hospital. Objective B is in the southeast corner of the main square pit, while A is in an adjacent trench connecting to the location, coming in from the west side.
A Trench Raider continues to assist the French defenders.
Sector 6[]
The final objectives are at the most remote point of the northern trenches, in almost identical positions to the French telegraphs in Frontlines. Objective A is in the central bunker on the west side, while B is at the sharp corner of a communication trench leading to Royere.
A Flame Trooper kit is available to the French for the last phase of the battle.
Domination[]
The small game modes occur in the center of the map, in the section between Dead Steel and Saint Berthe, but with some subtle differences in terms of map boundaries. For its part, Domination takes place across almost the whole length of the central map, with players restricted from accessing the frontline trenches on either edge of the play area.
Dead Steel[]
Set around the tank wrecks at the bottom of a massive crater. The capture zone is canted off to the west in comparison to Conquest.
No Man's Bridge[]
A farm with a bridge crossing the creek between Dead Steel and Saint Berthe. The capture zone is much smaller than its objective counterpart in Frontlines, as it is now concentrated around the bridge itself, forcing players to capture the flag from either the upper walkway or underneath.
Church Ruins[]
Located in the east section of the crumbling Saint Berthe church. The west wing is accessible, but the slope on the other side is now out of bounds.
Team Deathmatch[]
Team Deathmatch takes place in a shrunken area compared to Domination, with Dead Steel now cut off from play. The structures around the east end of No-Man's-Bridge are now the farthest east players can go.
War Pigeons[]
War Pigeons has wider map boundaries compared to Team Deathmatch - Dead Steel is still inaccessible, but each team's frontline trenches, such as around Chemin Frontline and Danzig Trench, now fall inside the boundaries.
Gallery[]
| ||||||||||||||||||||
Trivia[]
- The name of the map is a reference to French Army general Robert Nivelle, who led the army during the Nivelle Offensive (also named after him).
- The name of the ridge that the map takes place in, Chemin des Dames, is French for "the ladies' path".
- The map name is ambiguous and hard to translate in some countries. In the Polish version of the game this map was originally named "Wieczory w Nivelle" ("Evenings in Nivelle"). It wasn't accurate translation as it described the "Nivelle" word as the name of a city rather than a French general's name. The map's name was finally changed to "Ofensywa Nivelle'a" ("Nivelle's Offensive") to prevent ambiguity.
- The internal name for this map in Community Test Environment is MP_Trench.
- In Conquest, the B flagpole is canted, possibly the first time this has been done in the series, also showing off the game's cloth physics.
- The infantry seen in the distance to the east, use low-quality models of the British Assault and will die in one hit.
- When they die, they appear to be wearing a box-respirator gas mask.
- The soldiers' breathing on this map can be seen condensing, including the player's own, which can also be seen in first person. This can also be seen on Prise de Tahure, and on snow maps in the In the Name of the Tsar DLC.


