| This article requires a clean-up. Please help out by editing the page, or if necessary, please see the relevant discussion on the talk page. |
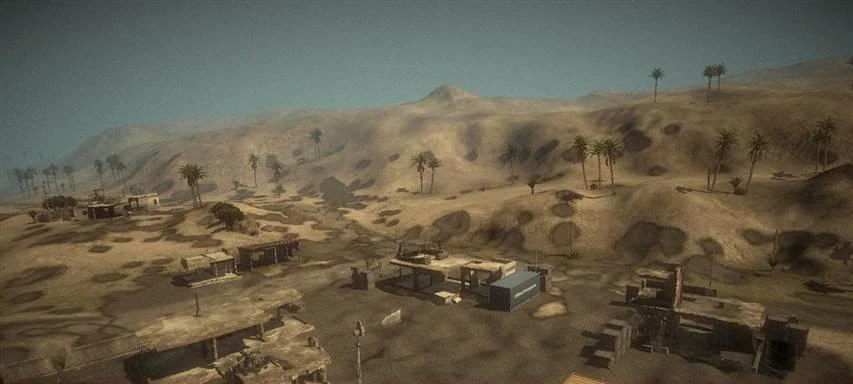
Oasis is a multiplayer map featured in Battlefield: Bad Company and in Battlefield: Bad Company 2. For Battlefield: Bad Company 2, it was included in VIP Map Pack 7. In Battlefield: Bad Company, the map takes place in a desert valley in the Middle East. In Battlefield: Bad Company 2, it is set near the Atacama desert of South America.
Battlefield: Bad Company
Oasis is the only map that appears on both Gold Rush and Conquest concerning the Middle Eastern Coalition. The Gold Rush variant was the featured map for the multiplayer section of the demo for Battlefield: Bad Company. It was rated by the community as one of their favorite maps and, hence, was remade to be released for Battlefield: Bad Company 2.
Gold Rush
Equipment
| Light vehicle(s) | |
| Infantry fighting vehicle(s) | |
| Main battle tank(s) | |
| Helicopters(s) | |
| Naval vessel(s) | |
| Emplacement(s) | |
| Infantry fighting vehicle(s) | |
| Main battle tank(s) | |
| Helicopters(s) | |
| Emplacement(s) | |
Bases
There is a total of 5 MEC bases, meaning there are 10 gold crates to destroy or defend.
Outpost
This is the starting area for the Attackers. There is the main road leading up to the Farm which is the easiest route to the enemy base. This is not always a wise choice of paths because of hilly sniping positions on the left of the defenders' base, making it hard for any advancing American tanks and transports to avoid being hit by laser-designators. There is a path leading from the right of the attackers' outpost as well, which is an excellent way to take, being there no cover for enemy snipers and only two buildings leading up to the Farm to worry about. This path is excellent for an attacking tank or two to make a fast flank around the back of the Farm, but be aware if this is unsupervised it can produce an easy path for defenders to sneak to your base and spawn-kill. Also, use the boats and AH-64 Apache to your advantage. The river provides an excellent way to the Farm using boats. As far as the Apache, try to flank around the outside hills by flying low, as the AA gun at the defenders' base is elevated. This is a very good base to give the gunner of the Apache a chance to take the crates, as both gold crates are easily exposed.
US control
- 3 M1A2 Abrams
- 3 HMMWVs
- 1 Cav Buggy
- 1 Artillery
- 1 AH-64 Apache
- 2 Patrol Boats
Farm
The Farm
This is the starting area for the Defenders. As defenders, there are several options. One is, you can resort to sniping in the hills just past the main road, and another not involving vehicles is retreating to the small group of buildings across the bridge. Attackers will have considerably more vehicles than Defenders, so make do with the Black Eagle battle tank and 2T Stalker you have. Be careful when using these, as attacking artillery can easily shell these. You are also given a couple AT launchers, so use them to take out enemy tanks. The Apache is always threatening at this tightly-nit base, so make an effort to suppress the chopper with the AA gun and rocket launchers. Be also aware that both of your crates are easily exposed, so watch for shelling of them.
This is the first base the attackers inherit after destroying the objectives. Be attentive and clear out all enemies as snipers and demolition experts can easily camp out in this base. Your vehicle abundance has decreased, but you are still left with the Apache, several tanks, and light transports.
MEC control
- 1 Black Eagle
- 1 2T Stalker
- 2 9M133 Kornets
- 1 ZU-23-2
- 1 KORD
US control
- 2 M1A2 Abrams
- 1 M3A3 Bradley
- 1 AH-64 Apache
- 1 KORD
- 1 ZU-23-2
Plantation
This is the second base for the MEC. This base is the best to defend. As defender, you have a Black Eagle, 2T Stalker and a KA-52 Alligator. The KA-52 is very important. It is in enemy artillery range, so it is easily destroyed. Try taking it when the artillery has just been fired, as artillery has to reload. The KA-52 and Black Eagle are important to keep an eye on since they are in the front of your base and attackers can easily steal them, and before you know it, there will be two enemy helicopters above. Your crates are easily defended and hard to shell for defenders. Just be careful of attackers flanking you from the rear and use the AA gun on top of the building to take out any enemy air support.
The Attackers will use this base as their second inherited base. As attacker, keep the Apache and, if you have it, the KA-52 i the air, as they will not spawn anymore. If the enemy has a helicopter, the AA at this base is useful, but if destroyed, it will not respawn. As attacker, your vehicle number has decreased even more. You are down to one Bradley, one Abrams, and a Humvee. Use them all wisely and keep them alive as long as possible. Two paths are available to you: the main uphill path leads to the elevated gold crate 1 and the swampy path leads to the building containing the second crate.
MEC control
- 1 Black Eagle
- 1 2T Stalker
- 1 Ka-52
- 1 ZU-23-2
- 1 9M133 Kornet
- 1 XM307
US control
- Note: whatever emplacements remain from MEC control will stay until destroyed
- 1 M1A2 Abrams
- 1 M3A3 Bradley
- 1 HMMWV
- 1 ZU-23-2
- 1 Pbl
Suburbs
This is the 3rd base for the MEC. Defenders, this is a tough base. You have very little vehicular defenses. The most you have are stationary grenade launchers and machine gun turrets Your first crate is elevated and it only takes a couple shots from a tank to blow its cover. The second crate is stuck inside a building and is covered decently, so this is a problem for attackers. There are some tall, bunched up buildings near the back of your spawn, so set up some sniper positions and possibly rocket launcher positions to take out enemy tanks and helicopters from long range. Defenders, be aware that a Patrol Boat can get the the secont crate and blow it with its grenade launcher.
Attackers, this should be a piece of cake. You may still have choppers, and you will have tanks, so use you armor to advantage over the defenders' infantry. When you receive this base, you will have a Bradley, 2 Humvees, and a boat. Run into the defenders' base through all sides, and use infantry style combat to fight through buildings. Both crates are easily shelled. If you have a chopper in the air, use it to hit the defenders' spawn building near the river and also take out the crate on the rooftop.
MEC control
US control
- 1 M3A3 Bradley
- 2 HMMWVs
- 1 Patrol Boat
Streets
The streets is another base that defenders will find extremely hard to defend. You have no vehicles aside from an elevated machine gun turret and two stationary rocket launchers. Use them to kill off attackers as much as possible. Your first crate will be easy for enemy infantry to sneak in and arm. The second crate is exposed on a rooftop in the rear of your spawn, so make sure any enemy choppers still in the air are brought down. You have an elevated AA gun in the same area, so use it to destroy enemy air support. Remember, at this point, infantry fighting really comes into play. If using machine guns or assault rifles, try to make the switch to shotguns and submachine guns. Even snipers should make the switch, considering there is a lot of cover inside buildings for enemy infantry.
As attacker, this is the base you will not inherit from defenders upon capturing it. Make sure you rat out any remaining enemies from this area, as ambushes and "snipefests" are very common. Upon attacking the Plaza, be aware that defenders have light armor and several turret positions. Use your Bradley carefully and flank with the boat to infiltrate their spawn. Also, if in a remaining helicopter, watch for the elevated AA gun in the defenders' spawn.
MEC control
- 1 2T Stalker
- 1 ZU-23-2
US control
- 1 M3A3 Bradley
- 1 HMMWV
Plaza
Defenders need to buckle down. You have a 2T Stalker, a couple of machine gun turrets and stationary anti-tank missile, as well as an elevated AA gun. Watch out for the attackers' Bradley and use the Stalker to defend against it. Be vigilant of the river and far hillside, as flanking will take place from likely both sides. If in a helicopter, watch your AA gun, as attacking soldiers may break your spawn and use the AA gun to bring you down. If in a helicopter, beware of the small combat areas, as it is easy to circle into the red zone. Both your gold crates are easily shelled by attackers. Gold crate 1 is up top and pretty far forward in your base, so keep an eye on it.#2 is in the middle of the square. Watch for the enemy Bradley and keep an eye on your stationary rocket launcher towards the hillside and make sure it is not occupied by an attacker who can hit the crates with it.
MEC control
- 1 2T Stalker
- 1 9M133 Kornet
- 1 ZU-23-2
Conquest
Equipment
| Light vehicle(s) | |
| Emplacement(s) | |
| Light vehicle(s) | |
| Emplacement(s) | |
Bases
US Base
The US Base is the starting point for the US Army. It consists of the South-most portion of the map, at the end of the village. It has a few buildings facing the plaza.
MEC control
US control
Rooftop
The Rooftop is the closest flag to the US Base. The flag, as its name states, is on a rooftop, on the East-side of the main road. It is placed in a tight cluster of buildings, giving specialists or demolition soldiers an advantage with their close-quarters firepower. If the fighting is found farther away from this flag, players might also opt for the Recon kit, as there are multiple and easy ways to get up to a high altitude point with a view of the main road. No vehicles spawn here.
Center
The Center is the farthest flag from both the US Base and MEC Base. As the name suggests, it is in the middle of the map. The flag is in the middle of the main road, and players can capture it by being in the middle of the road or by hiding in one of the nearby buildings. It is the most critical flag of the map, as it allows access to the nearby Yard and Rooftop flags, as well as it allows potentially safe travel through the abundance of narrow alleys and connected buildings. Recon units can also get a fairly large view of the map from one of the taller buildings, and their motion sensors can easily reveal enemies within buildings.
MEC control
- 1 Cobra
US control
- 1 HMMWV
Yard
The Yard is the closest flag to the MEC Base. It consists of some partially flooded buildings and terrain, on the West-side of the main road. It allows easy access to the main road and to the dunes on the North-West side of the map, as well as a good view of the Center. No vehicles spawn here.
MEC Base
The MEC Base is the starting point for the MEC. It consists of the North-most portion of the map, at the beginning of the village.
MEC control
US control
Outcome
US victory
The endgame camera will be pointing at the plaza. An Artillery strike is called on Gold Crate 1.
MEC victory
The endgame camera will be pointing at the Farm, regardless of whichever team is in control of the location.
| ||||||||
Battlefield: Bad Company 2
Oasis has been added to Battlefield: Bad Company 2 as part of VIP Map Pack 7. It is essentially the same as the Battlefield: Bad Company map, but with some changes in the map itself and in the gameplay features. The Middle Eastern Coalition has been replaced by the Russian Ground Forces and Artillery is excluded.[1][2] The location of the map has also been changed to Chile. On the loading screen satellite image, it appears to be close to the location of Laguna Alta.
Rush
Equipment
| Light vehicle(s) | |
| Infantry fighting vehicle(s) | |
| Main battle tank(s) | |
| Helicopters(s) | |
| Naval vessel(s) | |
| Emplacement(s) |
[All remaining RGF emplacements] |
| Infantry fighting vehicle(s) | |
| Main battle tank(s) | |
| Helicopters(s) | |
| Emplacement(s) | |
Bases
Conquest
Equipment
| Light vehicle(s) | |
| Infantry fighting vehicle(s) | |
| Naval vessel(s) | |
| Light vehicle(s) | |
| Infantry fighting vehicle(s) | |
| Naval vessel(s) | |
Bases
US Deployment
Located at the edge of town. Here spawns two Humvees for quick transport as well as a PWC for the water route. A shielded Heavy MG is located between Alpha and the deployment.
A: Rooftops
A two-story building surrounded by scaffolding. The flag itself rests atop a scaffold, but the base can be captured from anywhere inside of, or just outside of, the house. Between Alpha and Bravo are a large number of small houses, the roofs of which are easily accessed from the Alpha building. Players on these building can easily jump across the narrow alleys to the adjacent roofs.
B: Outpost
Located in the center of the map on a dock. By the flag, a IFV spawns. A BMD-3 if held by the RU or a Bradley if held by the US. Across the street, far outside the capture zone, is the UAV station. It lies in the center of a cluster of houses, but is easily accessed from any direction. On the oasis side, there is an island a short distance across the water, which is easily accessible from both deployments if traveling by PWC. On this island are several short trees and bushes where recons can blend in.
C: Suburbs
The flag is located just off the street leading out of the RU Deployment, surrounded by three houses. Two of which are small square houses, the other being a long L-shaped building. The base can be captured from inside both of the square houses, but not from the L-shaped one.
RU Deployment
Located in the wet marsh. Here spawns a Cobra in the center of the road and another closer to the mountains. A PWC is at the shore. A shielded KORD is nested farther up the road.
Squad Rush
Squad Deathmatch
Outcome
US victory
RU victory
| ||||||||||||||||||||
References
|