- This item has a Codex entry: Champagne-Ardenne
— [1] - Battlefield.com
Prise de Tahure (English: Seizure of Tahure) is a map in Battlefield 1. It was first announced in the "Summer of Battlefield" news post on the official Battlefield 1 website.[1] It is the counterpart to the similar Nivelle Nights post-release map addition.
Following Nivelle Nights, Prise de Tahure was made available to all Battlefield 1 players starting on January 16.[2]
Overview[]
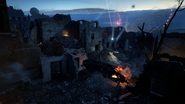
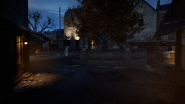
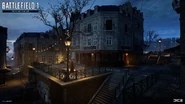
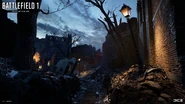
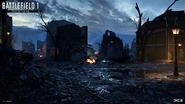
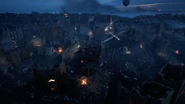
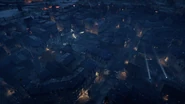
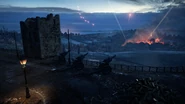
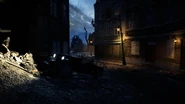
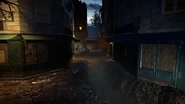
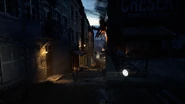
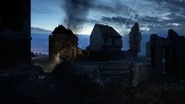
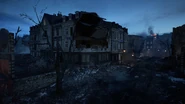
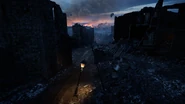
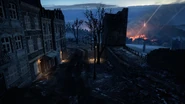
The town of Tahure is the site of a savage street battle in the gloom of a winter dawn. The hilltop settlement is bordered to the south by a steep valley, and was once a town of significant history as noted by the remains of medieval towers and foundations, as well as home to a large population by the scale and height of the urban expanse. At the time of the battle however it has been pulverised by artillery, reducing much of the community's western wards to rubble, and leaving most of the still-standing townhouses and shops with severe damage. Trenches have been hastily dug all over town, cutting across roads, between sidestreets and even through the demolished buildings, in anticipation of the German attack.
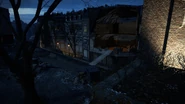
In terms of layout, much of the architecture is borrowed from Amiens, and although comparatively lacking in infrastructure the map is still densely packed. Along with the multi-story buildings, there are plenty of elevation changes in terrain, with plenty of narrow passageways between buildings that often have stairwells to split levels, and usually intersect at the center of town. A ring of roadways link the outer areas, while the town plaza and much of the rest of the map center is limited to foot traffic.
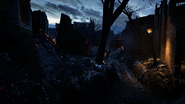
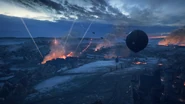
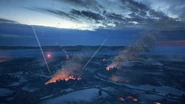
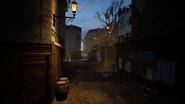
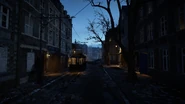
The streets are sparsely lit by lamposts, oil lanterns, and searchlights, although fires in the valley and artillery flashes illuminate the sky. Snow on the ground and icy windows suggest the battle takes place in early winter.
Behemoth[]
Due to the urban terrain, infantry elite kits are available to the disadvantaged team, namely a Flame Trooper, Trench Raider and two Sentry pickups.
Control Points[]
| Control Point | Frontlines | Conquest | Domination | Rush | Shock Operations |
|---|---|---|---|---|---|
| German Deployment | |||||
| Navarin Trench (Conquest) | A | 1A 1B |
1A | ||
| Navarin Trench (Frontlines) | A | A | 2A | ||
| Delaunay Trench | B | 2A | |||
| Tahure Square (Tahure Plaza) |
B | C |
|||
| Park | B | ||||
| Florian's Café | C | 3A 3B |
|||
| Schmidt Trench | D | 2B | 2B | ||
| Tooth Brush Trench | C | ||||
| Warehouses | E | 4A 4B |
3A | ||
| Howitzers | 3B | ||||
| French Deployment | |||||
Conquest[]
Flags are arranged in a cross, with deployments at opposing ends. All flags are located in large, open areas as opposed to the narrow alleyways that comprise the majority of the map. The terrain normally restricts the few vehicles each team is issued with to the perimeter roads - scout car drivers must be careful to avoid ditching in the many trenches dug throughout the area.
Equipment[]
Each team is equipped with a single tank and one scout car.
Deployments[]
German Deployment[]
The Germans deploy from the trench lines on the town's western limits, around the remains of the medieval outer walls and gate towers. Four roads lead eastwards past Navarin Trench, at the end connecting to the main road that loops around the edges of the town.
French Deployment[]
The French deploy on a vertical cobblestone road on the eastern edge of the map. To their west is a row of intact buildings, on the other side of which is the town green and the Warehouses objective. The street curves at the ends, each turning westwards and joining with the outer loop of the town's main road.
Flags[]
[]
Navarin Trench is set amongst a destroyed town block on the west side of the map. Only two buildings here are relatively intact, with the rest either left as gutted skeletons or mere remains in the form of detached walls and mounds of debris. A trench line cuts between these buildings and across the horizontal roads in the middle of the capture zone, which is primarily concentrated around the middle two of the four roads leading out of the German spawn, particularly where they join to the main loop.
Delaunay Trench[]
A Cross-shaped trench in the backyard of three houses, constructed in the inside corner of a Y-intersection, enclosing the area in a rough triangular shape. The detached houses look onto the main road to the immediate south, although no windows face the trench to the rear of the row of buildings.
Tahure Square[]
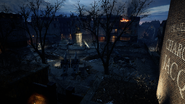
Tahure Square is a large, open plaza, in the dead center of the town. In the middle of the plaza is an ornate monument, with a central statue column surrounded by a stepped circular base of marble walls and other sculpted decorations. Around this, a trench loop has been dug, with the outside of the monument lined with sandbags and barbed wire. Additional cover in the expansive capture zone is provided by a number of shell craters, howitzers, and trees - useful as the area is surrounded by shops and other buildings with upper storeys useful for elevated firing positions. The area itself is elevated relative to the alleyways to the direct north, with a makeshift plank bridge spanning the gap from the plaza to the second floor of a nearby building.
A Flame Trooper kit can be picked up from beneath the statue.
Schmidt Trench[]
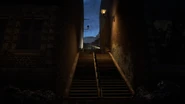
The former location of a tramway station on the southern edge of the map. A trench has been dug around the perimeter of the clearing, with derailed tram cars lying across them in some places. The intact station building is on the south side, with more building ruins to the northeast and west, next to two sets of stairs leading in from the map center.
Warehouses[]
Two adjacent walled compounds are found on the east side of the map, with the Warehouses objective capture zone concerning the northern of the pair. Two tall and two short buildings sit at the edges of the area, facing the streets, with an additional dirt road running between them. A tin-roofed warehouse stands in the southeast corner. East of the warehouses is an oblong park with a number of trees atop a knoll.
Frontlines[]
German Base[]
The German telegraphs are in the vicinity of the Conquest location of Navarin Trench, amongst the devastated structures of the map's western edge. Objective A is inside one of the few intact buildings in the area - on the ground floor of a three-storey house, with its front facing onto the northernmost horizontal road. Objective B is in the shell of a house of the middle south road.
[]
The Frontlines location of Navarin trench is directly west of Tahure Plaza. It consists of a trench line that runs through the debris of a line of flattened buildings. The area is somewhat enclosed by the neighboring line of intact buildings, which form the area into a slightly curved clearing, interspersed with half-standing walls and other assorted structural remains. There are six entry points into the clearing; two lead to the plaza, one to the south alley maze, and three link to the outer ring of main roads.
Tahure Plaza[]
Located in the center of town, in the same location as its Conquest counterpart of Tahure Square, but with a slightly enlarged capture zone that extends to the corners of the square, and includes the ground floor of the shops that look onto the objective from the west and south.
Tooth Brush Trench[]
Tooth Brush Trench is alongside the diagonal road between Schmidt Trench and Warehouses, in the southeast end of the map. It features similar destroyed architecture to Navarin Trench, as it is the intersection of a trench line and a collapsed block of buildings. However, the capture area is much smaller and considerably more open, being adjacent to the main road, although its position at a corner can block line of sight between the northern approach to the objective, which is made through one of two parallel alleyways.
French Base[]
The French telegraphs are in the Warehouse district to the east, with each one being inside a building in the two adjacent walled compounds. Objective A is in the north compound, in the three-storey corner house on the northeast side of the compound. Objective B is in the southern one, in the single-storey longhouse.
Shock Operations[]
In Shock Operations, the Germans launch a nighttime attack on a French town lost to war. Although relatively short with only three sectors to overcome, the Germans are expected to pay heavily for each objective set, with fighting generally anticipated to be at close range.
If the Germans should lose their first battalion, they are reinforced with elite kits in the second wave, which include a Sentry, Sentry SMG, Flame Trooper and Trench Raider.
Sector 1[]
In the initial phase, the Germans attack eastwards out of their Conquest spawn in the historic western ward to break through the singular objective of Navarin Trench. The capture zone is in its Conquest location, centered on the southern road, but is expanded greatly to the north and west.
This first battle sees the attackers advanced over highly exposed ground against a concentrated and well-covered enemy position that has both street-level trenches and elevated firing points in the gutted houses nearby. Although the advance is narrow, trapped between impassible buildings to the north and the valley lip to the south, flanking routes around these sides is possible due to map boundaries that also allow the Germans to attack from behind. Once inside the capture zone, it will be up to the weight of numbers to turn the tide. The French may have difficulty themselves if the flag turns neutral, as they have a similarly exposed path back from their sector spawn, across the road in the alleyways to the east.
The Germans have a single tank to assist them in this phase, which can prove vital in forcing the defenders from their entrenched positions. The French receive no such vehicular support, but have several heavy machine gun positions, set up in doorways and on the second floors of the ruined buildings, which can be used to deplete enemy infantry.
Sector 2[]
The second phase of the battle takes place around the map center, and is now focused on a pair of objectives known as Delaunay Trench and Schmidt Trench. Both objectives are quite far apart from one another, each lying at opposite ends of the map. This means that battles can rage in the alleyways surrounding the objectives as parties of either team, moving from one objective to the other, run into each other - Tahure Plaza, as the area between both objectives, is primary ground for such an ambush.
Delaunay Trench is found on the north side. Both the intact buildings and the trench dugout behind them provide decent cover in the capture zone. The second storey of these buildings can be used to survey the street-level approaches and lower ground capture area, however the capture zone only allows the flag to be influenced from the first floor. Defenders spawning on the flag can be placed at the end of the blocked-off street to the north, meaning a counterattack can come that direction.
The southern objective of Schmidt Trench is far more open than Delaunay, and is itself looked over by elevated positions atop staircases, and in destroyed structures, to the north. The circuit of trenches is the primary cover, with the capture zone also extending behind the Tram station along the southern edge of the area. Control of the alleyways above Schmidt to the north can possibly ensure the security of the objective, as it is the primary infantry route for attackers.
At this point, each side has a single tank for support, but their utility is severely limited by the terrain as both objectives have only a single main road leading into them (although the FT-17 Light Tank is small enough to go through most alleyways). This makes tank movements relatively easy to predict, with the cramped main roads able to be comprehensively mined, and drivers are left with few escape options in an ambush. Tanks also have to contend with an FK 96 field gun at either capture point, both of which are tucked around corners and orientated towards the main road. Depending on who controls the objectives, the guns can prove a threat to either side as they can be refaced towards either approach.
Sector 3[]
The final phase of attack is launched against the Fontaine district on the east side of town, and is made against the parallel objectives of Warehouses and Howitzers. Unlike in the last phase, the two objectives are very close to one another, although they are quite distinctly separated from one another by a row of buildings, a change in elevation, and high perimeter walls.
Warehouses is on the north side. The open courtyard is surrounded by multi-storey buildings which can be used as cover, although once again only the ground floor counts towards control of the capture point, and with the large building in the northeast corner being completely excluded from the capture radius. Inside the courtyard, players can hide in the corners between buildings and the perimeter wall, or inside the warehouse on the east side.
Howitzers lies to the direct south. The capture zone is a lot smaller than Warehouses, and is set inside a compound that houses a lone, single-storey building and a battery of heavy howitzers. With such a small capture zone to fight over, seizing this objective can be tricky as it is comparatively easier to reach for the defending team, who are by this point pushed back into their Conquest spawn location and must traverse an open town common between it and the objective set. Attackers are allowed into this area too, and may block the French from counterattacking by locking down the area.
Each team retains their tank support, with the defenders being further bolstered with two Trench Raider kits.
If the sector falls, the German Empire is declared the victor of the Operation. Their attack wins them shelter from the winter, whilst the French are forced to leave, taking solace only in their inevitable return.
Rush[]
In Rush, the Germans are tasked with attacking the town of Tahure, entering the urban center through the levelled western fortifications, while the French defenders must protect their line of telegraphs while barring the enemy from advancing.
Sector 1[]
The first sector is around the Conquest location of Navarin Trench. Objective B is near a burning tank in the middle group of destroyed buildings. Objective A is in the same position as a German telegraph in Frontlines - inside a three-storey building on the northernmost of the four horizontal roads out of the area.
The Germans have a Flame Trooper with them in the initial assault.
Sector 2[]
The battlelines are pushed back into the confined passages of the central block, with the next set of telegraphs inside this urban labyrinth. Objective A is on the landing between a twin set of stairs in a vertical alleyway connecting the Frontlines location of Navarin Trench to the horizontal sidestreet leading to Florian's Café. Objective B is in a parallel alley to the south, at the foot of set of stairs leading down to Schmidt Trench.
Sector 3[]
The next set is a short distance east of Florian's Café, itself directly south of the central Tahure Plaza. A is on the same level as the Cafe, at the end of a short alley. B is on the lower ground, tucked into a side passage. Both objectives are parallel with each other, separated only by a single line of horizontal, impassible buildings.
Sector 4[]
The final phase sees the attackers exit out the other side of the central block, assaulting the open area of the eastern Warehouses. Each objective is in buildings in separate walled courtyards - A is inside a tall building on the west side of the north courtyard, and B is in a bungalow at the northwest corner of the south courtyard.
Domination[]
Domination takes place around the center of town, with each of the three objectives lying in the streets and alleyways directly adjacent to Tahure Plaza. Flanking routes around the periphery such as by Delaunay and Schmidt Trench are accessible.
[]
Located straight west of the plaza, where the trench lines cut through a narrow street of completely levelled houses.
Park[]
Past a gate on the east side of the plaza is a square courtyard with a raised, circular park in the middle, with stairs descending around the outside. Inside the park is a large tree and several benches.
Florian's Café[]
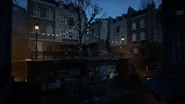
Down a flight of steps to the south of the plaza, Florian's Café is set upon raised foundations that overlooks the alleyways below - both of these areas are within the capture zone. The Cafe exterior has a tree decorated with fairy lights.
Team Deathmatch[]
Team Deathmatch uses similar boundaries to Domination, but now with the northern exits of the Plaza and Delaunay Trench itself cut off from the play area.
War Pigeons[]
War Pigeons takes place in the same area as Team Deathmatch.
Gallery[]
| ||||||||||||||||||||
Trivia[]
- Tahure is counted among the French villages considered lost to war.
- During CTE testing, some buildings were found to have easily accessible roofs.
- The internal name for this map in Community Test Environment is MP_Shoveltown.
- The soldiers' breathing on this map can be seen condensing, including the player's own, which can also be seen in first person. This can also be seen on Nivelle Nights, and on snow maps in the In the Name of the Tsar DLC.
- Vinyl records and a gramophone can be found scattered on set locations around the map, and bringing a vinyl record to a gramophone will cause it to play the Battlefield theme.[3]
- The vinyl record is marked with Champ de Bataille and Les dé, which translate to "Battlefield" and "Dice" respectively.
- If a player were to go west of Navarin Trench and into the interior of one of the buildings. If they listen closely near the door, they can hear the sound of a woman and baby crying.


