Provence is a map in Battlefield V introduced in September 3rd, 2019 within the fourth chapter of Tides of War, Defying the Odds. This map was then later expanded with the Summer Update.
The map is located in the southern French region of Provence, originally part of the German client state of Vichy France following the Fall of France in 1940, but formally occupied by the Germans in November 1942 in response to the Allied landings in North Africa during Operation Torch. Provence was the site of the Franco-American amphibious landings of Operation Dragoon in August 1944 that, in coordination with the landings in Normandy, liberated France from German occupation.[1]
Overview[]

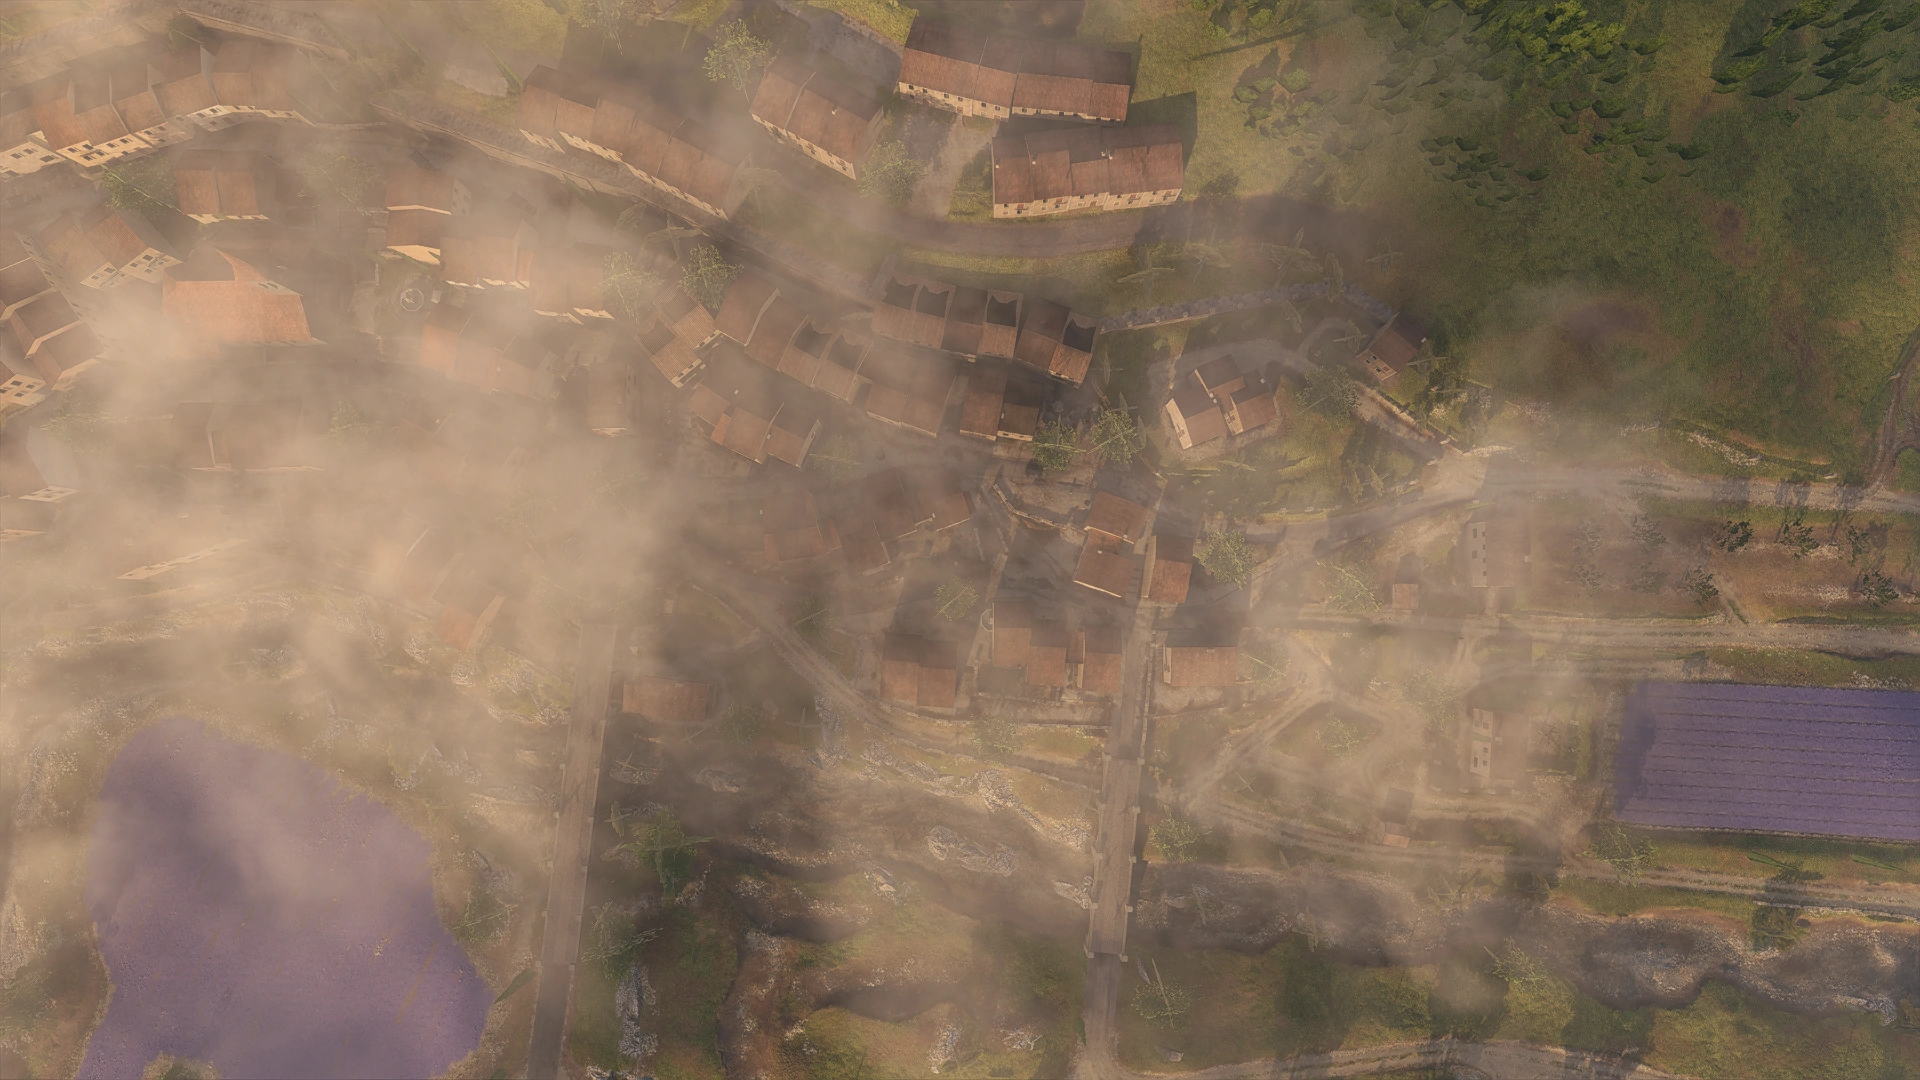
In the dawn light of low autumn sun, the population of the Provence, currently under the iron grip of occupation, wake to find the hour of their liberation is close at hand. Amidst sublime surroundings of rolling hills dotted with cypress trees and vibrant floral blooms, a French town becomes the site of pitched battle as US troops make their long awaited landfall in Fortress Europe.
In terms of layout and visuals, Provence is reminiscent of Arras with a large rural zone surrounding a more urban area, with a river running through the map center cleanly dividing the map into two halves. On one side of the river is the generically named West Fields, consisting of dusty country lanes running between farming fields, hills, and patchy woodlands, connecting up several farming outposts and otherwise isolated homesteads. The bright yellow canola fields of Arras are swapped out for deep purple meadows of lavender, and altogether the terrain is simultaneously more rugged and with greater infrastructure than its French counterpart. Regardless, sightlines are generally fairly open, giving space for tanks duel one another over large distances, and light vehicles to conduct daring flanks.
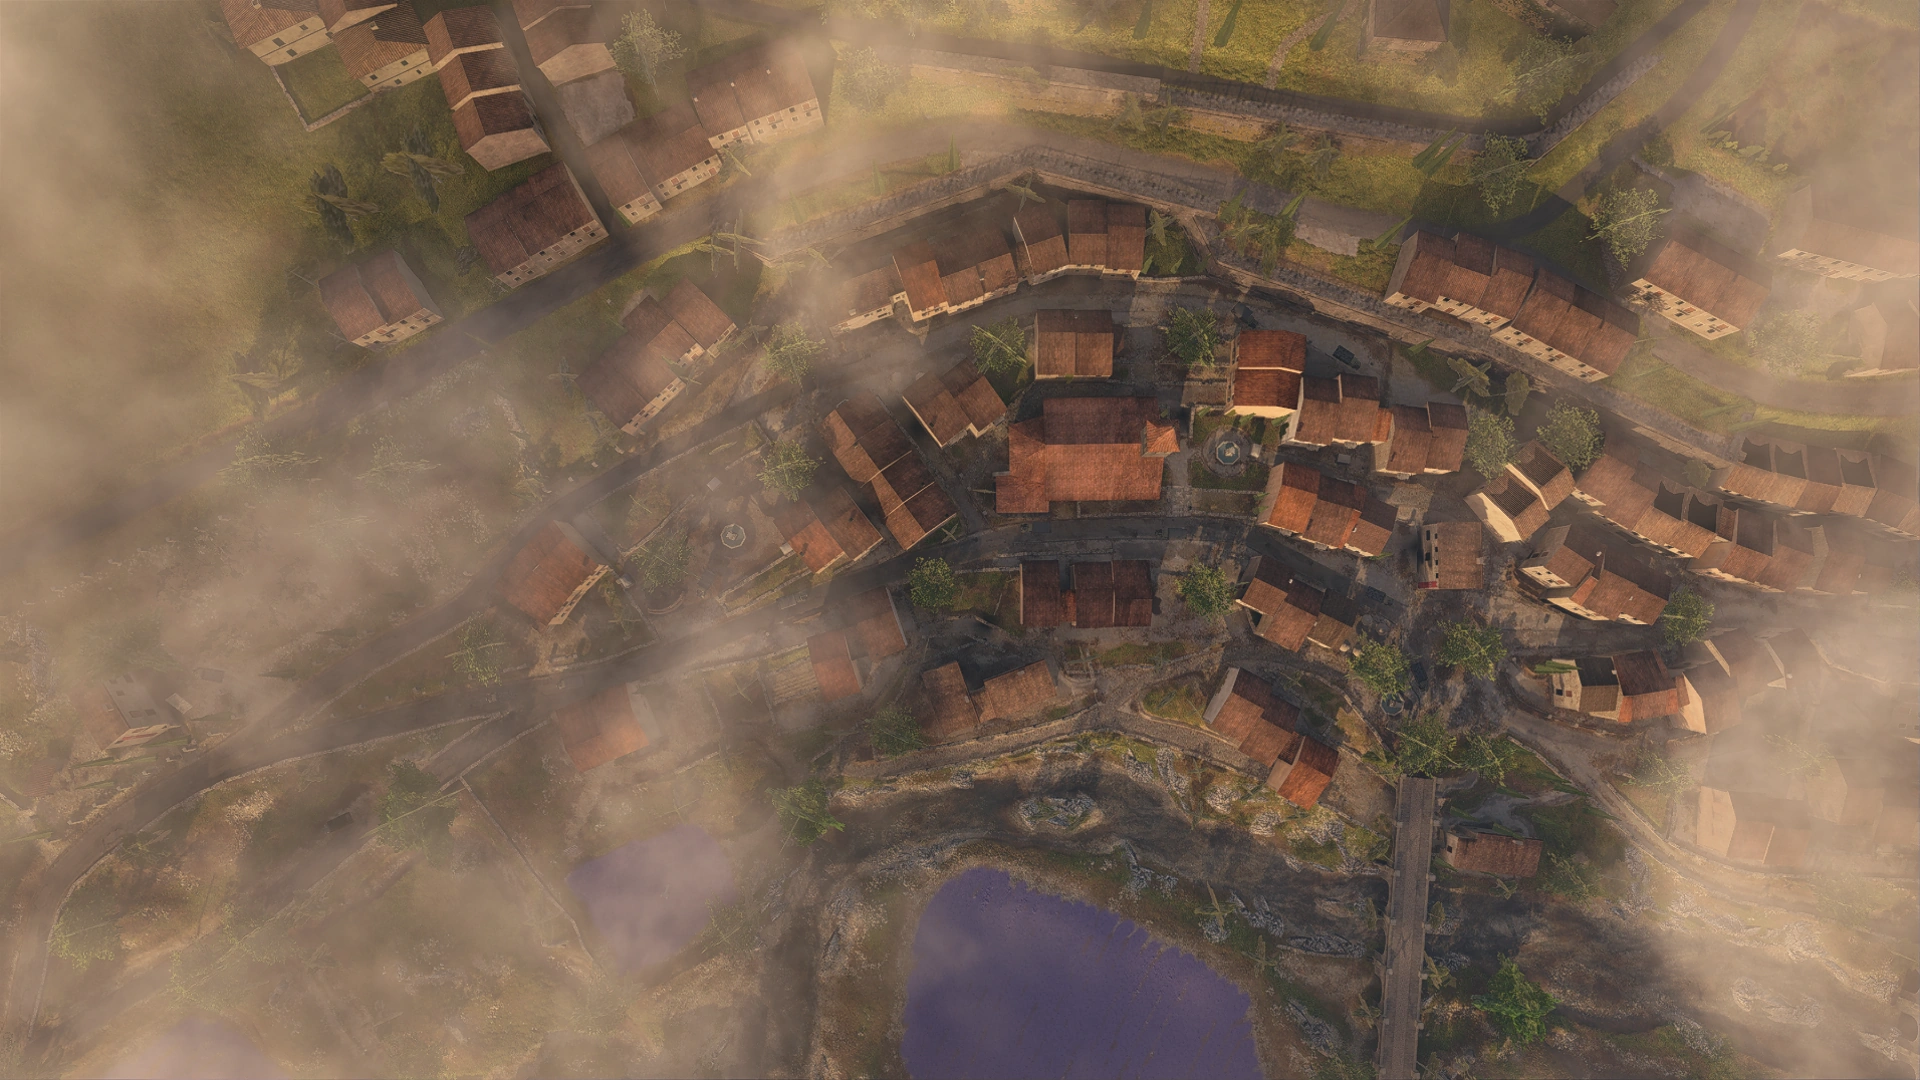
On the opposite riverbank, and covering most of the eastern side of the map, lies a modestly-sized town. The town is aesthetically uniform if disorganized in layout - terraces of beige stone and terracotta tiles, their facades strewn with marquees, are pressed together along the winding cobblestone streets which are towered over to the east by a grand inaccessible château. The map takes place by a riverbank on the town's western outskirts, within a district consisting of a charming amalgam of houses, cafés and shops, linked together by a network of cramped alleyways and stepped back passages that form a highly uneven topography. They are themselves intersected by more open areas such as courtyards and fenced-off bylanes, with places of interest being the church on the central Rue Renan, the roundabout and adjacent plaza of the Town Center, and the two arched bridges leading across the river out into the expanse of the countryside. However, amidst their quaintness, the German tyranny has left its unmistakable mark on these historic streets. Security checkpoints cover all routes in and out of the town, the roads clogged with military trucks and makeshift barricades, and an anti-aircraft artillery battery has taken over what was the town marketplace. Yet for every German banner draped over an important building, elsewhere there is a French tricolor flying in defiance from the rows of balconies.
Within the town, long distance engagements are only likely to occur along the Rue Principale, or the lowlands by the riverbank on the western map edge - both paths span the entire length of the map spawn-to-spawn, although the former varies somewhat in terms of width and direction. The majority of buildings within the map are inaccessible, signified by barred doors, however caution should still be paid to the surrounding structures - the few that are accessible pose a significant threat in the form of upstairs windows and balconies, and offer yet more options for routing while staying off the streets. These buildings can in turn be reduced to rubble with destruction.
The combination of unobstructed farmland about the periphery, and the semi-urban environment that predominately lends itself to close-quarters infantry combat, Provence offers varied combined arms combat encounters amongst its labyrinthine alleyways, splendid old manor houses and hedge-lined countryside.
Flag Layout[]
| Control Point | Conquest | Breakthrough | Squad Conquest | Domination |
|---|---|---|---|---|
| US Deployment | ||||
| Church Courtyard (Church) | A | 4A | A | C |
| Crossroads | B | 4B | ||
| Bridge | C | |||
| Windmill | D | 2A | ||
| Overlook Farm (Hill Farm) | E | 1A | ||
| Watermill | 3A | |||
| Checkpoint | 3B | |||
| Anti-Air Plaza | C | |||
| Riverside Manor | B | |||
| Town Center | B | |||
| Cafe | A | |||
| German Deployment | ||||
Conquest[]
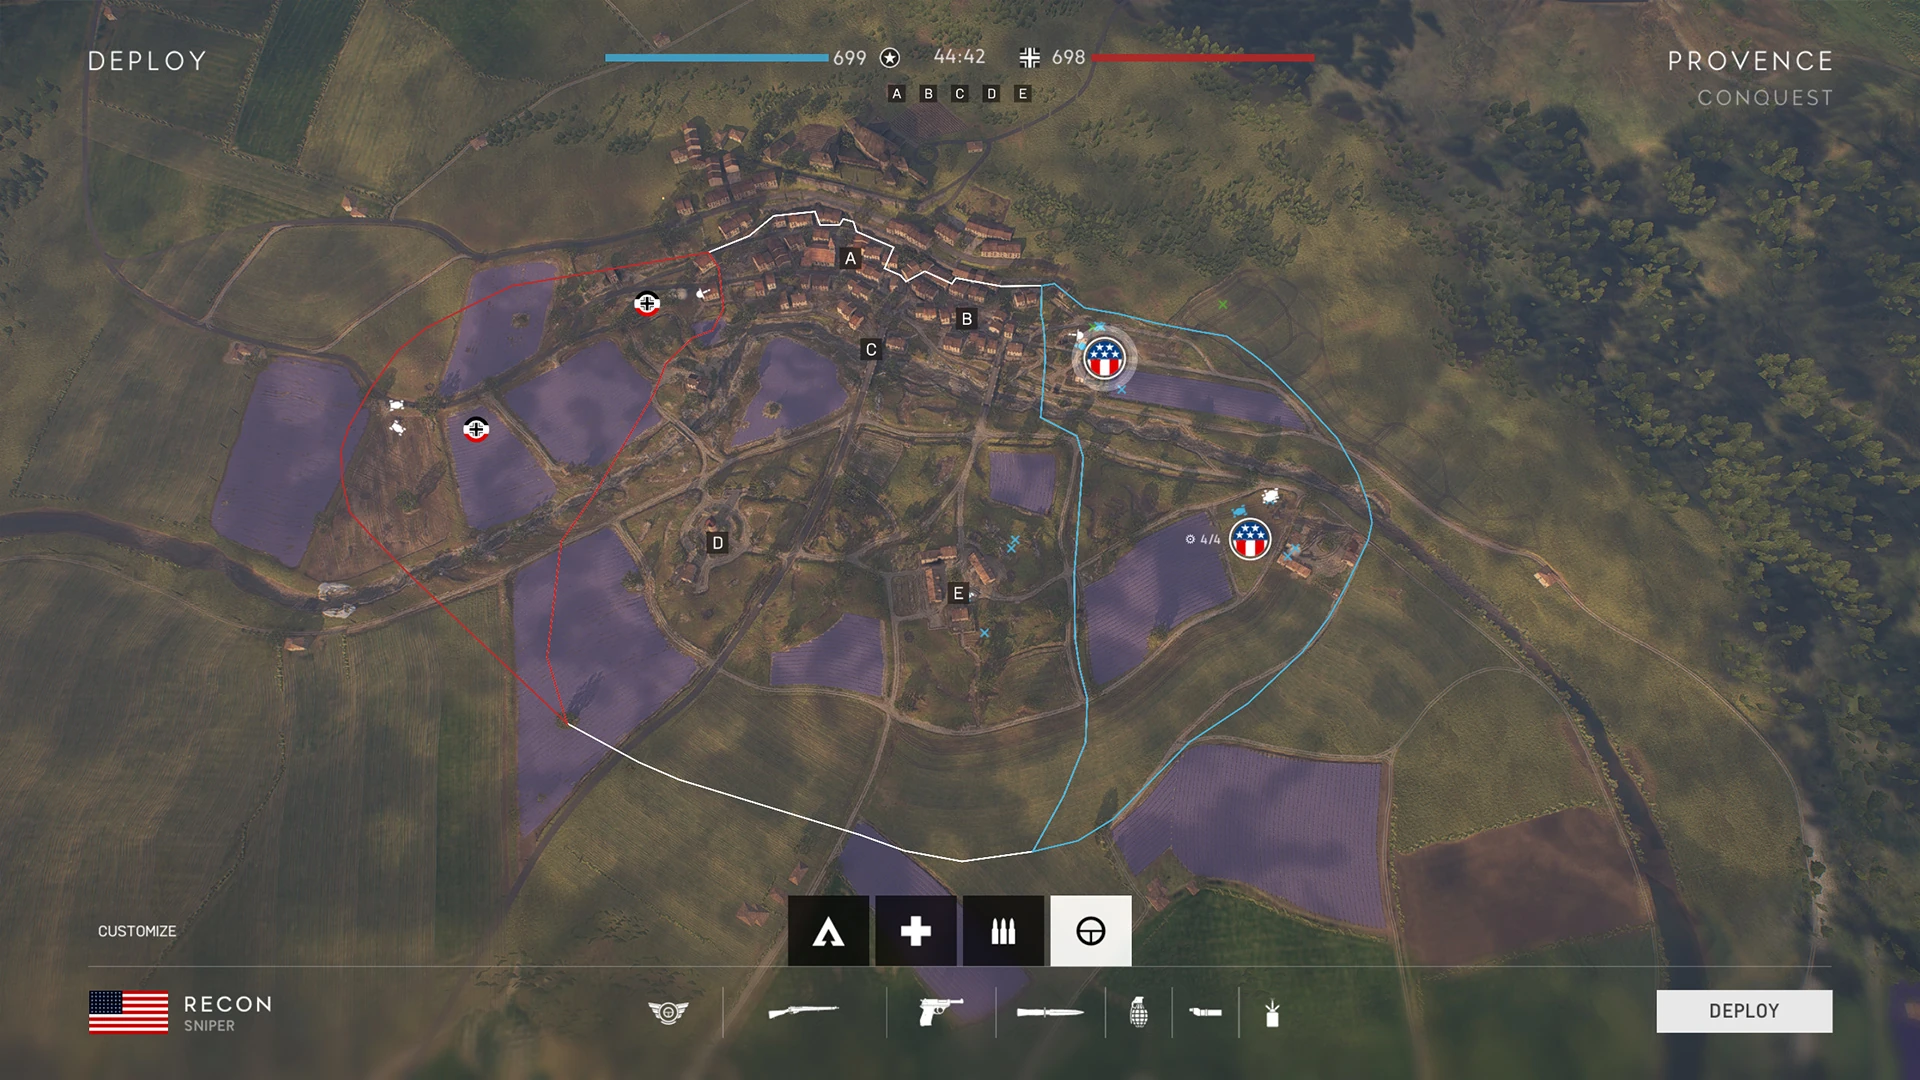
Conquest on Provence features a five flag layout, with the first three flags located inside the town within the eastern map half, and the two others at opposite ends of the West Fields. The three urban objectives are located quite close to one another, but are separated from direct line of sight by buildings and twisting streets - engagements in this area usually occur at short range, although the height advantages provided by multistorey buildings can allow players to cover the more open areas around the flags. In contrast, the rurally located objectives are set within generally unobstructed farmland, and offer long range battles between infantry and vehicles.
Each side starts with 700 tickets. The map features a large number of tanks, as well as supporting call-in vehicles, but no aircraft.
Equipment[]
| Light vehicle(s) |
3 GPW |
| Tank(s) | |
| Emplacement(s) |
1 M2 HMG |
| Light vehicle(s) | |
| Tank(s) |
4 SdKfz 234 Puma/Panzer IV/Flakpanzer IV/Tiger I/Sturmgeschütz IV |
| Emplacement(s) | |
Deployments[]
Each team has two deployment points. The main spawns for vehicles are located west of the river near the map's lateral edges, whereas their infantry-only secondary spawn is more towards the map centre at either end of the town near the eastern map boundary.
US Deployment[]
The US deployment is in the southern region of the map. The team's primary spawn point is located within a farmstead comprised of several buildings within a flattened compound where a number of olive green cargo trucks are parked. The deployment point is directly south of Overlook farm, with a hilly lavender field and a thicket of trees that dot low ground leading up to the overlook providing some cover for players leaving the spawn protected area. Of the three country roads out of the spawn, two can be used to bypass the Farm objective via the West Fields or by fording the river, respectively. A Vehicle Resupply Station is located ahead of the trucks at the edge of the lavender field. A drivable, neutrally-allocated Tractor can also be found within the compound.
The secondary spawn point is within the Village sector just south of the Crossroads flag. Around the town outskirts is a park area which makes up much of the approach to Crossroads - cover is sparse in the area save for the dry stone walls on either side of the road. An M2 HMG is set up outside a two storey building to deter enemy intrusions into the out-of-bounds area. The entire area is overlooked to the east by a gated-off hill house that is accessible to both teams, but is more easily reached by using the driveway on the US side of the hill. This position can help the US fight back against pressure on their spawn.
")
")
")
German Deployment[]
The main deployment for the German team is at the north end of the West Fields. The ground between the spawn and the nearest objective of Windmill is considerably flatter and more exposed than the terrain around Hill Farm, meaning enemy players at Windmill can see directly into the Germans' deployment area across the lavender fields. In the event of attacks on their spawn, the Germans can cut around the west and eastern edges of the field to avoid the bulk of resistance, presumably centred around the Windmill capture point. The teams light vehicles (including a Tractor), as well as a Vehicle Repair Station, are located far to the east of the deployment's tank spawn on the roadway leading to town.
The German deployment within the town is around the Checkpoint north of the Church. As with the US deployment the area is largely open, with the team funnelled down three routes down from the Northern Edge Of Town. Enemy players can advance as far as the north side of the Anti-Air Plaza, and so can block entry by defending the roads. The central roadway can be helped kept clear by using a Stationary MG34 orientated southwards at the corner of a riverside building.
")
")
Flags[]
A: Church Courtyard[]
The Church objective is on the north side of town, with the Anti-Air Plaza/Plaza Sector to the north and the Town Center to the south along the adjacent Rue Principale. The objective radius covers the interior of the large, grey stone church as well as the Church Courtyard outside its main entrance and a small area on either side of the length of the structure. The Courtyard, other than a small fountain in its centre and the two Resupply Stations in its southeast corner, is mostly lacking in cover, however the open stepped plaza provides space for the flag to be captured by vehicles.
With limited cover outside, on-foot defenders are expected to shelter inside the Church building, which consists of a main room lined with pews and a smaller narthex near the alter which houses the rear entrance. On the east side, the raised terrain sloping down from the Eastern Plaza Sector means players can also enter the building through the stained glass windows. The belltower is also accessible via a ladder, with the flag capable of being captured from both the roof and street level. To prevent this, players can destroy the belltower and parts of the roof with explosives.
")
B: Crossroads[]
The Crossroads objective is towards the southern end of the town, between the two bridges, within the heavily built-up Cafe and Shops Sectors. The flag is the smallest and most enclosed of any of the capture points, revolving around an oblique fork in the road. The tight, awkwardly angled roads and can make it difficult for armored vehicles to manoeuvre. On foot, line of sight within the capture zone is obfuscated because of the many of the buildings, particularly on the east side of the area, are on different tiers of raised foundations, and are surrounded by waist-high stone walls. Buildings surround the central flag area on all sides, although only one, standing on the east side with a bright red sign, is enterable. Between most of the buildings, quarters become even closer as tight alleyways and archways provide flanking routes along the length of the capture zone. A similar, considerably more open route exists by the riverfront.
Ammo and Health can be retrieved from caches on the north and south ends of the capture area, respectively.
")
")
")
")
C: Bridge[]
The Bridge objective is located about the Town Center, and is the northernmost of the two viaduct-style bridges crossing over the River plain into town. The Bridge itself is suspended some 15m above the shallow waters, with three supporting archways running beneath that can act as cover spots for infantry. The expansive capture zone covers both the upper and lower portion of the bridge, as well as a section of the Town Center roundabout off its eastern end. Also included within the capture zone is a large house, built right on the riverbank. The house is below street level and is partially hidden from the east due to the abutment, although its second storey windows provide good fields of fire over the Bridge deck, the adjacent roundabout and the River itself.
The high variance in verticality around this objective, most notably the division between the raised terrain uphill from either bank and the low ground of the River valley, combined with the number of places players can conceal themselves within the spacious capture zone, can make rooting out defenders troublesome. Beyond the flag, which intersects the main routes from the two other town objectives, the wide open sparsely covered Town Centre Sector can act as a sort of stalemate prone no-mans-land between Church and Crossroads which can be hazardous for infantry to pass through. Buildings to the east of the roundabout, positioned on high ground, can be useful for controlling this vital route.
Around this objective, an Ammo Station can be found underneath the Bridge itself, tucked into the easternmost archway, while Health can be retrieved from a Station directly south of the roundabout. An anti-tank gun can be set up on the eastern side of the roundabout to watch over the Bridge approach.
")
")
")
")
")
D: Windmill[]
The closest objective to the German spawn, the Windmill sports the largest capture zone out of the five flags. It consists primarily of a lone Windmill situated on a neat, gentle hill with a circular road and adjacent cobblestone pathway looping around its base. On the west side of the capture zone is a single two-storey house with a short driveway out the front and a raised patio at the back. A handful of trees lie at the periphery.
The lack of visual clutter around this objective and the West Fields in general make it ideal for tank engagements, with the flag supporting a Vehicle Resupply Station positioned next to the two-storey house. Consequently, infantry can find it difficult both approaching and capturing this objective because of a lack of solid cover. Although ditches and boulders at the edges of the larger field the flag is situated in can suffice, infantry players will invariably gravitate towards the two structures. The Windmill itself is enterable with four floors, providing a useful if conspicuous vantage point as long as it remains standing.
In addition to the Vehicle Repair Station, a Health Station is located around the back of the house. Depending on the team, either a GPW or Kubelwagen spawns here upon capture. Using the Advanced Toolbox, an anti-tank gun can be constructed a short distance away from the capture zone, by some boulders on the southwestern hill crest, enabling players to screen the east flank against enemy armored vehicles.
")
")
")
")
E: Overlook Farm[]
Overlook Farm, variable described as Hill Farm, Hill and Farm depending on the gamemode and map marker, is positioned within the southern half of the West Fields. As the name suggests, the site consists of a farmstead built on a bowl-shaped hill. The four buildings that surround the inner compound area, holding the flag itself, offer the majority of cover within the large capture zone. They consist of two barns, one medium sized house and one manor-type house with two storeys and an accessible basement. A patch of heavily wooded rough ground blocks line of sight between this flag and Windmill.
In comparison to Windmill, this objective provides more opportunities for infantry to infiltrate and provide themselves with cover, however the open area in the middle of the objective, as well as the neighboring fields, are just as inviting for armor. To this end, a Vehicle Resupply Station can be found on the northwest side of the hill.
A light transport and a Tractor can also be found nearby. The flag's Ammo and Health resupply points are located within the southern and northern barns, respectively. An AT gun can be built near the road north of the Vehicle Repair Station.
")
")
")
")
")
Breakthrough[]
In Breakthrough, the US launch a dawn attack on German positions in the Provence sector. Their four phase attack seeks to neutralize individual strongpoints west of the river, thus encircling the town before closing the pocket entirely. The team starts with 400 respawn tickets.
Sector 1[]
The first attack is made against the German frontline around Hill Farm, with the Americans launching their offensive from the farmhouse at the southern base of the hill. In this sector, the attackers have to overcome significant strategic, terrain and material advantages held by the defenders. On a basic level, the singular objective allows the Germans to concentrate their defense along a singular line, rather than having to hold two points simultaneously. Concerning the objective itself, the elevated position of the hill and the buildings therein provide the Germans with more than adequate cover, whereas most of the US's approach lines, such as through lavender fields or the roadways on the flanks, are generally devoid of cover. Although the expansive capture zone has many opportunities for attackers to infiltrate and seek cover, the open nature of the central compound can potentially make clearing separate buildings difficult, even once the capture zone has been reached. Furthermore, the already formidable redoubt is heavily reinforced with no less than five Pak 40 guns, five Stationary MG34s, and limited to three non respawnable tanks, opposing the four respawning tanks, four GPWs and a single mighty tractor afforded to the US.
Sector 2[]
The second sector is made up of another singular objective, the Windmill. Here, there are fewer prebuilt defenses for the Germans to occupy, yet the Americans face similar problems as before, as they must attack through unfavorable terrain with limited vehicle support. Within the capture zone, the lack of adequate cover is a deficiency for both sides - the Windmill offers an attractive refuge, but concentrating large portions of the team within such a small area can be dangerous in the event of artillery or rocket attack. The German vehicle complement in this sector is two additional tanks and one AT gun.
Sector 3[]
The sector three defenses are split between two control points. Objective A, the Watermill, forms the border between the rural West Fields and town outskirts, and consists of a single two-storey manorhouse on the east bank of the River. The building is on a tall, vertical wall foundation that makes it harder to access from the south side. To the immediate west, a stone arched bridge links the east and westbound road networks. The Watermill objective is located very close to the frontline, and features a smaller, more heavily concentrated capture zone that gives the Germans less freedom for defensive positioning. However, the fields that surround the building on all sides, as well as the river itself, are further environmental hurdles for the US to overcome.
Objective B, located up a gentle hill from Watermill to the northeast, is the Checkpoint. It too consists of a single structure, a two-storey villa adorned with German banners. Compared to previous objective, the hill slope, which is lined with stone walls at regular intervals up its length, offers plentiful cover for attackers, while map boundaries allow for flanking opportunities through the northern outskirts of town or the far Northeast Fields, however the latter route is protected by a line of three Pak 40 guns.
The Germans lose all their vehicle support at this stage.
Sector 4[]
In the final sector, the US engage in streetfighting proper as they seek to capture the two points of interest within the city center - the Church and the Crossroads. The Church objective is largely the same as in Conquest, and can be seized from the interior, exterior, or roof of the house of worship. Prebuilt defenses include a Pak 40 and Stationary MG34 orientated down Rue Principale. The Crossroads objective is slightly expanded over its Conquest iteration, now covering the houses on the riverbank and the long enclosed alleyway adjacent to the Shop Sector. Here, three Pak 40s and an HMG can be used to deter attacks from the river bed to the west, while another MG34 is set up on the south side of the zone, with a large field of fire to watch over the Crossroads themselves.
Any surviving US or German vehicles can still make their presence felt by locking down avenues of approach within the restrictive town layout, while at the same time leaving them vulnerable to infantry ambush and making escape difficult. If there are no surviving vehicles, A single tank for either side will constantly respawn until the very end.
If the sector falls to the US, they can consider themselves the victors. The liberation of Provence means there are now two Allied breaches of Fortress Europe, and that the days of the German occupation are numbered.
Squad Conquest[]

Squad Conquest takes place entirely within the north side of town. It includes the eastern Alley and Plaza Sectors, the western Outskirts and River Sectors, and the centrally located Church Sector. The main street of Rue Principale cuts diagonally across the middle of the play area, and serves as the primary and most direct route for travel, as it links to all three flags. The sidestreets to the east and riverbank meadow to the west are notable alternatives.
Deployments[]
US Deployment[]
The Americans deploy from the town's central block on the south end of the map boundary, with an initial spawn by the roadblock at Alley Sector to the southeast of the Church flag. The team is limited in the number of base exits, and are primary funnelled through tight alleyways and streets adjacent to the Western Church Sector, such as Rue Renan which connects directly to the Church Courtyard capture zone on its south side, and are thus vulnerable to spawn trapping. Players may avoid this by doubling back towards the Town Center location, and using the cover of the River Bank Houses to advance along the River itself. Their spawn-protected area also includes the Main Bridge, which can be used as a vantage point to clear the approach of enemies through to Riverside Manor.
An Ammo Cache can be found in the middle of the roundabout in the Town Center area.
")
German Deployment[]
The Germans deploy from the Northern Edge Of Town, at a fork in the main road. Their initial spawn is in an alleyway at the end of Ancienne Rue des Baptemes, directly north of the Anti-Air Plaza. Their spawn is considerably more open than the USA's, with only two buildings standing aside the roadway blocking line of sight into their deployment zone, and easy access to the River route via the gated off gardens and steep embankment of Outskirts, found northwest of the main road.
The team's Ammo station is positioned behind the north building in the Northern Edge Of Town map location.
")
Flags[]
A: Church Courtyard[]
The Church Courtyard is the southernmost flag, found outside the main entrance of the Church building. The small capture zone is mostly devoid of cover, aside from a centrally located fountain and a few metal supply canisters stacked up beside it. Enclosed to the north and south by buildings, player may attempt to press themselves into the corners of these structures or hide in adjacent shrubbery for protection when seizing the objective. Much of the capture zone has no cover along its horizontal axis, as it is bordered by the stepped sidestreets of the Eastern and Western Church Sector, which are considerably more open and allow those in the capture zone to be engaged at medium distance.
The Church building itself is enterable, and serves as both a cover position for defending the flag and as an access route through the Central Sector via its two entrances. Due to elevation of the footpath on the building's east side it is possible to enter into the Church through the windows, or climb on the roof of the vestibule on the church's northwest corner, permitting Rue Principale to be covered from above. However, the roof and belltower is inaccessible due to the lack of a ladder.
In the way of Fortifications, the altar area of the church building can be fortified into a key firing position. Defenders can also build barbed wire at the main entrance of the church from the flag, making it easy for potential occupiers to defend the Church Courtyard objective for their team.
A Health Station is located on the south side of the capture area.
")
")
")
")
")
B: Riverside Manor[]
The Riverside Manor is found on the west side of the central play area. The vine-covered stone manorhouse consists of two structures, divided at ground level by an arched alleyway and connected on the second floor by a corridor overpass, and has reportedly been converted into a barracks for the Axis occupiers. The house contains eleven rooms in total, with staircases in the two main hallways, the largest rooms, on the north and south side of the house. There are also a number of balconies on the second floor. The objective is located on low ground directly opposite the riverbank, with the back street of Rue Principale being level with the building's upper story. This allows those outside the capture zone to shoot down into the surrounding Manor grounds, which consists of a cramped courtyard and set of steps out front, and two levels of walled footpaths running parallel to the river around the back. The upper floor windows of the house can be used to defend against such an attack.
The capture zone is the largest of the three objectives, and encompasses the entire interior of the house as well as a small section outside within its walled perimeter. An Ammo Station is found to the rear of the house next to the archway.
")
")
")
")
")
")
")
C: Anti-Air Plaza[]
The Anti-Air Plaza is located on the northeast side of town, between Rues Baptemes and Principale. It consists of an oblong paved park where a battery of two destroyed Flak 38 guns and a radar director trailer have been emplaced. The park lies adjacent to two walled-off grassy areas adorned with trees and bushes, and is enclosed to the south by townhouses. In a similar vein to the Church flag the capture area, which consists only of the southern part of the Plaza and not the battery itself, is largely devoid of cover except at the building corners. However when compared to the Church and the Manor objective, the Plaza is on the highest accessible point of the map, and so can only be reached from Rue Principale and the western approach via stone staircases, of which there are two.
Sandbag walls can be built around capture zone perimeter to both provide cover to defenders and to block off one of the two staircases leading up from the main road, the one in question passing between the buildings adjacent to the capture area itself. A Health Station is located on the northern side of the point, within the capture radius.
")
")
")
")
")
")
Team Deathmatch[]

Team Deathmatch takes place on the southern half of town, with the play area roughly spanning the space between the north and south Bridges over the river. These structures, named as the Main and Farm Bridges respectively, which be climbed on and passed under are the main point of interest aside from the Town Center, found on the north side of the zone. It consists of a cobblestone roundabout with a surrounding perimeter of sandbags, center of which is a fountain. With five adjoining streets, the Town Center serves as the main link to the outlying sectors. On the east side of it is the Shop Sector, where several tight uphill-running alleyways run parallel to the junction of Ancienne Rue des Baptemes and Back Street, next to the Provence Pharmacy. West of this is the Main Street Sector, found in the middle of the play area with a row of houses between Rue Baptemes and Principale. West still is the Café Sector, bordering the Meadow and analogous to the River Bank Houses of the other town half. Directly south of the Town Center is the River Bank sector that runs between the two Bridges. It consists of a series lightly forested fields and river marshes that forms the most open and lightly covered area of the map, tied with the Farm Sector on the far south side of the map.
The main roads of Principale and Baptemes are still present and serve the same purpose of primary routes across the map body, but are generally more curving and, as with the rest of this particular section of town, uneven in elevation. Notably, there are more enterable buildings here than the Squad Conquest play area.
Domination[]
Domination takes place over the near full length of the map, with only the far north areas of Riverside Manor and Anti-Air Plaza cut off from play. This is seemingly to accommodate the higher player count over Squad Conquest, as is the enlargement of most capture areas. In spite of this, the relative size of the map forces the three objectives to be quite close together, while the linear arrangement of objectives and constrictive lateral boundaries limit flanking opportunities somewhat.
A: Cafe[]
The Cafe objective is found in the southeast corner of the map. The flag is based around a triangular-shaped junction between the Main Street and Eastern Shop Sectors, with the boxy capture zone stretching west over the adjacent roadway. The flag is mostly devoid of cover save for stone walls and parked vehicles. While outside of the capture radius, the windows and balconies of a number of accessible buildings look directly onto the Cafe flag to the east and west, allowing the otherwise relatively sparse area to be covered from above.
B: Town Center[]
The largest objective is Town Center, concentrating on the large circular plaza located fittingly in the center of the map. Located on the low ground, as with Cafe the plaza offers only light directional cover within the capture radius, and is overlooked by several multistory buildings to the east and south that prevent desirable overwatch positions.
C: Church[]
The Church objective is focused on the Church building in the map north. The expansive capture zone includes both the interior of the building as well as the immediate outer perimeter, allowing the base to be captured from the adjacent street and alleyway. The structure itself can be fortified to keep out attackers, through use of barbed wire barricades over the main entrance and sandbag fortifications near the altar.
Gallery[]
")
")
")
")
")
")
")
")
")
")
")
")
")
")
")
")
")
")
")
")
")
")
")
")
")
")
")
")
| ||||||||||||||||||||||||||
Trivia[]
- The map's internal name is MP_Provence.
- This map was originally designed for the cut 5v5 competitive gamemode.[2][3]
- Provence was scheduled for release on August 27th, 2019 along with Lofoten Islands, but the 4.4 patch was delayed leading to its release on September 3rd, 2019.
- The Summer Update on June 4th, 2020 featured a new version of Provence, significantly expanding and reworking the map to support 64 players and replacing the original United Kingdom Allied faction with the USA. The new map takes place at early morning instead of midday, and now takes place "at a later stage in the war" instead of during a 1943 RAF commando raid, as was its original setting.[4]