mNo edit summary Tag: Source edit |
|||
| (31 intermediate revisions by 9 users not shown) | |||
| Line 1: | Line 1: | ||
| + | {{DISPLAYTITLE:Wake Island}} |
||
| − | {{Stub}} |
||
| + | {{classification|standard}} |
||
| − | {{Construction}} |
||
| + | {{Weapon Nav|bf1942=1|bfvwwii=1|bf2=1|bf2142=1|bfh=1|bf1943=1|bfo=1|bf3=1|bf5=1}} |
||
| − | {{RA}} |
||
| − | {{See|''For other versions of the map, see [[Wake Island (Disambiguation)]]''}} |
||
| − | |||
{{Infobox/map |
{{Infobox/map |
||
| − | |name = Wake Island |
+ | |name = Wake Island |
| − | |image = [[File:Battlefield V Wake Island Article Header.jpg|300px]] |
+ | |image = [[File:Battlefield V Wake Island Article Header.jpg|300px]] |
| − | |game = [[File:Battlefield V Icon.png|25px]] [[Battlefield V]] |
+ | |game = [[File:Battlefield V Icon.png|25px]] [[Battlefield V]] |
| − | |modes = [[Breakthrough]]<br />[[Conquest Assault]]<br />[[Squad Conquest]]<br />[[Team Deathmatch]] |
+ | |modes = [[Breakthrough]]<br />[[Conquest Assault]]<br />[[Squad Conquest]]<br />[[Team Deathmatch]]<br />[[Rush]] |
| − | |war = [[World War II]] |
+ | |war = [[World War II]] |
| − | |teams = [[File:U.S. flag, 48 stars.svg|20px]] [[United States#Battlefield V|USA]] vs. [[File:Japan Flag.png|20px]] [[Imperial Japanese Army#Battlefield V|Japan]] |
+ | |teams = [[File:U.S. flag, 48 stars.svg|20px]] [[United States#Battlefield V|USA]] vs. [[File:Japan Flag.png|20px]] [[Imperial Japanese Army#Battlefield V|Japan]] |
| + | |date = |
||
| − | |place = Wake Island, Micronesia, Pacific Ocean |
||
| + | |place = {{w|Wake Island}} |
||
| − | |battle = |
+ | |battle = |
| + | |music = |
||
| + | |tickets = 500 <small>(Breakthrough)</small><br />700 - 500 <small>(Conquest Assault)</small><br />150 <small>(Squad Conquest)</small><br />75 <small>(Rush)</small> |
||
| + | |terrain = Coastal, Island |
||
| + | |combat = Amphibious, Combined Arms |
||
| + | |weather = Partial Clouds |
||
| + | |singleplayer = |
||
}} |
}} |
||
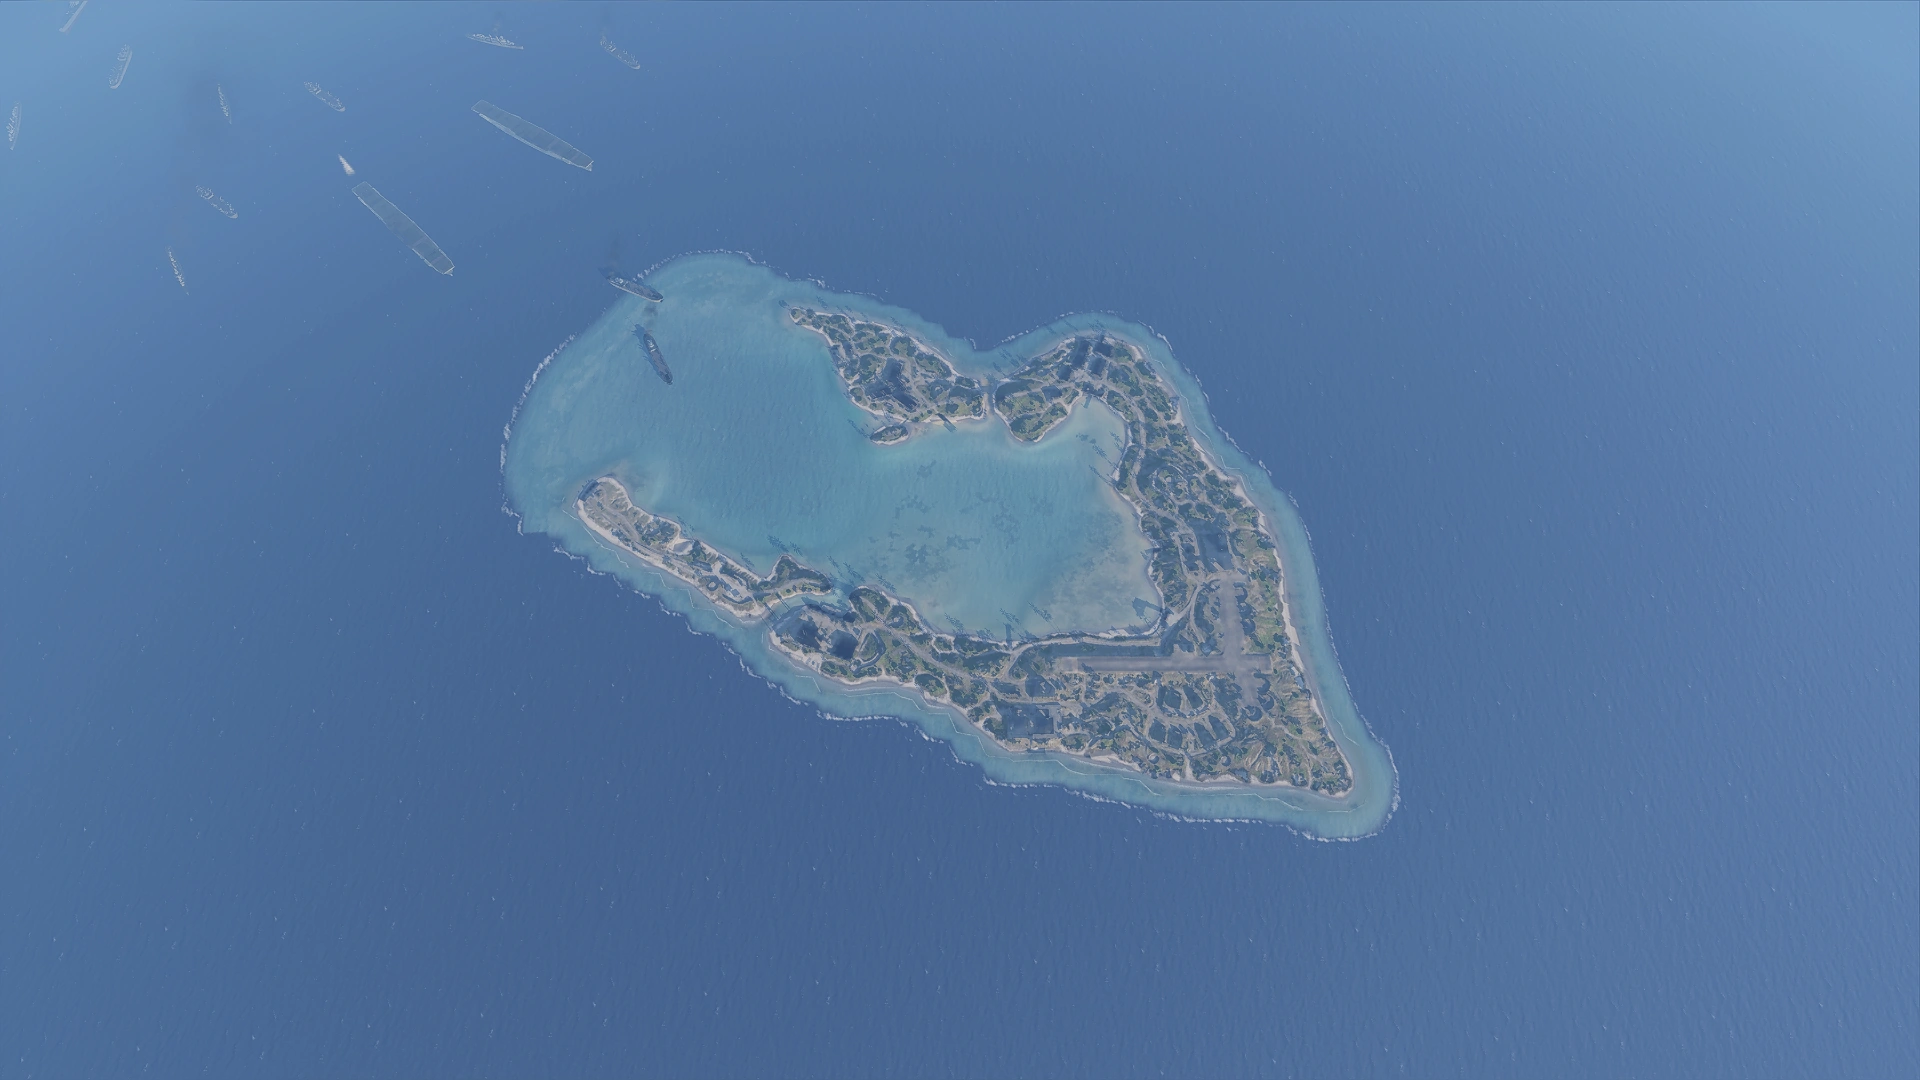
{{Quote|Welcome back to the battlefield that started it all. Welcome back to Wake Island.<br />As Chapter 5: War in the Pacific continues, we’re now deploying our reimagination of what is arguably the most iconic Battlefield map ever. As you fight for control over land, air, and sea on this horseshoe-shaped classic, we hope you’ll enjoy both the nostalgia and the new improvements.|[https://www.ea.com/games/battlefield/news/maps-of-battlefield-v-wake-island Official Blog]}} |
{{Quote|Welcome back to the battlefield that started it all. Welcome back to Wake Island.<br />As Chapter 5: War in the Pacific continues, we’re now deploying our reimagination of what is arguably the most iconic Battlefield map ever. As you fight for control over land, air, and sea on this horseshoe-shaped classic, we hope you’ll enjoy both the nostalgia and the new improvements.|[https://www.ea.com/games/battlefield/news/maps-of-battlefield-v-wake-island Official Blog]}} |
||
| − | '''Wake Island''' is a map of ''[[Battlefield V]]'' that was introduced in the fifth [[Tides of War]] chapter, ''[[Battlefield V: War in the Pacific|War in the Pacific]]''. It was first revealed in [[Battlefield V – War in the Pacific Official Trailer]]. It was released on December |
+ | '''Wake Island''' is a map of ''[[Battlefield V]]'' that was introduced in the fifth [[Tides of War]] chapter, ''[[Battlefield V: War in the Pacific|War in the Pacific]]''. It was first revealed in [[Battlefield V – War in the Pacific Official Trailer]]. It was released on December 12th, 2019.<ref>[https://www.ea.com/games/battlefield/news/maps-of-battlefield-v-wake-island The Maps of Battlefield V: Wake Island]</ref> |
| + | |||
| + | The {{w|Battle of Wake Island}} occurred during the [[Imperial Japanese Navy|Japanese]] expansion into the Pacific after the surprise {{w|Attack on Pearl Harbor}} on December 7th, 1941. After successfully repulsing an attempted landing, the outnumbered [[United States Marine Corps|US Marine]] defenders were overwhelmed and defeated following a fifteen day siege. A reaction force based around the aircraft carrier {{w|USS Saratoga (CV-3)|USS ''Saratoga''}} was forced to abort their attempted relief of the garrison after hearing of the surrender, and the island would remain in Japanese hands until the end of the war in September 1945. |
||
| + | |||
| + | In contrast to previous iterations, this rendition of Wake Island has the [[United States#Battlefield V|US]] as the attackers and the [[Imperial Japanese Army#Battlefield V|Japanese]] as the defenders. |
||
| + | |||
==Overview== |
==Overview== |
||
| + | [[File:Wake Island 01.png|thumb|right|200px]] |
||
| ⚫ | |||
| + | The unusual horseshoe-shape formed by the atoll and its smaller adjoining islets creates a playspace that is highly recognizable, but also very limiting and linear when travelling on land. The island's outstretched "arms" are each over a kilometer in length, about 50m at its thinnest point and less than 200m at its widest, reducing flanking opportunities, while the ability to sabotage bridges and build obstacles can make road access unreliable. However the map's vast oceanic area, which includes shortcut-like waterways around the island tips, encourage sea travel as a means of transport. A rough map boundary is actually visible from above, marked by the cyan waters of the coastal shallows that surround the island, as well as the coral reefs of the inner lagoon. On land, there is a similar variance in terrain - although generally flat, the sunken, eroded beach areas along the coast and more rough, lush terrain further inland form a pleasant contrast to one another. |
||
| + | |||
| + | The many strategic points of interest on the island, foremost being the large airfield at the joint between Wake's two arms and the "downtown" Barracks for the island's modest garrison, were evidently not enough to deter a [[Japan]]ese takeover. Isolated more than a thousand miles from the nearest friendly neighbouring [[Battle of Midway|island]] territory, the half-finished construction projects, an array of abandoned construction machinery, and swathes of trees felled for lumber, all imply a hastily prepared defense, while the [[Imperial Japanese Army#Battlefield V|Japanese]] [[Zero#Battlefield V|Zeros]] lining the runway suggest the efforts were ultimately in vain. However, the [[United States#Battlefield V|US]] counterstroke is at hand, with a massive fleet gathered offshore. The air above is thick with black artillery bursts as swarms of [[Imperial Japanese Army#Battlefield V|Japanese]] fighters circle overhead, strafing and bombing incessantly, attempting themselves to prevent the imminent counterattack, to be launched into dawn's rising sun. |
||
| + | |||
| ⚫ | Although similar in layout and theme to past installments, the map is larger to better match the real life scale of the island. The increased terrain size creates better pacing and more places to take cover such as in foliage or rock formations. [[Fortifications]] allow for the destruction and repair of bridges on the map. They can also be used to stop the advance of the enemy team due to the linear nature of the map.<ref>[https://www.ea.com/games/battlefield/news/wake-island-now-and-then Wake Island Now and Then: Reimagining a Classic]</ref> |
||
===Flag Layout=== |
===Flag Layout=== |
||
| Line 57: | Line 72: | ||
|F ||4A || |
|F ||4A || |
||
|} |
|} |
||
| + | |||
==Conquest Assault== |
==Conquest Assault== |
||
[[File:Battlefield V Wake Island Conquest Layout.jpg|thumb|right|200px]] |
[[File:Battlefield V Wake Island Conquest Layout.jpg|thumb|right|200px]] |
||
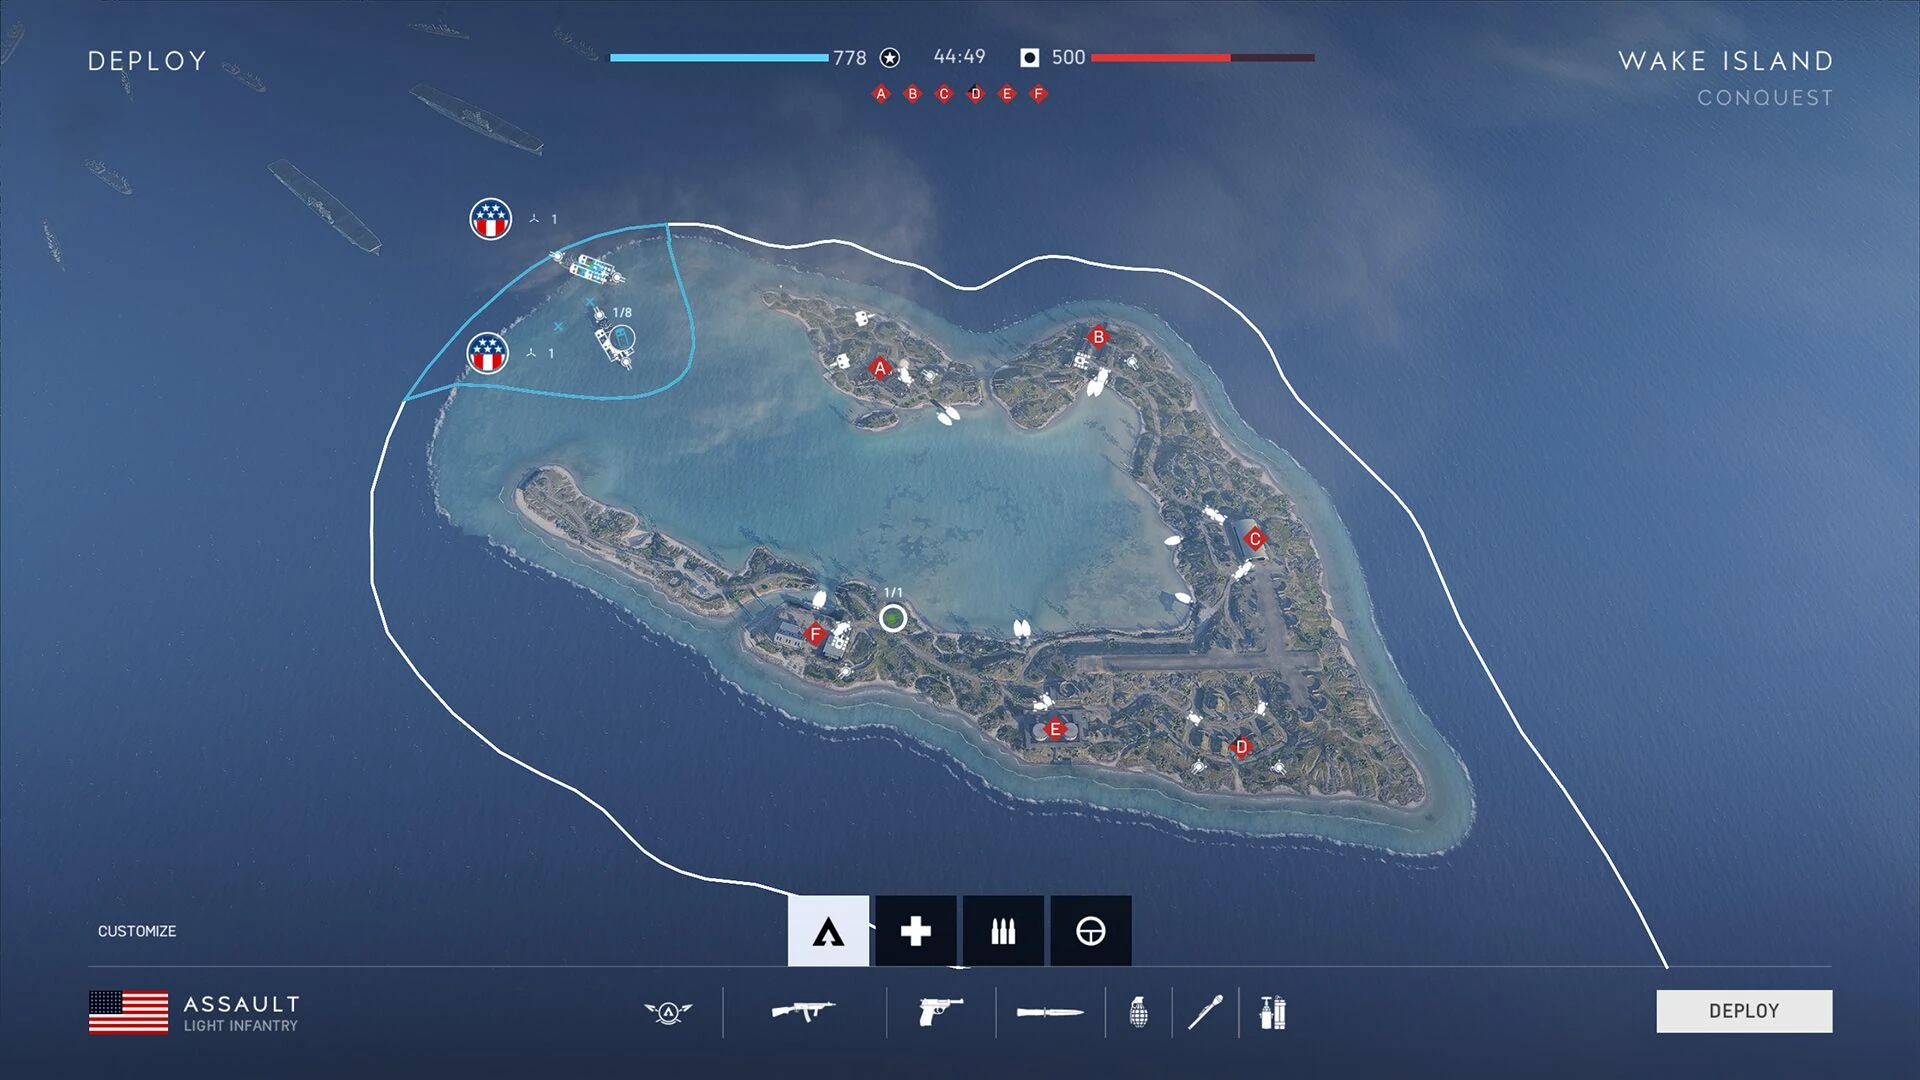
| + | Conquest Assault is fought between six flags, arranged along the main body of Wake Island. Congruous to its appearance in most previous instalments, the round starts with all flags under the control of the defending team, creating rapid ticket bleed for attackers until an objective is neutralized. As a consequence, the defending team start with less tickets and have no permanent deployment point - 700 tickets are allocated for the Americans, while only 500 are allotted for the Japanese. |
||
| + | In spite of terrain that seemingly forces flags to be captured in a linear sequence, the abundance and variety of vehicles opens up many opportunities for avoiding predictable routes of advance. Light vehicles can be used to speedily bypass the frontline, and are capable of transporting a partial squad from one end of the island to the other within a short period. To counter this, Fortifications and the destruction of bridges can hamper overland progress. Meanwhile, the many [[LCVP#Battlefield V|LCVPs]] of the US deployment vessels as well [[Dinghy|Dinghies]] spawned by virtually all flags provide great freedom for crossing the map via the central lagoon, with the passable waterways between the smaller islets granting access to easier opposite coasts. Although many objectives cater directly to infantry, the further myriad of tanks, aircraft and emplaced weapons round out the quintessential combined arms ''Battlefield'' experience befitting of this classic map. |
||
| + | Because of the US team's starting position, [[Squad Reinforcement]] vehicles such as the [[T34 Calliope]] and [[HaChi]] are disabled in this mode. |
||
| − | Similar to previous installments, Conquest Assault is fought under pre-controlled flags, creating ticket bleed for attackers unless an objective is neutralized. Six flags are under control by the Japanese from the start. |
||
| − | |||
| − | |||
| − | 700 tickets are allocated for the Americans, while only 500 are alloted for the Japanese. |
||
===Equipment=== |
===Equipment=== |
||
| + | {{Equipment |
||
| + | |faction = [[File:U.S. flag, 48 stars.svg|x20px]] [[United States#Battlefield V|USA]] |
||
| + | |tank2 = 4 [[LVT#Battlefield V|LVT]] |
||
| + | |plane = 3 [[F4U Corsair#Battlefield V|Corsair F4U]] |
||
| + | |boat = 8 [[LCVP#Battlefield V|LCVP]] |
||
| + | |emplacement = 4 [[40mm Bofors#Battlefield V|40mm AA]] |
||
| + | }} |
||
| + | {{Equipment |
||
| + | |faction = [[File:Japan Flag.png|x20px]] [[Imperial Japanese Army#Battlefield V|Japan]] |
||
| + | |tank2 = 2 [[Chi-Ha#Battlefield V|Type 97]]/[[Ka-Mi]] <small>(Flag Dependent)</small> |
||
| + | |plane = 3 [[Zero#Battlefield V|Zero]] <small>(Flag Dependent)</small> |
||
| + | }} |
||
===Deployments=== |
===Deployments=== |
||
====US Deployment==== |
====US Deployment==== |
||
| − | The American forces deploy |
+ | The [[United States#Battlefield V|American forces]] deploy from two [[Landing Ship, Tank|LSTs]], moored just inside the lagoon off the western tip of Peale Islet, in the northwestern corner of the map. Each [[Landing Ship, Tank|landing ship]] houses two unspecialized [[LVT#Battlefield V|LVT]] tanks and four [[LCVP#Battlefield V|LCVP]] boats for transport to the island, and can be defended using [[40mm Bofors#Battlefield V|40mm AA]] guns at the bow and stern of each ship. The three [[F4U Corsair#Battlefield V|Corsairs]] takeoff from the decks of [[Enterprise|carriers]] further out into the Pacific. |
| + | |||
| + | <gallery> |
||
| ⚫ | |||
| + | Wake Island 08.png |
||
| + | </gallery> |
||
| + | |||
====Japanese Deployment==== |
====Japanese Deployment==== |
||
| + | Lacking a permanent base, the [[Imperial Japanese Army#Battlefield V|Japanese]] can only deploy on captured flags, [[Squad|squad members]], [[Radio Beacon#Battlefield V|spawn beacons]], and transport vehicles active on the battlefield. Their initial heavy vehicle complement of two tanks and three aircraft are spawned on cappable flags, and thus can be used by the opposing team if the bases are captured. [[Pilot]]s should also take care as the three [[Zero#Battlefield V|Zeros]] spawned by the Hangar and Ammo Depot flags must takeoff from an airstrip in the middle of the play area, unlike the boundary-protected US spawn. |
||
| − | The Japanese deploy on captured flags, squad members, spawn beacons, and vehicles active on the battlefield only. |
||
===Flags=== |
===Flags=== |
||
====A: Hotel==== |
====A: Hotel==== |
||
| + | The main point of interest on Peale Islet, the landform making up the end of the atoll's northern arm, is a large three-winged building. The beachfront Hotel was in the midst of construction when war broke out and has since been left unfinished, standing as a steel and concrete skeleton with some wall sections missing. Much of the space inside the building is divided up into empty corridors adjoining to smaller guest rooms, although the lack of installed windows and doors, and wooden walls that are easily [[Destruction|destructible]], can create flanking vulnerabilities. Furthermore, scaffolding and ladders on the exterior of the building, as well as a staircase in the main lobby, allow players to reach the incomplete roof sections of the building and control the interior and surrounding area from above. |
||
| − | This building under construction is located to the north central of the map, and is directly facing the LST boats, which can create early conflicts, as the Japanese can deploy meters within the Hotel before the round starts. The Hotel houses multiple empty corridors with large windows that can create vulnerabilities in flanking, as well as scaffoldings that have ladders and a staircase to reach the second floor itself. |
||
| + | |||
| + | The capture zone for this flag is fairly large, covering the Hotel itself and its outer perimeter, the adjacent roadway to the north, and a section of jetty to the southeast. The immediate area is mostly open, having been flattened and cleared of the vegetation to make way for the building, but the resultant mounds of bulldozed dirt can be used as rudimentary directional cover. An entrenched [[40mm Bofors#Battlefield V|40mm AA]] gun is found nearby, while an [[Supply Station#Player Supply Stations|Ammo and Health resupply point]] is located near the lobby staircase. South of the Hotel, a bamboo footbridge connects Peale to a smaller, moderately [[Fortifications|fortifiable]] island that provides an alternate defensive position just outside the capture zone. |
||
| + | |||
| + | The flag can be the site of early round conflicts, as it is the closest land point to the [[United States#Battlefield V|US]] deployment. The western tip of the islet is defended by two [[Type 10]] emplacements that can provide long range fire, threatening amphibious advances throughout the match, although their fields of fire are limited by land obstacles. A [[Supply Station#Vehicle Supply Stations|Vehicle Resupply Point]], located between the gun positions by a shed and a small hill, can be useful for repairs once amphibious tanks reach the shore, and also provides an [[M2 Flamethrower/Battlefield V|M2 Flamethrower]] [[Battle Pickup]]. The flag itself spawns one light vehicle and two [[Dinghy|Dinghies]]. |
||
| + | |||
| + | <gallery> |
||
| + | Wake Island 09.png |
||
| + | Wake Island 02.png |
||
| + | Wake Island 13.png |
||
| + | Wake Island 10.png |
||
| + | Wake Island 12.png |
||
| + | </gallery> |
||
| − | An Ammo and Health resupply point is located near the staircase to the second floor. A Vehicle Resupply station is separated by a hill and covered by a hut, but is exposed to the open water, leaving vehicles exposed to enemy fire from all sides. A Type 10 emplacement is located near the Resupply point to provide long range fire to deter amphibious advances. |
||
====B: Barracks==== |
====B: Barracks==== |
||
| + | The Barracks is the northernmost objective, located on the main body of island and linked to the adjacent Peale Islet by a destructible road bridge. Formerly a residential area for the US soldiers and civilian contractors stationed on Wake before the attack, the barracks now evidently shelter [[Imperial Japanese Army#Battlefield V|Japanese forces]]. There are six barracks buildings in total, consisting of bunk rooms, mess halls, an aid station, storage space and administration. The installation is further bordered by a supply dock to the south, a water tower and [[40mm Bofors#Battlefield V|40mm AA]] gunpit to the east, and a row of trenches to the west. The relatively small capture zone is concentrated on the central four building cluster and the dividing parkway between them. |
||
| − | Formerly a residential area for the contractors and soldiers stationed in 1941, the Barracks now shelter Japanese forces within houses with some having cabinets of storage providing cover, but at the risk of being crushed by debris. Tank blocking Fortifications similar to Dragon's Teeth can be built within the objective near the northern shore. |
||
| + | Initially, the flag offers plenty of options for exterior defense in the numerous buildings within the capture zone, despite the inside of most barracks being void of solid cover. However the buildings themselves can be quite easily flattened by explosives, after which the concentrated capture zone leaves defenders vulnerable to air and tank attack. Players can hide underneath the stilt foundations of some of the buildings when all above-ground over is exhausted. Alternatively, they can try to keep tanks out by constructing anti-tank cubes, buildable near the riprap-adorned northern shore and bridge roadway. |
||
| ⚫ | |||
| + | |||
| + | The flag spawns one deployable tank, as well as an unspecialized Medium Tank, upon capture. Two [[Dinghy|dinghy]] boats for transport across the lagoon are available from the southern dock, as well as a [[Type 94 Shin Guntō#Battlefield V|Katana]], [[Supply Station#Vehicle Supply Stations|Vehicle Supply Station]], and a single transport vehicle. An [[Supply Station#Player Supply Stations|Ammo and Health resupply station]] is located by a [[Opel Blitz|truck]] in the middle of the objective, but is highly exposed to enemy fire. |
||
| + | |||
| + | <gallery> |
||
| + | Wake Island 03.png |
||
| + | Wake Island 14.png |
||
| + | Wake Island 15.png |
||
| + | Wake Island 16.png |
||
| + | Wake Island 52.png |
||
| + | </gallery> |
||
| − | Two dinghy boats are available in a nearby jetty for amphibious transport, as well as a single transport vehicle. |
||
====C: Hangar==== |
====C: Hangar==== |
||
| + | Similar to the namesake objective on [[Aerodrome]], this objective is centered around a single, if slightly smaller, cylindrical Hangar. It is directly north of the airstrip runway itself, connected by a perpendicularly orientated taxiway. The capture zone is focussed mainly on the Hangar interior, but can also be seized from the outside walls and the roof, the latter accessible thanks to ladders located on the four exterior corners of the structure. Inside, the majority of cover is comprised of rows of metal supply shelves, as well as a number of static [[Zero]] fighters that can explode if damaged. Furthermore, the corners of the Hangar are used to store red fuel barrels that pose an additional flammable threat. The outer perimeter of the objective is marked by a wire fence that surrounds the Hangar, three Anderson-type outbuildings and a watchtower. Downhill to the south is a small docking area, whilst to the west is the Hill. Simply named and modestly sized, it is nevertheless Wake Island's highest natural point, with a broad base that diverts the road from Hangar to the Barracks, and contains fortifications that house an [[40mm Bofors#Battlefield V|Anti-Aircraft gun]]. |
||
| − | Similar to [[Aerodrome]], this objective is centered around a single hangar, but with opportunities from above thanks to ladders located outside the hangar. The roofing of the hangar can be destroyed in order to reveal enemy positions to relay to teammates from above. On the right side of the hangar, two [[6 Pounder]] guns are located within houses pointing towards the water, making it effective when in range against amphibious attacks. |
||
| + | |||
| + | The flag is primarily the domain of infantry, with fights taking place at close range between the sparsely covered lanes within the Hangar interior. Land vehicles and tanks are capable of driving into the hangar via the large doors at either end, although room to manoeuvre is highly limited and can be prevented completely by constructing tank blockers. The corrugated iron structure is quite vulnerable to explosives - infantry can open up new entryways along the sides of the Hangar, while parts of the roof can be knocked through, exposing the ground to fire from above. |
||
| + | |||
| + | Capture of the flag grants access to a single aircraft spawn that takes off from the southern runway. The runway itself, along with much of the ground south of the flag, is generally exposed save for a number of parked aircraft and their accompanying concrete maintenance bays located at intervals along its length. Ground vehicle maintenance is available at the flag from a [[Supply Station#Vehicle Supply Stations|Repair Station]] outside the Hangar's southern wall - nearby are spots for spawning an [[M2 Flamethrower/Battlefield V|M2 Flamethrower]], four light vehicles, and two [[Dinghy|dinghies]]. Another [[Dinghy|dinghy]] spawns at the Outpost, a smaller jetty near the airfield's control tower, which can be climbed to reach the vantage point on the observation deck. |
||
| + | |||
| + | <gallery> |
||
| + | Wake Island 04.png |
||
| + | Wake Island 18.png |
||
| + | Wake Island 21.png |
||
| + | Wake Island 20.png |
||
| + | Wake Island 19.png |
||
| + | Wake Island 17.png |
||
| + | Wake Island 22.png |
||
| + | Wake Island 25.png |
||
| + | </gallery> |
||
| − | The Hangar entrances can be blocked with Tank blocking cube Fortifications for cover. South of the hangar include transport vehicles for use. |
||
====D: Ammo Depot==== |
====D: Ammo Depot==== |
||
| + | The Ammo Depot is located in the southeast corner of the map by the island's "elbow". Situated on flattened ground, the adjacent raised runway acts to separate direct line of sight between the flag and the Hangar to the north, with road tunnels dug underneath the runway for easier access. As the name suggest, the Ammo Depot is the storage area for aircraft munitions, contained within six trapezoid bunkers arranged neatly around the central clearing, with large open spaces between them to allow vehicles to traverse the area. |
||
| − | The Ammo Depot is situated south of the Hangar and near a runway, which is used for deploying aircraft, but is totally risky especially when enemies are swarming this objective, leaving planes vulnerable to enemy fire. This objective is comprised of bunkers that house supplies that provide close quarters fights within multiple corridors. Access to this objective can be from the Oil Tanks, the underground tunnels below the runway, or the runway itself. In the runway near the Depot, a watchtower can be utilized to provide overwatch not only from the Depot, but also from the Hangar and Oil Tanks. |
||
| + | The bunkers are the primary source of cover within the large capture zone, useful for hiding from enemies on the surrounding raised terrain to the north and east. They have exterior shielding walls and ramp-like roofs than can used to gain an elevated position, with the interior of each bunker being accessible via doorways at each end or a single open hatch in the roof. As such they are easily defensible and highly resistant to external bombardment, however players should be aware that the four bunkers near the south coast are packed with explosive ordnance that can be set off by gunfire. This triggers an explosion of impressive force that will kill anyone inside, severely injure those outside, and knock over and disorient those in the general vicinity, as well as destroying the bunker in the process. In spite of this, even in their destroyed state the sturdy remains of the outer walls of the bunker can provide robust shoulder-height cover for infantry. |
||
| − | An Ammo and Health resupply station is located in a small road between the bunkers. |
||
| + | |||
| + | The flag spawns two aircraft, deployed from the runway. The planes can be highly vulnerable during takeoff, especially when this or the nearby objectives of Hangar and Oil Tanks are contested by enemies. At the very least, the runway can be defended from aerial attack using two [[40mm Bofors#Battlefield V|40mm Bofors]] gun positions on the south end of the Depot. An [[Supply Station#Battlefield V|Ammo, Health and Vehicle resupply stations]] are located on the roadway between the two rows of bunkers, while a [[Type 94 Shin Guntō#Battlefield V|Katana]] battle pickup can also be acquired nearby. |
||
| + | |||
| + | <gallery> |
||
| + | Wake Island 27.png |
||
| + | Wake Island 28.png |
||
| + | Wake Island 29.png |
||
| + | Wake Island 30.png |
||
| + | Wake Island 24.png |
||
| + | Wake Island 26.png |
||
| + | </gallery> |
||
| − | This objective contains explosive ordnance within bunkers that when hit by players, triggers explosions equivalent to a V-1/JB-2/Ki-147 blast, and kills every player within danger close, as well as destroying the bunker in the process, leaving them exposed to enemies. |
||
====E: Oil Tanks==== |
====E: Oil Tanks==== |
||
| + | The holding tanks for supplying the island bases's aircraft with fuel are located within a facility on the southern arm of Wake, off the west end of the airstrip runway. The oil is stored in two large cylindrical fuel silos extending from below ground within a hollow concrete foundation that comprises much of the capture zone. While this area is mostly protected from long range attack, the confines of the pit-like underground are otherwise lacking in cover, and are further littered with barrels that can catch fire and explode. Players should also be vigilant of attack from above due to the vertical nature of the objective. A series of metal gantries suspended above the pit are supported by stairwells to allows players to climb in and out, while the silos themselves can be scaled using ladders, granting an ideal overwatch position over the pit and the surrounding, flattened terrain. |
||
| − | Providing the critical supply for the war effort, the Oil Tanks are situated within an underground corridor with access provided via staircases. Within the underground, ladders can be found that lead to top of the tanks, ideal for overwatch. Players should be aware of enemies from above due to the vertical nature of the objective. |
||
| + | |||
| + | The oil tanks are flanked by a bundled pipeline on raised supports, as well as a roadway to the north. Across from this, a third partially constructed silo connected to the others by overhead pipes stands on an elevated concrete platfrom. Although outside of the capture radius, the missing panels at the base of the silo allows players to climb inside, granting an elevated firing position with near all-round cover. |
||
| + | |||
| + | As with the adjacent Ammo Depot objective, the fuel silos on the flag pose a significant environmental threat. If they are damaged enough by explosives, the silo will emit black smoke, its metal walls creaking and bulging, indicating an imminent explosion. When this occurs, the force can kill any players within a roughly 15m radius, also destroying the metal gantries between the silos. Pools of fire will also collect in the below ground section, denying use of the area for some time following the explosion. |
||
| + | |||
| ⚫ | |||
| + | |||
| + | A small supply shed adjacent to the unfinished silo houses the flag's [[[Supply Station#Vehicle Supply Stations|Vehicle Supply Station]] and a [[M2 Flamethrower/Battlefield V|Flamethrower]] battle pickup. The flag also spawns two light vehicles, and two [[Dinghy|dinghies]] on the coast about 50m north of the capture radius. |
||
| + | |||
| + | <gallery> |
||
| + | Wake Island 05.png |
||
| + | Wake Island 32.png |
||
| + | Wake Island 33.png |
||
| + | Wake Island 34.png |
||
| + | Wake Island 35.png |
||
| + | Wake Island 36.png |
||
| + | Wake Island 31.png |
||
| + | </gallery> |
||
| − | Ammo and Health resupply stations are located in the middle of the objective, below ground. An adjacent abandoned tank houses a Vehicle Resupply station. |
||
====F: Dock==== |
====F: Dock==== |
||
| + | The Docking area, directly west of Oil Tanks, is the main naval supply point on Wake Island. It contains a small harbor built into the marine channel that divides the southern arm of Wake from the adjacent Wilkes Islet, crossed overland by a road bridge. The capture zone is concentrated on a small compound within the docking facility, spanning two warehouses to the south with a small jetty along its northern edge. The warehouses were previously used for tank maintenance, with the hulks of half a dozen [[M4 Sherman|Shermans]] sitting forgotten either on mechanical jacks or on the dockside, rusting in the briny air. The Warehouses, although large and open at most sides, can provide general cover, with their roofs being climbable using supply stacks around their outer walls. They are vulnerable to explosives however, with wall and ceiling panels capable of being torn open. Substitute elevated positions about the flag include a watchtower near the compound's main gate, and the raised bridge outside the capture zone to the north. |
||
| − | This objective spans two warehouses and a jetty that contains destroyed Sherman tanks for maintenance. |
||
| + | The waterway between the dock and Wilkes allows boats to pass from the southern coast of Wake to the inner lagoon area, and vice versa. Wilkes Islet itself is mostly devoid of tactical resources such as gun emplacements or vehicles, and as a result is usually unoccupied - this may offer the [[United States#Battlefield V|US]] team a more discreet landing point than the more accessible but hotly contested Hotel. East of the flag, a row of [[Fortifications|fortifications]] including a trench, pillbox and a [[40mm Bofors#Battlefield V|40mm AA]] gun cover the open ground up to Oil Tanks. A second [[40mm Bofors#Battlefield V|AA gun]] is to the southeast of the flag, on the south coast. |
||
| − | When captured, this objective spawns a neutral, unspecialized Medium Tank for use. |
||
| − | An Ammo and Health resupply station is located between the warehouses, |
+ | As with Barracks, this objective provides an additional tank spawn as well as a neutral, unspecialized Medium Tank for use when captured. An [[Supply Station#Player Supply Stations|Ammo and Health resupply station]] combo is located between the warehouses, while a [[Type 94 Shin Guntō#Battlefield V|Katana]] battle pickup is found on the west end of the capture zone. |
| + | |||
| + | <gallery> |
||
| + | Wake Island 06.png |
||
| + | Wake Island 37.png |
||
| + | Wake Island 38.png |
||
| + | Wake Island 39.png |
||
| + | Wake Island 40.png |
||
| + | </gallery> |
||
==Breakthrough== |
==Breakthrough== |
||
| + | With the defeat of its original defenders in December 1941, [[United States#Battlefield V|US Forces]] are tasked with retaking the island from the [[Imperial Japanese Army#Battlefield V|Japanese]] occupiers by staging their own amphibious landing. Breakthrough on Wake Island is divided into four sectors, consisting of a complete round trip from the northern shore to the southern shore of the island itself, with objectives alternating between pairs and singular flags. |
||
| − | US Marines are tasked in retaking the island from the Japanese after suffering defeat last December 1941. |
||
| + | |||
| + | 500 tickets are allocated for the attackers on this map. The [[United States#Battlefield V|US]] attack is backed by significant material resources, with [[Imperial Japanese Army#Battlefield V|Japanese]] tank and air forces being frequently outnumbered throughout the battle. The team must instead rely on existing and buildable [[Fortifications|fortifications]], the careful positioning and dedicated use of stationary weapons, and knowledge that after the initial stage, the [[United States#Battlefield V|US]] main thrust is likely to occur from a single, predictable direction. |
||
| − | Breakthrough in Wake Island is divided into four sectors, which form a round trip from the northern shore to the southern shore of the island itself. Interestingly, unlike its previous installment, the new Wake Island in Breakthrough features the United States as the attackers of the map, while the Imperial Japanese forces are defending the island. 500 tickets are allocated for the attackers on this map. |
||
===Sector 1=== |
===Sector 1=== |
||
| − | + | The objectives for the initial landing are the capture of the incomplete Hotel and the captured residential Barracks within the northwestern sector of the island. The vehicle complement aboard the [[Landing Ship, Tank|LSTs]] gives the [[United States#Battlefield V|US]] team choice in how to stage their attack; they can either land directly on Peale Island and advance inland, thus giving defenders the least possible time to react, or bypass the main line of contention along the north and south coast, potentially even landing at Barracks first to catch the defenders in a pincer. Defenders should therefore be aware of incoming attacks from land and sea, utilizing the dual [[Type 10]] emplacements to destroy approaching [[LCVP#Battlefield V|landing craft]] and [[LVT#Battlefield V|amphibious tank]], and patrolling the coast to prevent uncontested landings at more obscure sites. |
|
| + | The [[United States#Battlefield V|US]] attackers deploy from [[Landing Ship, Tank|LSTs]] carrying two unspecialized [[LVT#Battlefield V|LVT]] tanks and eight [[LCVP#Battlefield V|LCVP]] boats for transport, as well as an allocation of three planes and four [[40mm Bofors#Battlefield V|40mm Bofors]]. The AA guns on the ship's bow can perform a dual role, as they are capable of hitting enemy targets that enter the water off the southern coast. The [[Imperial Japanese Army#Battlefield V|Japanese]] have three aircraft of their own at this stage but no tanks, but have the two [[Type 10|coastal guns]] and two [[40mm Bofors#Battlefield V|40mm AA guns]] to deter vehicles. It should be noted that both flags in this sector awards an unspecialized [[M4 Sherman#Battlefield V|Sherman]] tank immediately upon capture by the [[United States#Battlefield V|US]]. This can give attackers a further lead in armored strength, or potentially allow the [[Imperial Japanese Army#Battlefield V|Japanese]] to steal a tank if they are quick enough. Two [[Dinghy|Dinghies]] also spawn at the Hotel jetty for fast transport along the shoreline. The [[United States#Battlefield V|US]] team also cannot deploy [[T34 Calliope#Battlefield V|Sherman Calliope]] tanks until the sector is cleared. |
||
| − | The US attackers deploy from boats carrying unspecialized LVT tanks and LCVP boats for transport, as well as allocation of planes within a distant aircraft carrier. Japanese defenders have no countermeasures on land, leaving the infantry utilizing the Type 10 emplacements as well as anti-tank weaponry from teammates to deter vehicle attacks and 3 anti-aircraft [[40mm Bofors]] guns to defend against aircraft. |
||
===Sector 2=== |
===Sector 2=== |
||
| − | After taking both objectives, the US forces have established a foothold on the island, and must now push forward to secure the sole Hangar on the island, now currently |
+ | After taking both objectives, the [[United States#Battlefield V|US forces]] have established a foothold on the island, and must now push forward to secure the airstrip. The sole Hangar on the island, now currently used to store [[Zero]] aircraft, is the primary target for this phase. The single objective allows defenders to concentrate their forces, and the Hangar structure itself, although partially destructible, is generally well-protected against tank and air attack. This requires the complex be infiltrated by infantry forces and seized with close-quarters fighting. To reach the objective, the [[United States#Battlefield V|US]] can try attacking from the flanks along the east and west coast. By way of its limited access points, the roof of the hangar is highly defensible and can be utilized to gain or retain control of the flag. If the objective is neutralized, defenders are forced to spawn at the Ammo Depot, far to the south across almost completely exposed terrain, which can be a significant obstacle in conducting a successful counterattack. |
| + | |||
| + | The [[United States#Battlefield V|US forces]] now allow [[M4 Sherman#Battlefield V|Sherman]] tanks for deployment on land, with three tank spawns being allocated to their side. Depending on the retained number of [[LVT#Battlefield V|amphibious]] and neutrally-spawning tanks in the last sector, the defenders could be faced by as many as six enemy tanks at once. Despite this disparity, the Hangar sector is not ideal terrain for tanks, as they can be blocked from entering the capture zone or its immediate vicinity via [[Fortifications|fortifications]]. Furthermore, the [[Imperial Japanese Army#Battlefield V|Japanese]] defenders are issued two [[Towing#Battlefield V|towable]] and one static [[6 Pounder]] anti-tank gun. While the static gun is pre-sighted to defend the west coast from US [[Dinghy|dinghy]] assault, provided by spawns at the Hotel and Barracks, the two other guns can be moved into position to counter [[United States#Battlefield V|US]] tank assaults from whichever direction they come from - usually, this is the main road and Hill crest directly north of the Hangar. Two [[Type 95 Kurogane#Battlefield V|Type 95 Cars]] are supplied as towing vehicles. |
||
| − | The US forces now allow Sherman tanks for deployment on land. Three tanks are allocated for the Americans. |
||
===Sector 3=== |
===Sector 3=== |
||
| + | Securing the Hangar and overrunning the airstrip grants air superiority for the [[United States#Battlefield V|Americans]], making it impossible for the [[Imperial Japanese Army#Battlefield V|Japanese]] to launch planes. They are now tasked with the capture of key supply points, namely the Ammo Depot and the Oil Tanks. When fighting for the Ammo Depot, players must be wary of the explosive hazard posed by the storage bunkers, as the massive explosion can destroy infantry hiding within them and disrupt the distribution of cover. Once the bunkers have been destroyed, the area becomes highly vulnerable to [[Squad Reinforcement]] [[Artillery#Squad Reinforcement|artillery support]], which can also be effective at attacking the more concentrated Oil Tanks objective. While the raised and flattened terrain of the runway generally favors the [[United States#Battlefield V|Americans]], granting raised positions around two sides of the capture area and allowing tanks to move freely, the direct approach to Oil Tanks is more defender-sided, with stretches of open ground covered by multiple defensive pillboxes and trenches. |
||
| − | Securing the hangar grants air superiority for the Americans. They are now tasked to capture key supply points: the Ammo Depot and the Oil Tanks. |
||
| + | |||
| + | To make up for their loss of air power, the [[Imperial Japanese Army#Battlefield V|Japanese]] are provided with two tanks - from this point onwards, the team have only [[Fliegerfaust|man-portable]] and [[40mm Bofors#Battlefield V|static anti-aircraft]] weapons for defense, such as the two guns at Ammo Depot. [[United States#Battlefield V|US forces]] are again encouraged to flank the enemy, this time using both [[Dinghy|Dinghies]] and [[Willys MB#Battlefield V|GPWs]] spawn in the Hangar vicinity. |
||
| + | |||
===Sector 4=== |
===Sector 4=== |
||
| + | After successfully securing the supplies, the [[United States#Battlefield V|Americans]] must now finish their conquest of the island by capturing the Dock. This single objective, like Oil Tanks, offers only one overland route of advance across ground of limited concealment. Taking place at the thinnest part of the island, it also limits the amount of route deviation achieved through flanking. Upon reaching the capture zone, rooting out defenders can be difficult due to the size of the capture radius and the number of possible hiding places. Nevertheless, the area can still be saturated with air and off-map ordnance to great effect. The defenders' sector spawn on Wilkes Island means they have to cross the harbor canal to reach the objective - destroying the road bridge can thus strand tanks and infantry on the wrong side of the waterway, preventing them from influencing flag traction at this crucial stage. |
||
| − | After successfully securing the supplies, the Americans must now finish their conquest of the island by capturing the Dock. |
||
| + | |||
| + | The round is won for the attackers if they succeed in taking the Dockyards. Marooned on Wilkes Islet with only the ocean to their backs, the situation appears hopeless for the [[Imperial Japanese Army#Battlefield V|Japanese]] defenders, ending what appears to be the second Battle of Wake Island. |
||
| + | |||
==Squad Conquest== |
==Squad Conquest== |
||
Squad Conquest takes place around the Airfield at the "joint" of the Atoll, with objectives spread out in a linear fashion across the width of the airstrip. As a result most of the terrain on the south side of the map is highly open with little cover, while the north side has vegetation and uneven terrain for infantry to utilize. |
Squad Conquest takes place around the Airfield at the "joint" of the Atoll, with objectives spread out in a linear fashion across the width of the airstrip. As a result most of the terrain on the south side of the map is highly open with little cover, while the north side has vegetation and uneven terrain for infantry to utilize. |
||
| − | Each team starts with a ticket limit of 150. |
+ | Each team starts with a ticket limit of 150. They are also allocated a single tank, as well as a light vehicle for infantry rushes across the more open sections of the map, giving the potential to break deadlocks. It should also be noted that each deployment lacks [[Supply Station#Battlefield V|Health, Ammo and Vehicle Resupply Stations]], requiring tanks to capture the Hangar to receive ammunition and repairs. |
===Deployments=== |
===Deployments=== |
||
====US Deployment==== |
====US Deployment==== |
||
| + | [[File:Wake Island 51.png|thumb|right|200px]] |
||
| − | The |
+ | The [[United States#Battlefield V|US]] Deployment is on the roadway between the Barracks and Hangar Conquest objectives. They spawn very close to the Hill objective, with the hill itself screening most of their deployment area from enemy view. As the [[United States#Battlefield V|US]] deploy from a much narrower point of the island than the [[Imperial Japanese Army#Battlefield V|Japanese]], potential base exit routes are more limited, but are substantially better covered. |
====Japanese Deployment==== |
====Japanese Deployment==== |
||
| + | [[File:Wake Island 49.png|thumb|right|200px]] |
||
| − | The Japanese Deployment is within the Ammo Depot at the southern end of the Airfield, with their main spawn area being on the opposite side of the below-runway tunnel from the Outpost objective. Despite this, their protected spawn area is quite large, enabling players to exit the base anywhere along the accessible length of runway, even |
+ | The [[Imperial Japanese Army#Battlefield V|Japanese]] Deployment is within the Ammo Depot at the southern end of the Airfield, with their main spawn area being on the opposite side of the below-runway tunnel from the Outpost objective. Despite this, their protected spawn area is quite large, enabling players to exit the base anywhere along the accessible length of runway, even using the far east coast of the island. |
===Flags=== |
===Flags=== |
||
====A: Hill==== |
====A: Hill==== |
||
| + | [[File:Wake Island 47.png|thumb|right|200px]] |
||
| − | The Hill objective is off the north end of the airstrip. It consists of a series of forifications set into a small, foliage-covered hilltop. The trench system is arranged in a coil around the hill crest with a small, circular fighting pit located centrally. The pit contains Health, Ammo and a Flamethrower battle pickup. The capture zone extends over much of the hill surface, allowing players to fight from both the trenches and surrounding bushes. |
+ | The Hill objective is off the north end of the airstrip. It consists of a series of forifications set into a small, foliage-covered hilltop. The trench system is arranged in a coil around the hill crest with a small, circular fighting pit located centrally. The pit contains [[Supply Station#Player Supply Stations|Health, Ammo]] and a [[M2 Flamethrower/Battlefield V|Flamethrower]] battle pickup. The capture zone extends over much of the hill surface, allowing players to fight from both the trenches and surrounding bushes. |
====B: Hangar==== |
====B: Hangar==== |
||
| + | [[File:Wake Island 48.png|thumb|right|200px]] |
||
| − | The Hangar objective is the middle flag, aligned with the vertically-orientated runway that forms the playable area's centerline. The capture area is largely unchanged from Conquest, and can be captured from inside, immediately outside, or from the roof. Holding the flag can be of great benefit to teams, as it gives unrestricted sightlines over the vast majority of the map, particularly towards the Japanese side. It is also the location of the map's only Vehicle Resupply Station, as well as Health, Ammo and a Katana battle pickup. |
+ | The Hangar objective is the middle flag, aligned with the vertically-orientated runway that forms the playable area's centerline. The capture area is largely unchanged from Conquest, and can be captured from inside, immediately outside, or from the roof. Holding the flag can be of great benefit to teams, as it gives unrestricted sightlines over the vast majority of the map, particularly towards the [[Imperial Japanese Army#Battlefield V|Japanese]] side. It is also the location of the map's only [[Supply Station#Vehicle Supply Stations|Vehicle Resupply Station]], as well as [[Supply Station#Player Supply Stations|Health, Ammo]] and a [[Type 94 Shin Guntō#Battlefield V|Katana]] battle pickup. |
====C: Outpost==== |
====C: Outpost==== |
||
| + | [[File:Wake Island 50.png|thumb|right|200px]] |
||
| − | The Outpost objective is located on the south side of the play area on the inner coastline. The flag is set around the larger of the two supply docks in the area, with the capture zone encompassing both the pier extension, the dock itself, and a small section of the waterline around it. The pier is mostly devoid of cover, while the dock is sparsely covered by supply crates and cargo trucks - the area is nontheless highly vulnerable to fire from adjacent elevated positions, such as the Hangar to the north and the Control Tower and elevated runway to the south. The pier spawns two Dinghies that mostly benefit the Japanese team, allowing them to bypass the unfavourably exposed terrain around the airstrip by skirting the coastline. The flag also provides Health, Ammo and a Flamethrower pickup. |
+ | The Outpost objective is located on the south side of the play area on the inner coastline. The flag is set around the larger of the two supply docks in the area, with the capture zone encompassing both the pier extension, the dock itself, and a small section of the waterline around it. The pier is mostly devoid of cover, while the dock is sparsely covered by supply crates and cargo trucks - the area is nontheless highly vulnerable to fire from adjacent elevated positions, such as the Hangar to the north and the Control Tower and elevated runway to the south. The pier spawns two [[Dinghy|Dinghies]] that mostly benefit the [[Imperial Japanese Army#Battlefield V|Japanese]] team, allowing them to bypass the unfavourably exposed terrain around the airstrip by skirting the coastline. The flag also provides [[Supply Station#Player Supply Stations|Health, Ammo]] and a [[M2 Flamethrower/Battlefield V|Flamethrower]] pickup. |
| Line 152: | Line 267: | ||
| − | == |
+ | ==Rush== |
| + | Rush on Wake Island first became playable during Week Seven of ''[[Battlefield V: Into The Jungle|Into The Jungle]]'' from 19th to 26th March, 2020. Similar to Breakthrough, the battle progresses across the whole body of the island, but with the advance occurring in the opposite direction, and in five instead of four sectors. |
||
| ⚫ | *North-west of the airfield on Wake Island there is a monument from DICE that says: ''To those who fought here in 1942 - BF2 - 2142 - 1943 - BF3 - BFV We are grateful''. This is an updated version of the same easter egg that appeared in the [[Wake Island |
||
| + | |||
| ⚫ | |||
| + | ===Sector 1=== |
||
| ⚫ | **A crab is located in front of the plaque. Hidden around the map are multiple crabs. Approaching the crabs will cause them to make a clicking sound, burrow into the ground, and reappear in front of the plaque. If five crabs are found, the six crabs will form a circle, and a pair of headphones and a gramophone will appear in the middle of the circle. |
||
| + | In the first sector, the [[United States#Battlefield V|US]] launch their assault from the Dock area towards Oil Tanks. The [[M-COM]] station designated objective 1A is located on the northwest side of the area by the main road, set up in a supply shed that in Conquest houses a Vehicle Supply Station. While the structure has no walls, it is partially surrounded by head-height sandbag constructions that offers cover for players immediately adjacent to the objective, but is open to the south. |
||
| ⚫ | **After picking up the headphones, the player can head to an M-COM located at D Flag, and hear morse code coming from the M-COM. The morse code decrypts to a string of code, which, when Googled, will direct to a coordinate located near the real Wake Island. By heading to the corresponding location in-game, the player can find a vinyl record hidden under the water. |
||
| + | |||
| ⚫ | **With the vinyl record, if the player interacts with the gramophone, the ''Battlefield |
||
| + | Objective B is in the square "pit" between the two fuel silos. Compared to A, which is almost on the border with the [[United States#Battlefield V|US]] team's spawn protection boundary, this objective is more defensible as it is further back from the frontline, its below-ground position largely protected from long-range attack, and it can be effectively covered from the top of the climbable fuel tanks. However the pit can be completely cleared out by either team twice in a round, should they detonate the fuel tanks. When this objective is destroyed, The fuel tank nearest to the [[M-COM]] station will explode if undetonated. |
||
| ⚫ | **After the ''Battlefield 3'' song, one more vinyl record can be found. By interacting with the gramophone again, crabs will begin to appear next to the plaque, and an EDM remix of the ''Battlefield'' theme, accompanied with crab clicks, will start playing. When the song reaches the climax, the crabs will begin to dance with the beat, and pyrotechnics will be fired from the plaque. |
||
| + | |||
| ⚫ | |||
| + | The US bring with them two GPWs in the first wave. |
||
| + | |||
| + | ===Sector 2=== |
||
| + | In sector two, combat moves to the Ammo Depot near the island's joint. The two objectives are located outside the bunkers and roughly parallel to one another, with objective A positioned between the two structures on the north side and objective B between the second and third bunker to the south. The bunkers, as well as the large [[Fortifications|fortifications]] built around each objective, offer defenders a cover advantage. As with the last flag, attackers can set off the stored munitions to reduce the available cover. Alternatively, they can use the opposite side of the aircraft runway to flank the position and attack from the rear. |
||
| + | |||
| + | ===Sector 3=== |
||
| + | The battle continues at the aircraft Hangar, around which the two objectives are closely positioned. Objective A is inside the Hangar, set up against the west wall midway along the structure's length. The adjacent shelving and sandbag [[Fortifications|fortifications]], as well as the other large clutter objects throughout the Hangar, obfuscate sightlines within the objective zone, although after blasting out sections of the roof the interior can be clearly surveyed from above. Objective B is between a number the tin shacks near the western perimeter fence. |
||
| + | |||
| + | At this point, both teams receive one tank. The heavy vehicles can be useful in escorting infantry across the open ground surrounding the Airfield, as well as knocking out destructable panels of the Hangar and nearby structures to grant easier access. |
||
| + | |||
| + | ===Sector 4=== |
||
| + | Moving across the northern arm of Wake, combat is rejoined at the Barracks area. Objective A is found on the small docking area south of the position, while objective B is located in the middle of the settlement. By this point, the primary route of advance for attackers is across one of the thinnest parts of the island, across generally exposed ground to assault a well built-up area. In spite of the lack of [[Dinghy|boats]], [[United States#Battlefield V|US]] players may consider swimming across the lagoon as a means of avoiding this particular piece of terrain. |
||
| + | |||
| + | ===Sector 5=== |
||
| + | The final sector takes place at the dilapidated Hotel on the northwestern tip of the island. Both [[M-COM]] stations are found on the ground floor of the Hotel building itself - objective A is at the end of the east wing and B in the west. The main terrain obstacles in this area are the single road bridge onto Peale Island and the lack of substantial cover surrounding the Hotel, which offers strong elevated fighting positions befitting of a final defense. The [[United States#Battlefield V|US]] team should be aware that by breaching the wooden walls of the Hotel they can deny the enemy cover and open up new infiltration points into the building. |
||
| + | |||
| + | All support for armor is dropped. With [[Supply Station#Vehicle Supply Stations|vehicle resupply stations]] spontaniously exploding, unable to be rebuilt. |
||
==Gallery== |
==Gallery== |
||
<gallery> |
<gallery> |
||
| − | Battlefield V – Wake Island Overview Trailer |
+ | Battlefield V – Wake Island Overview Trailer|Wake Island Overview Trailer |
| + | BF5 Wake Island Trailer.png|Wake Island as seen in the trailer for the War in the Pacific |
||
| + | Wake Island 2019 4.jpeg|Promotional Images |
||
Battlefield V Wake Island Promotional Art 1.jpg |
Battlefield V Wake Island Promotional Art 1.jpg |
||
Battlefield V Wake Island Promotional Art 2.jpg |
Battlefield V Wake Island Promotional Art 2.jpg |
||
Battlefield V Wake Island Promotional Art 3.jpg |
Battlefield V Wake Island Promotional Art 3.jpg |
||
| ⚫ | |||
Wake Island 2019 1.jpeg |
Wake Island 2019 1.jpeg |
||
Wake Island 2019 2.jpeg |
Wake Island 2019 2.jpeg |
||
BF5 Wake Island 3.jpeg |
BF5 Wake Island 3.jpeg |
||
| − | + | Wake Island 43.png|Peale Islet |
|
| + | Wake Island 44.png|Barracks and Hill |
||
| − | Bandicam 2019-10-23 23-49-14-511.png |
||
| + | Wake Island 45.png|Airfield, Hangar and Ammo Depot |
||
| − | Bandicam 2019-10-23 23-50-36-977.png |
||
| + | Wake Island 23.png|Memorial |
||
| + | Wake Island 46.png|Docks and Wilkes Islet |
||
| + | Wake Island 41.png|Wilkes Islet |
||
| + | Wake Island 42.png|Wilkes Islet |
||
</gallery> |
</gallery> |
||
{{Maps/BF5}} |
{{Maps/BF5}} |
||
| + | |||
| + | ==Trivia== |
||
| + | *The map's internal name is '''MP_WakeIsland'''. |
||
| ⚫ | *North-west of the airfield on Wake Island there is a monument from [[EA Digital Illusions CE|DICE]] that says: ''To those who fought here in 1942 - BF2 - 2142 - 1943 - BF3 - BFV We are grateful''. This is an updated version of the same easter egg that appeared in the [[Wake Island/Battlefield 3|Battlefield 3 version]] of the map. |
||
| ⚫ | |||
| ⚫ | **A crab is located in front of the plaque. Hidden around the map are multiple crabs. Approaching the crabs will cause them to make a clicking sound, burrow into the ground, and reappear in front of the plaque. If five crabs are found, the six crabs will form a circle, and a pair of headphones and a gramophone will appear in the middle of the circle. |
||
| ⚫ | **After picking up the headphones, the player can head to an M-COM located at D Flag, and hear morse code coming from the M-COM. The morse code decrypts to a string of code, which, when Googled, will direct to a coordinate located near the real Wake Island. By heading to the corresponding location in-game, the player can find a vinyl record hidden under the water. |
||
| ⚫ | **With the vinyl record, if the player interacts with the gramophone, the ''[[Battlefield 1942]]'' theme will start to play. The M-COM morse code will also change, pointing to a new set of coordinates, and another vinyl record can be picked up at the corresponding in-game location. Interact with the gramophone again, and the song will change to a song from ''[[Battlefield 2]]''. The process can be repeated several times, changing the song to ''[[Battlefield 2142]]'', ''[[Battlefield Heroes]]'', ''[[Battlefield 1943]]'', and ''[[Battlefield 3]]'' songs. |
||
| ⚫ | **After the ''[[Battlefield 3]]'' song, one more vinyl record can be found. By interacting with the gramophone again, crabs will begin to appear next to the plaque, and an EDM remix of the ''Battlefield'' theme, accompanied with crab clicks, will start playing. When the song reaches the climax, the crabs will begin to dance with the beat, and pyrotechnics will be fired from the plaque. |
||
| ⚫ | |||
| + | *The silos at Fuel Tanks originally did not explode. This functionality was added with the 6.2 patch on March 5th, 2020.<ref>[https://www.reddit.com/r/BattlefieldV/comments/fcxn49/battlefield_v_update_62_thursday_5th_march/ Battlefield V - Update 6.2 (Thursday 5th March)]</ref> |
||
==References== |
==References== |
||
| − | {{Reflist}} |
+ | {{Reflist}} |
| + | [[Category:Maps of Battlefield V]] |
||
[[Category:Battlefield V: War In The Pacific]] |
[[Category:Battlefield V: War In The Pacific]] |
||
| + | [[Category:Subpages]] |
||
Latest revision as of 09:12, 12 October 2021
| Overview | 1942 | WWII Mod | BF2 | 2142 | Heroes | Online | 1943 | BF3 | BFV |
|---|
As Chapter 5: War in the Pacific continues, we’re now deploying our reimagination of what is arguably the most iconic Battlefield map ever. As you fight for control over land, air, and sea on this horseshoe-shaped classic, we hope you’ll enjoy both the nostalgia and the new improvements."
Wake Island is a map of Battlefield V that was introduced in the fifth Tides of War chapter, War in the Pacific. It was first revealed in Battlefield V – War in the Pacific Official Trailer. It was released on December 12th, 2019.[1]
The Battle of Wake Island occurred during the Japanese expansion into the Pacific after the surprise Attack on Pearl Harbor on December 7th, 1941. After successfully repulsing an attempted landing, the outnumbered US Marine defenders were overwhelmed and defeated following a fifteen day siege. A reaction force based around the aircraft carrier USS Saratoga was forced to abort their attempted relief of the garrison after hearing of the surrender, and the island would remain in Japanese hands until the end of the war in September 1945.
In contrast to previous iterations, this rendition of Wake Island has the US as the attackers and the Japanese as the defenders.
Overview[]
The unusual horseshoe-shape formed by the atoll and its smaller adjoining islets creates a playspace that is highly recognizable, but also very limiting and linear when travelling on land. The island's outstretched "arms" are each over a kilometer in length, about 50m at its thinnest point and less than 200m at its widest, reducing flanking opportunities, while the ability to sabotage bridges and build obstacles can make road access unreliable. However the map's vast oceanic area, which includes shortcut-like waterways around the island tips, encourage sea travel as a means of transport. A rough map boundary is actually visible from above, marked by the cyan waters of the coastal shallows that surround the island, as well as the coral reefs of the inner lagoon. On land, there is a similar variance in terrain - although generally flat, the sunken, eroded beach areas along the coast and more rough, lush terrain further inland form a pleasant contrast to one another.
The many strategic points of interest on the island, foremost being the large airfield at the joint between Wake's two arms and the "downtown" Barracks for the island's modest garrison, were evidently not enough to deter a Japanese takeover. Isolated more than a thousand miles from the nearest friendly neighbouring island territory, the half-finished construction projects, an array of abandoned construction machinery, and swathes of trees felled for lumber, all imply a hastily prepared defense, while the Japanese Zeros lining the runway suggest the efforts were ultimately in vain. However, the US counterstroke is at hand, with a massive fleet gathered offshore. The air above is thick with black artillery bursts as swarms of Japanese fighters circle overhead, strafing and bombing incessantly, attempting themselves to prevent the imminent counterattack, to be launched into dawn's rising sun.
Although similar in layout and theme to past installments, the map is larger to better match the real life scale of the island. The increased terrain size creates better pacing and more places to take cover such as in foliage or rock formations. Fortifications allow for the destruction and repair of bridges on the map. They can also be used to stop the advance of the enemy team due to the linear nature of the map.[2]
Flag Layout[]
| Control Point | Conquest Assault | Breakthrough | Squad Conquest |
|---|---|---|---|
| US Deployment | |||
| Hotel | A | 1A | |
| Barracks | B | 1B | |
| Hill | A | ||
| Hangar | C | 2A | B |
| Outpost | C | ||
| Ammo Depot | D | 3A | |
| Oil Tanks | E | 3B | |
| Dock | F | 4A | |
Conquest Assault[]

Conquest Assault is fought between six flags, arranged along the main body of Wake Island. Congruous to its appearance in most previous instalments, the round starts with all flags under the control of the defending team, creating rapid ticket bleed for attackers until an objective is neutralized. As a consequence, the defending team start with less tickets and have no permanent deployment point - 700 tickets are allocated for the Americans, while only 500 are allotted for the Japanese.
In spite of terrain that seemingly forces flags to be captured in a linear sequence, the abundance and variety of vehicles opens up many opportunities for avoiding predictable routes of advance. Light vehicles can be used to speedily bypass the frontline, and are capable of transporting a partial squad from one end of the island to the other within a short period. To counter this, Fortifications and the destruction of bridges can hamper overland progress. Meanwhile, the many LCVPs of the US deployment vessels as well Dinghies spawned by virtually all flags provide great freedom for crossing the map via the central lagoon, with the passable waterways between the smaller islets granting access to easier opposite coasts. Although many objectives cater directly to infantry, the further myriad of tanks, aircraft and emplaced weapons round out the quintessential combined arms Battlefield experience befitting of this classic map.
Because of the US team's starting position, Squad Reinforcement vehicles such as the T34 Calliope and HaChi are disabled in this mode.
Equipment[]
| Tank(s) |
4 LVT |
| Fixed-wing aircraft | |
| Boat(s) |
8 LCVP |
| Emplacement(s) |
4 40mm AA |
| Tank(s) | |
| Fixed-wing aircraft |
3 Zero (Flag Dependent) |
Deployments[]
US Deployment[]
The American forces deploy from two LSTs, moored just inside the lagoon off the western tip of Peale Islet, in the northwestern corner of the map. Each landing ship houses two unspecialized LVT tanks and four LCVP boats for transport to the island, and can be defended using 40mm AA guns at the bow and stern of each ship. The three Corsairs takeoff from the decks of carriers further out into the Pacific.
")
")
Japanese Deployment[]
Lacking a permanent base, the Japanese can only deploy on captured flags, squad members, spawn beacons, and transport vehicles active on the battlefield. Their initial heavy vehicle complement of two tanks and three aircraft are spawned on cappable flags, and thus can be used by the opposing team if the bases are captured. Pilots should also take care as the three Zeros spawned by the Hangar and Ammo Depot flags must takeoff from an airstrip in the middle of the play area, unlike the boundary-protected US spawn.
Flags[]
A: Hotel[]
The main point of interest on Peale Islet, the landform making up the end of the atoll's northern arm, is a large three-winged building. The beachfront Hotel was in the midst of construction when war broke out and has since been left unfinished, standing as a steel and concrete skeleton with some wall sections missing. Much of the space inside the building is divided up into empty corridors adjoining to smaller guest rooms, although the lack of installed windows and doors, and wooden walls that are easily destructible, can create flanking vulnerabilities. Furthermore, scaffolding and ladders on the exterior of the building, as well as a staircase in the main lobby, allow players to reach the incomplete roof sections of the building and control the interior and surrounding area from above.
The capture zone for this flag is fairly large, covering the Hotel itself and its outer perimeter, the adjacent roadway to the north, and a section of jetty to the southeast. The immediate area is mostly open, having been flattened and cleared of the vegetation to make way for the building, but the resultant mounds of bulldozed dirt can be used as rudimentary directional cover. An entrenched 40mm AA gun is found nearby, while an Ammo and Health resupply point is located near the lobby staircase. South of the Hotel, a bamboo footbridge connects Peale to a smaller, moderately fortifiable island that provides an alternate defensive position just outside the capture zone.
The flag can be the site of early round conflicts, as it is the closest land point to the US deployment. The western tip of the islet is defended by two Type 10 emplacements that can provide long range fire, threatening amphibious advances throughout the match, although their fields of fire are limited by land obstacles. A Vehicle Resupply Point, located between the gun positions by a shed and a small hill, can be useful for repairs once amphibious tanks reach the shore, and also provides an M2 Flamethrower Battle Pickup. The flag itself spawns one light vehicle and two Dinghies.
")
")
")
")
")
B: Barracks[]
The Barracks is the northernmost objective, located on the main body of island and linked to the adjacent Peale Islet by a destructible road bridge. Formerly a residential area for the US soldiers and civilian contractors stationed on Wake before the attack, the barracks now evidently shelter Japanese forces. There are six barracks buildings in total, consisting of bunk rooms, mess halls, an aid station, storage space and administration. The installation is further bordered by a supply dock to the south, a water tower and 40mm AA gunpit to the east, and a row of trenches to the west. The relatively small capture zone is concentrated on the central four building cluster and the dividing parkway between them.
Initially, the flag offers plenty of options for exterior defense in the numerous buildings within the capture zone, despite the inside of most barracks being void of solid cover. However the buildings themselves can be quite easily flattened by explosives, after which the concentrated capture zone leaves defenders vulnerable to air and tank attack. Players can hide underneath the stilt foundations of some of the buildings when all above-ground over is exhausted. Alternatively, they can try to keep tanks out by constructing anti-tank cubes, buildable near the riprap-adorned northern shore and bridge roadway.
The flag spawns one deployable tank, as well as an unspecialized Medium Tank, upon capture. Two dinghy boats for transport across the lagoon are available from the southern dock, as well as a Katana, Vehicle Supply Station, and a single transport vehicle. An Ammo and Health resupply station is located by a truck in the middle of the objective, but is highly exposed to enemy fire.
")
")
")
")
")
C: Hangar[]
Similar to the namesake objective on Aerodrome, this objective is centered around a single, if slightly smaller, cylindrical Hangar. It is directly north of the airstrip runway itself, connected by a perpendicularly orientated taxiway. The capture zone is focussed mainly on the Hangar interior, but can also be seized from the outside walls and the roof, the latter accessible thanks to ladders located on the four exterior corners of the structure. Inside, the majority of cover is comprised of rows of metal supply shelves, as well as a number of static Zero fighters that can explode if damaged. Furthermore, the corners of the Hangar are used to store red fuel barrels that pose an additional flammable threat. The outer perimeter of the objective is marked by a wire fence that surrounds the Hangar, three Anderson-type outbuildings and a watchtower. Downhill to the south is a small docking area, whilst to the west is the Hill. Simply named and modestly sized, it is nevertheless Wake Island's highest natural point, with a broad base that diverts the road from Hangar to the Barracks, and contains fortifications that house an Anti-Aircraft gun.
The flag is primarily the domain of infantry, with fights taking place at close range between the sparsely covered lanes within the Hangar interior. Land vehicles and tanks are capable of driving into the hangar via the large doors at either end, although room to manoeuvre is highly limited and can be prevented completely by constructing tank blockers. The corrugated iron structure is quite vulnerable to explosives - infantry can open up new entryways along the sides of the Hangar, while parts of the roof can be knocked through, exposing the ground to fire from above.
Capture of the flag grants access to a single aircraft spawn that takes off from the southern runway. The runway itself, along with much of the ground south of the flag, is generally exposed save for a number of parked aircraft and their accompanying concrete maintenance bays located at intervals along its length. Ground vehicle maintenance is available at the flag from a Repair Station outside the Hangar's southern wall - nearby are spots for spawning an M2 Flamethrower, four light vehicles, and two dinghies. Another dinghy spawns at the Outpost, a smaller jetty near the airfield's control tower, which can be climbed to reach the vantage point on the observation deck.
")
")
")
")
")
")
")
")
D: Ammo Depot[]
The Ammo Depot is located in the southeast corner of the map by the island's "elbow". Situated on flattened ground, the adjacent raised runway acts to separate direct line of sight between the flag and the Hangar to the north, with road tunnels dug underneath the runway for easier access. As the name suggest, the Ammo Depot is the storage area for aircraft munitions, contained within six trapezoid bunkers arranged neatly around the central clearing, with large open spaces between them to allow vehicles to traverse the area.
The bunkers are the primary source of cover within the large capture zone, useful for hiding from enemies on the surrounding raised terrain to the north and east. They have exterior shielding walls and ramp-like roofs than can used to gain an elevated position, with the interior of each bunker being accessible via doorways at each end or a single open hatch in the roof. As such they are easily defensible and highly resistant to external bombardment, however players should be aware that the four bunkers near the south coast are packed with explosive ordnance that can be set off by gunfire. This triggers an explosion of impressive force that will kill anyone inside, severely injure those outside, and knock over and disorient those in the general vicinity, as well as destroying the bunker in the process. In spite of this, even in their destroyed state the sturdy remains of the outer walls of the bunker can provide robust shoulder-height cover for infantry.
The flag spawns two aircraft, deployed from the runway. The planes can be highly vulnerable during takeoff, especially when this or the nearby objectives of Hangar and Oil Tanks are contested by enemies. At the very least, the runway can be defended from aerial attack using two 40mm Bofors gun positions on the south end of the Depot. An Ammo, Health and Vehicle resupply stations are located on the roadway between the two rows of bunkers, while a Katana battle pickup can also be acquired nearby.
")
")
")
")
")
")
E: Oil Tanks[]
The holding tanks for supplying the island bases's aircraft with fuel are located within a facility on the southern arm of Wake, off the west end of the airstrip runway. The oil is stored in two large cylindrical fuel silos extending from below ground within a hollow concrete foundation that comprises much of the capture zone. While this area is mostly protected from long range attack, the confines of the pit-like underground are otherwise lacking in cover, and are further littered with barrels that can catch fire and explode. Players should also be vigilant of attack from above due to the vertical nature of the objective. A series of metal gantries suspended above the pit are supported by stairwells to allows players to climb in and out, while the silos themselves can be scaled using ladders, granting an ideal overwatch position over the pit and the surrounding, flattened terrain.
The oil tanks are flanked by a bundled pipeline on raised supports, as well as a roadway to the north. Across from this, a third partially constructed silo connected to the others by overhead pipes stands on an elevated concrete platfrom. Although outside of the capture radius, the missing panels at the base of the silo allows players to climb inside, granting an elevated firing position with near all-round cover.
As with the adjacent Ammo Depot objective, the fuel silos on the flag pose a significant environmental threat. If they are damaged enough by explosives, the silo will emit black smoke, its metal walls creaking and bulging, indicating an imminent explosion. When this occurs, the force can kill any players within a roughly 15m radius, also destroying the metal gantries between the silos. Pools of fire will also collect in the below ground section, denying use of the area for some time following the explosion.
Ammo and Health resupply stations are located in the middle of the objective, below ground.
A small supply shed adjacent to the unfinished silo houses the flag's [[[Supply Station#Vehicle Supply Stations|Vehicle Supply Station]] and a Flamethrower battle pickup. The flag also spawns two light vehicles, and two dinghies on the coast about 50m north of the capture radius.
")
")
")
")
")
")
")
F: Dock[]
The Docking area, directly west of Oil Tanks, is the main naval supply point on Wake Island. It contains a small harbor built into the marine channel that divides the southern arm of Wake from the adjacent Wilkes Islet, crossed overland by a road bridge. The capture zone is concentrated on a small compound within the docking facility, spanning two warehouses to the south with a small jetty along its northern edge. The warehouses were previously used for tank maintenance, with the hulks of half a dozen Shermans sitting forgotten either on mechanical jacks or on the dockside, rusting in the briny air. The Warehouses, although large and open at most sides, can provide general cover, with their roofs being climbable using supply stacks around their outer walls. They are vulnerable to explosives however, with wall and ceiling panels capable of being torn open. Substitute elevated positions about the flag include a watchtower near the compound's main gate, and the raised bridge outside the capture zone to the north.
The waterway between the dock and Wilkes allows boats to pass from the southern coast of Wake to the inner lagoon area, and vice versa. Wilkes Islet itself is mostly devoid of tactical resources such as gun emplacements or vehicles, and as a result is usually unoccupied - this may offer the US team a more discreet landing point than the more accessible but hotly contested Hotel. East of the flag, a row of fortifications including a trench, pillbox and a 40mm AA gun cover the open ground up to Oil Tanks. A second AA gun is to the southeast of the flag, on the south coast.
As with Barracks, this objective provides an additional tank spawn as well as a neutral, unspecialized Medium Tank for use when captured. An Ammo and Health resupply station combo is located between the warehouses, while a Katana battle pickup is found on the west end of the capture zone.
")
")
")
")
")
Breakthrough[]
With the defeat of its original defenders in December 1941, US Forces are tasked with retaking the island from the Japanese occupiers by staging their own amphibious landing. Breakthrough on Wake Island is divided into four sectors, consisting of a complete round trip from the northern shore to the southern shore of the island itself, with objectives alternating between pairs and singular flags.
500 tickets are allocated for the attackers on this map. The US attack is backed by significant material resources, with Japanese tank and air forces being frequently outnumbered throughout the battle. The team must instead rely on existing and buildable fortifications, the careful positioning and dedicated use of stationary weapons, and knowledge that after the initial stage, the US main thrust is likely to occur from a single, predictable direction.
Sector 1[]
The objectives for the initial landing are the capture of the incomplete Hotel and the captured residential Barracks within the northwestern sector of the island. The vehicle complement aboard the LSTs gives the US team choice in how to stage their attack; they can either land directly on Peale Island and advance inland, thus giving defenders the least possible time to react, or bypass the main line of contention along the north and south coast, potentially even landing at Barracks first to catch the defenders in a pincer. Defenders should therefore be aware of incoming attacks from land and sea, utilizing the dual Type 10 emplacements to destroy approaching landing craft and amphibious tank, and patrolling the coast to prevent uncontested landings at more obscure sites.
The US attackers deploy from LSTs carrying two unspecialized LVT tanks and eight LCVP boats for transport, as well as an allocation of three planes and four 40mm Bofors. The AA guns on the ship's bow can perform a dual role, as they are capable of hitting enemy targets that enter the water off the southern coast. The Japanese have three aircraft of their own at this stage but no tanks, but have the two coastal guns and two 40mm AA guns to deter vehicles. It should be noted that both flags in this sector awards an unspecialized Sherman tank immediately upon capture by the US. This can give attackers a further lead in armored strength, or potentially allow the Japanese to steal a tank if they are quick enough. Two Dinghies also spawn at the Hotel jetty for fast transport along the shoreline. The US team also cannot deploy Sherman Calliope tanks until the sector is cleared.
Sector 2[]
After taking both objectives, the US forces have established a foothold on the island, and must now push forward to secure the airstrip. The sole Hangar on the island, now currently used to store Zero aircraft, is the primary target for this phase. The single objective allows defenders to concentrate their forces, and the Hangar structure itself, although partially destructible, is generally well-protected against tank and air attack. This requires the complex be infiltrated by infantry forces and seized with close-quarters fighting. To reach the objective, the US can try attacking from the flanks along the east and west coast. By way of its limited access points, the roof of the hangar is highly defensible and can be utilized to gain or retain control of the flag. If the objective is neutralized, defenders are forced to spawn at the Ammo Depot, far to the south across almost completely exposed terrain, which can be a significant obstacle in conducting a successful counterattack.
The US forces now allow Sherman tanks for deployment on land, with three tank spawns being allocated to their side. Depending on the retained number of amphibious and neutrally-spawning tanks in the last sector, the defenders could be faced by as many as six enemy tanks at once. Despite this disparity, the Hangar sector is not ideal terrain for tanks, as they can be blocked from entering the capture zone or its immediate vicinity via fortifications. Furthermore, the Japanese defenders are issued two towable and one static 6 Pounder anti-tank gun. While the static gun is pre-sighted to defend the west coast from US dinghy assault, provided by spawns at the Hotel and Barracks, the two other guns can be moved into position to counter US tank assaults from whichever direction they come from - usually, this is the main road and Hill crest directly north of the Hangar. Two Type 95 Cars are supplied as towing vehicles.
Sector 3[]
Securing the Hangar and overrunning the airstrip grants air superiority for the Americans, making it impossible for the Japanese to launch planes. They are now tasked with the capture of key supply points, namely the Ammo Depot and the Oil Tanks. When fighting for the Ammo Depot, players must be wary of the explosive hazard posed by the storage bunkers, as the massive explosion can destroy infantry hiding within them and disrupt the distribution of cover. Once the bunkers have been destroyed, the area becomes highly vulnerable to Squad Reinforcement artillery support, which can also be effective at attacking the more concentrated Oil Tanks objective. While the raised and flattened terrain of the runway generally favors the Americans, granting raised positions around two sides of the capture area and allowing tanks to move freely, the direct approach to Oil Tanks is more defender-sided, with stretches of open ground covered by multiple defensive pillboxes and trenches.
To make up for their loss of air power, the Japanese are provided with two tanks - from this point onwards, the team have only man-portable and static anti-aircraft weapons for defense, such as the two guns at Ammo Depot. US forces are again encouraged to flank the enemy, this time using both Dinghies and GPWs spawn in the Hangar vicinity.
Sector 4[]
After successfully securing the supplies, the Americans must now finish their conquest of the island by capturing the Dock. This single objective, like Oil Tanks, offers only one overland route of advance across ground of limited concealment. Taking place at the thinnest part of the island, it also limits the amount of route deviation achieved through flanking. Upon reaching the capture zone, rooting out defenders can be difficult due to the size of the capture radius and the number of possible hiding places. Nevertheless, the area can still be saturated with air and off-map ordnance to great effect. The defenders' sector spawn on Wilkes Island means they have to cross the harbor canal to reach the objective - destroying the road bridge can thus strand tanks and infantry on the wrong side of the waterway, preventing them from influencing flag traction at this crucial stage.
The round is won for the attackers if they succeed in taking the Dockyards. Marooned on Wilkes Islet with only the ocean to their backs, the situation appears hopeless for the Japanese defenders, ending what appears to be the second Battle of Wake Island.
Squad Conquest[]
Squad Conquest takes place around the Airfield at the "joint" of the Atoll, with objectives spread out in a linear fashion across the width of the airstrip. As a result most of the terrain on the south side of the map is highly open with little cover, while the north side has vegetation and uneven terrain for infantry to utilize.
Each team starts with a ticket limit of 150. They are also allocated a single tank, as well as a light vehicle for infantry rushes across the more open sections of the map, giving the potential to break deadlocks. It should also be noted that each deployment lacks Health, Ammo and Vehicle Resupply Stations, requiring tanks to capture the Hangar to receive ammunition and repairs.
Deployments[]
US Deployment[]
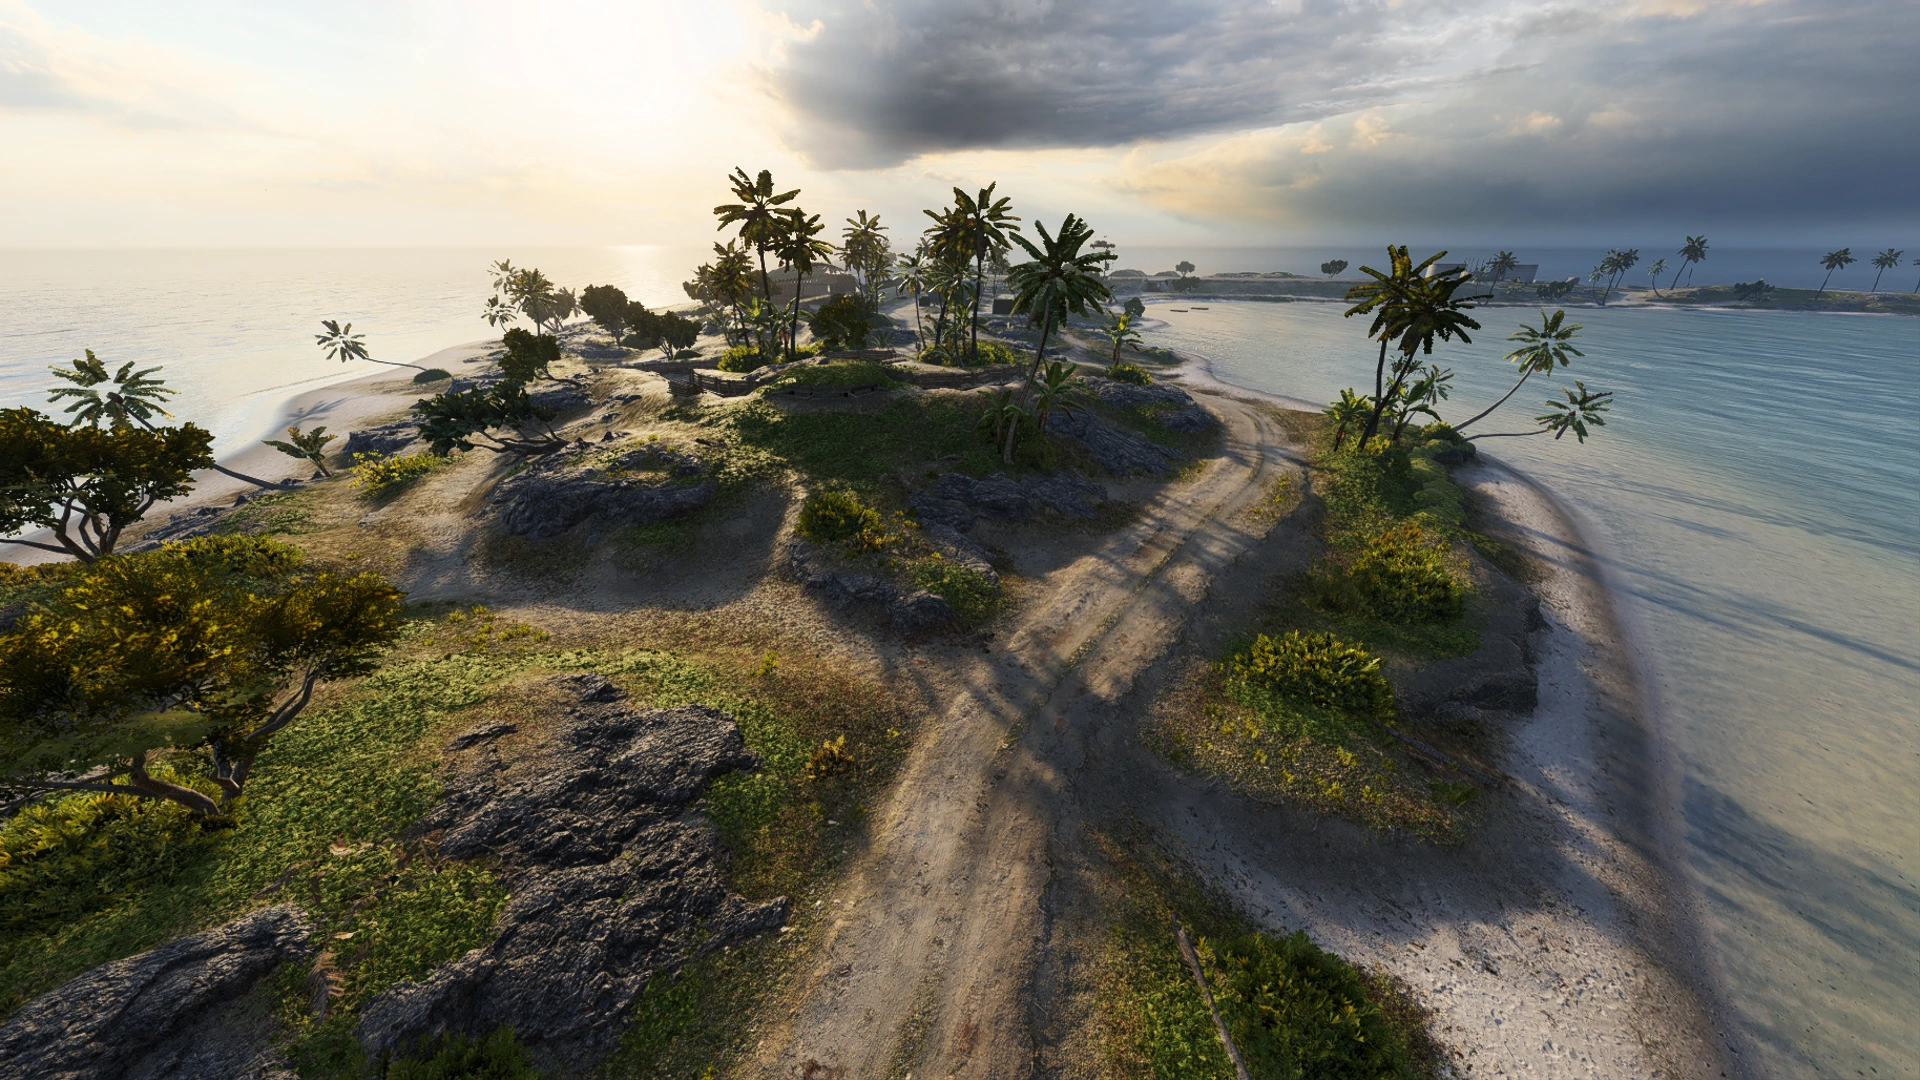
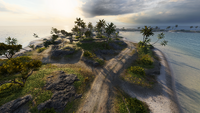
The US Deployment is on the roadway between the Barracks and Hangar Conquest objectives. They spawn very close to the Hill objective, with the hill itself screening most of their deployment area from enemy view. As the US deploy from a much narrower point of the island than the Japanese, potential base exit routes are more limited, but are substantially better covered.
Japanese Deployment[]
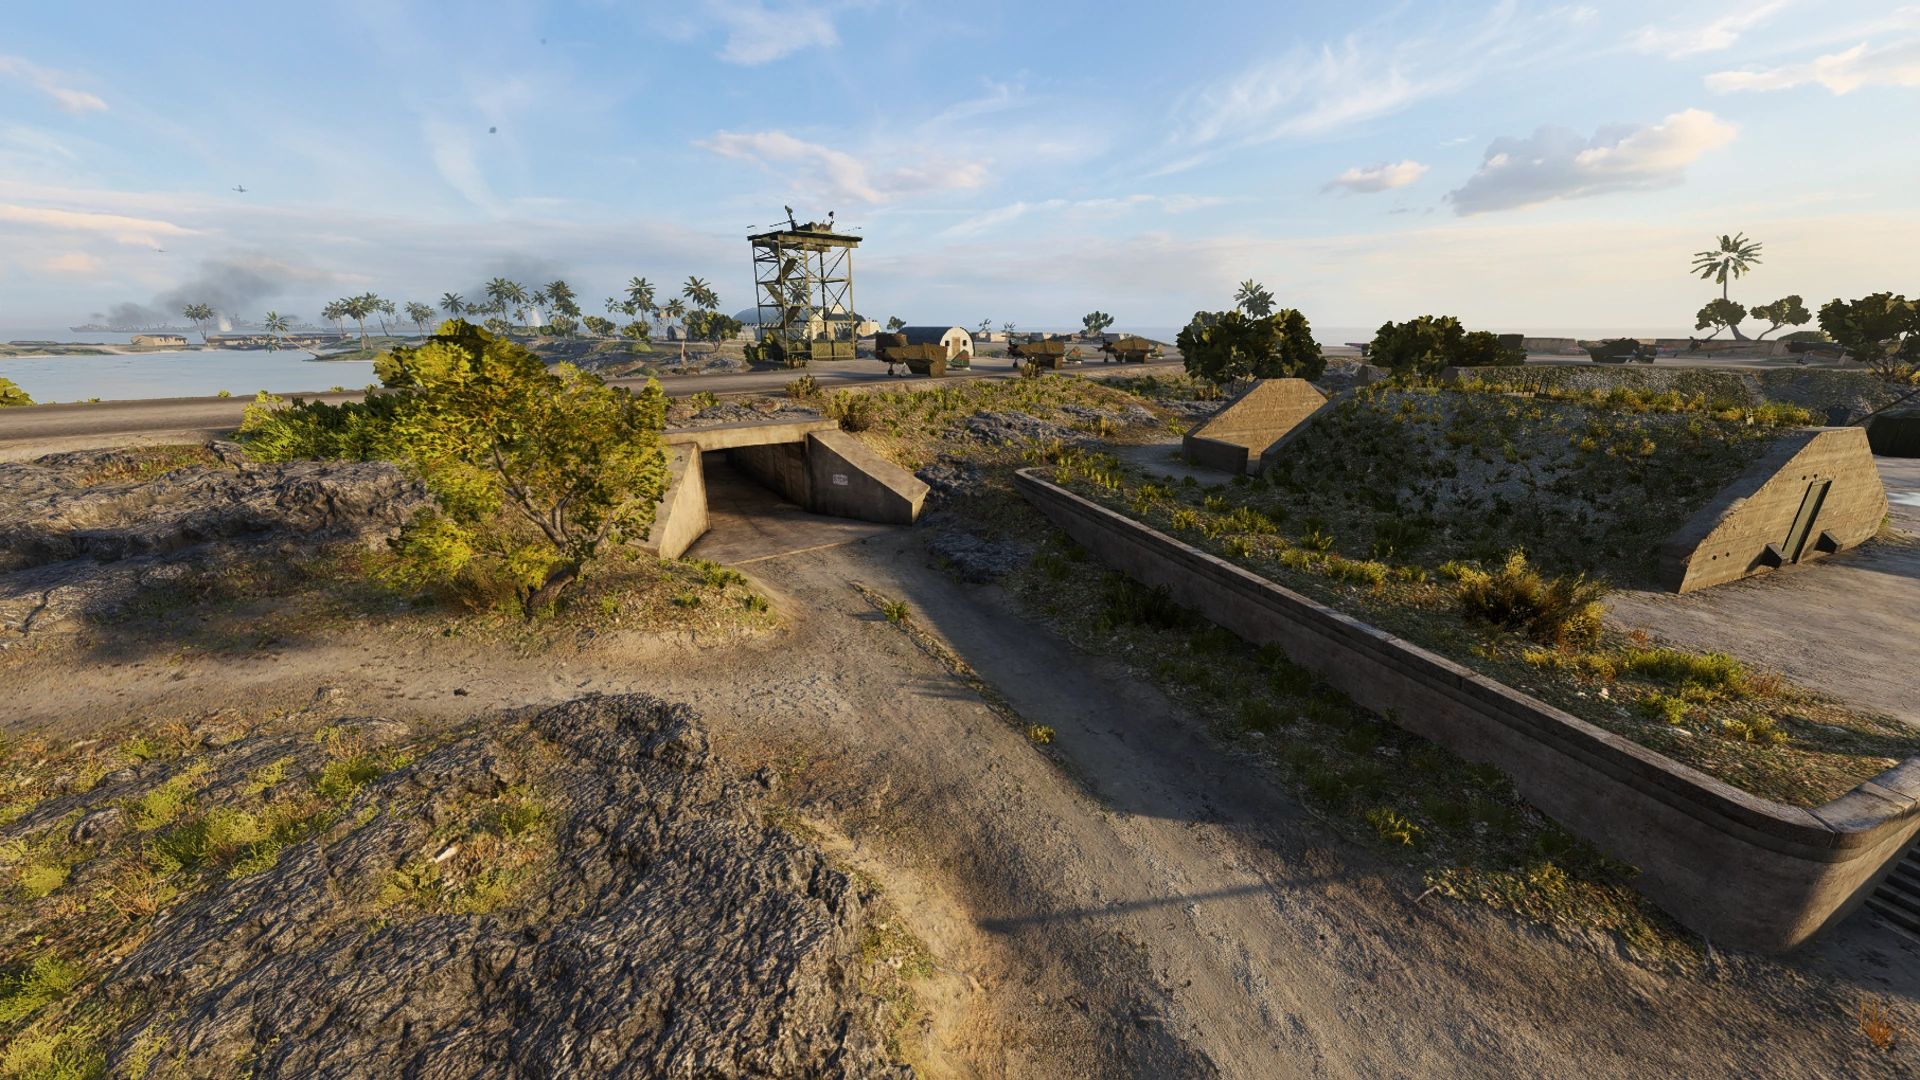

The Japanese Deployment is within the Ammo Depot at the southern end of the Airfield, with their main spawn area being on the opposite side of the below-runway tunnel from the Outpost objective. Despite this, their protected spawn area is quite large, enabling players to exit the base anywhere along the accessible length of runway, even using the far east coast of the island.
Flags[]
A: Hill[]
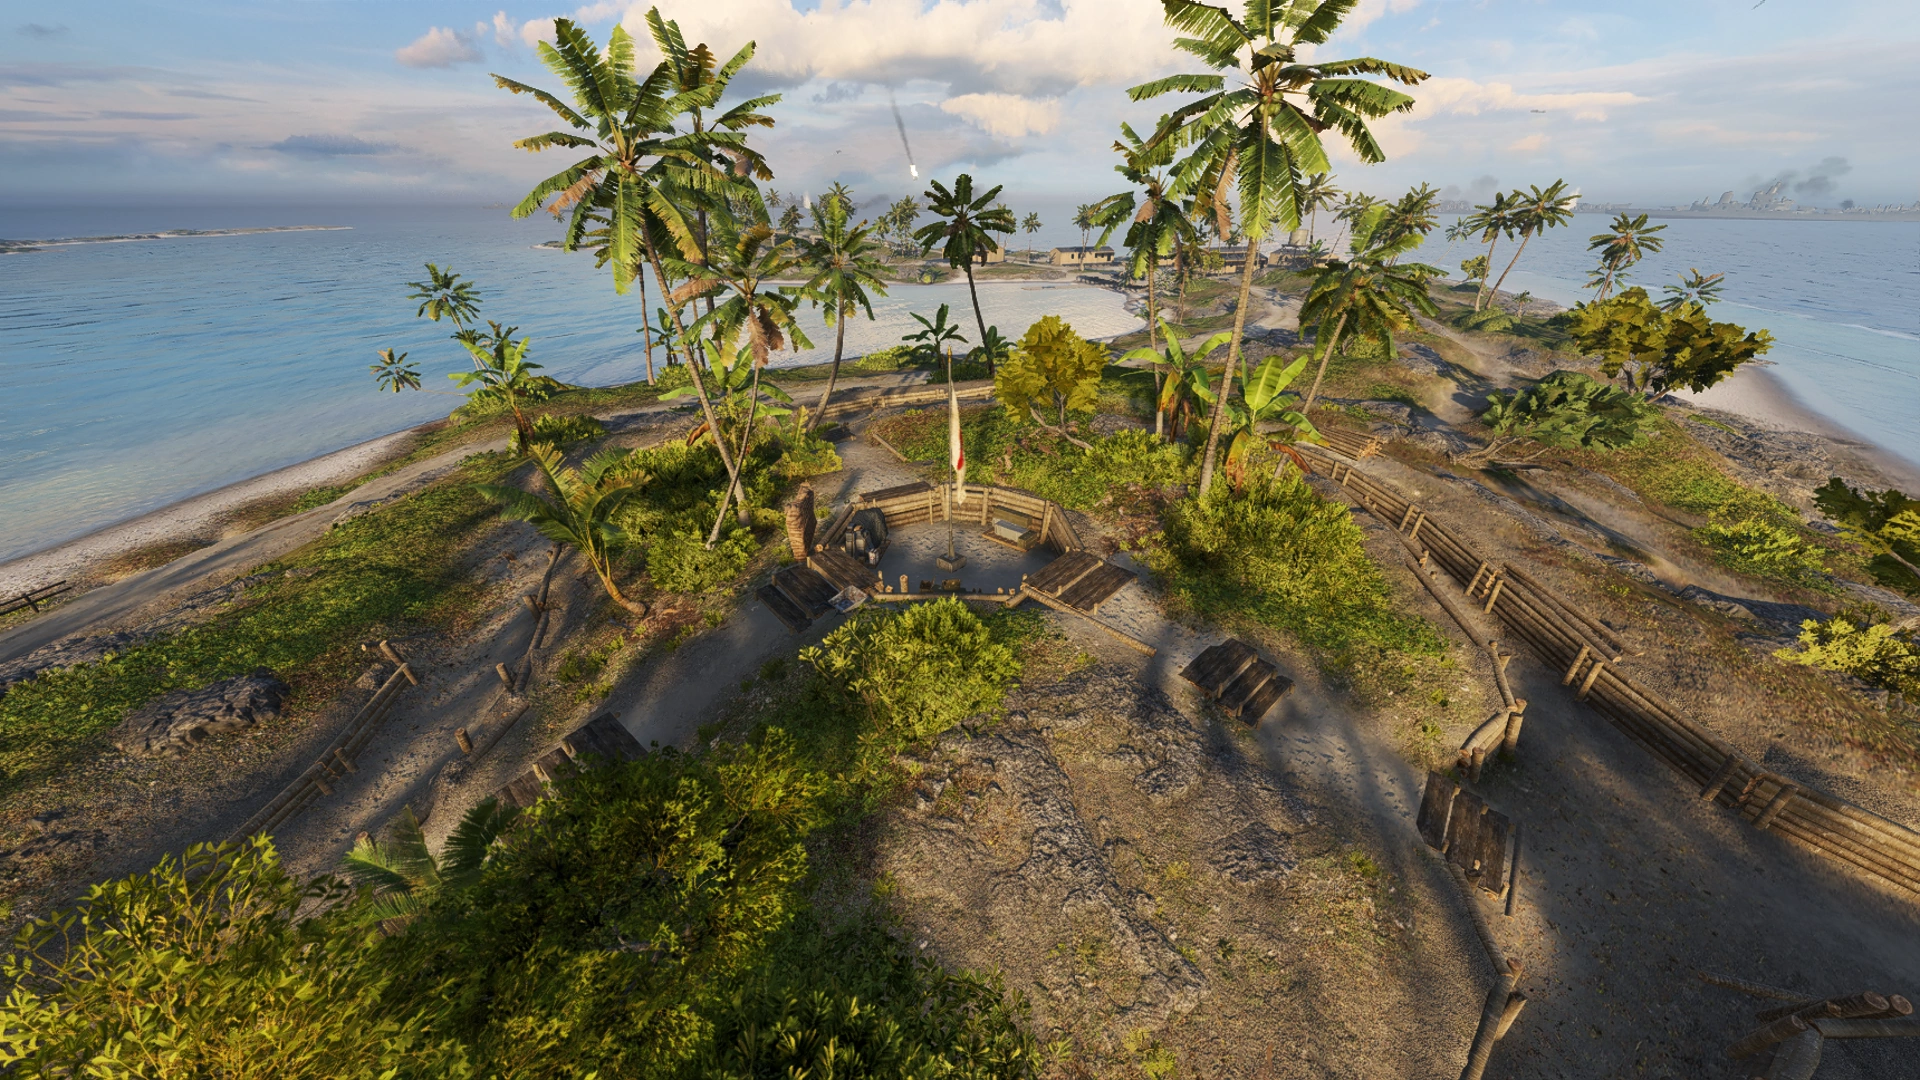

The Hill objective is off the north end of the airstrip. It consists of a series of forifications set into a small, foliage-covered hilltop. The trench system is arranged in a coil around the hill crest with a small, circular fighting pit located centrally. The pit contains Health, Ammo and a Flamethrower battle pickup. The capture zone extends over much of the hill surface, allowing players to fight from both the trenches and surrounding bushes.
B: Hangar[]

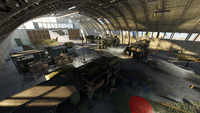
The Hangar objective is the middle flag, aligned with the vertically-orientated runway that forms the playable area's centerline. The capture area is largely unchanged from Conquest, and can be captured from inside, immediately outside, or from the roof. Holding the flag can be of great benefit to teams, as it gives unrestricted sightlines over the vast majority of the map, particularly towards the Japanese side. It is also the location of the map's only Vehicle Resupply Station, as well as Health, Ammo and a Katana battle pickup.
C: Outpost[]
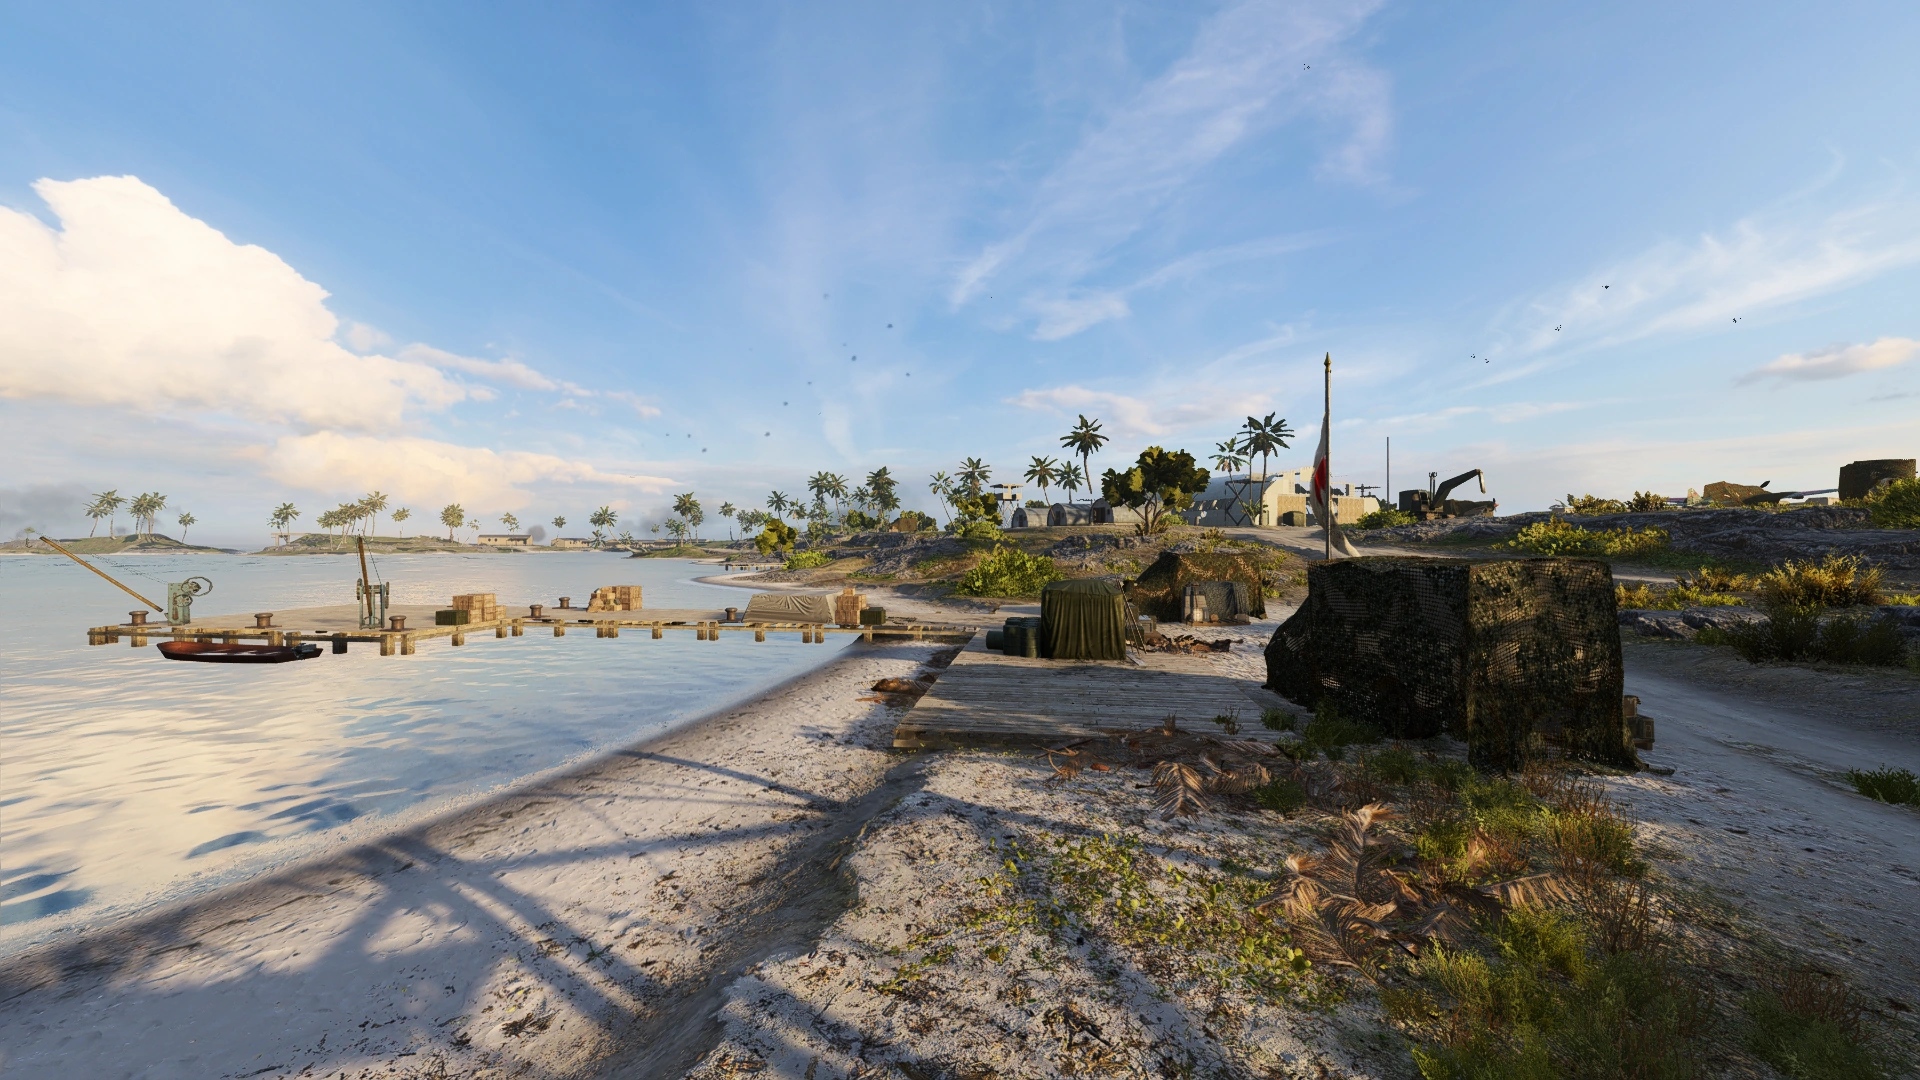

The Outpost objective is located on the south side of the play area on the inner coastline. The flag is set around the larger of the two supply docks in the area, with the capture zone encompassing both the pier extension, the dock itself, and a small section of the waterline around it. The pier is mostly devoid of cover, while the dock is sparsely covered by supply crates and cargo trucks - the area is nontheless highly vulnerable to fire from adjacent elevated positions, such as the Hangar to the north and the Control Tower and elevated runway to the south. The pier spawns two Dinghies that mostly benefit the Japanese team, allowing them to bypass the unfavourably exposed terrain around the airstrip by skirting the coastline. The flag also provides Health, Ammo and a Flamethrower pickup.
Team Deathmatch[]
Team Deathmatch is centered on the Ammo Depot. The widest section the island, the play area delivers a mixture of long-range combat around the flat expanse of the airstrip runway and southern coastline, and close-quarters, semi-urban combat towards the center. While the storage bunkers can be useful holdouts for groups of infantry, they can also pose a devastating explosive hazard should the ordnance inside ignite.
Rush[]
Rush on Wake Island first became playable during Week Seven of Into The Jungle from 19th to 26th March, 2020. Similar to Breakthrough, the battle progresses across the whole body of the island, but with the advance occurring in the opposite direction, and in five instead of four sectors.
Sector 1[]
In the first sector, the US launch their assault from the Dock area towards Oil Tanks. The M-COM station designated objective 1A is located on the northwest side of the area by the main road, set up in a supply shed that in Conquest houses a Vehicle Supply Station. While the structure has no walls, it is partially surrounded by head-height sandbag constructions that offers cover for players immediately adjacent to the objective, but is open to the south.
Objective B is in the square "pit" between the two fuel silos. Compared to A, which is almost on the border with the US team's spawn protection boundary, this objective is more defensible as it is further back from the frontline, its below-ground position largely protected from long-range attack, and it can be effectively covered from the top of the climbable fuel tanks. However the pit can be completely cleared out by either team twice in a round, should they detonate the fuel tanks. When this objective is destroyed, The fuel tank nearest to the M-COM station will explode if undetonated.
The US bring with them two GPWs in the first wave.
Sector 2[]
In sector two, combat moves to the Ammo Depot near the island's joint. The two objectives are located outside the bunkers and roughly parallel to one another, with objective A positioned between the two structures on the north side and objective B between the second and third bunker to the south. The bunkers, as well as the large fortifications built around each objective, offer defenders a cover advantage. As with the last flag, attackers can set off the stored munitions to reduce the available cover. Alternatively, they can use the opposite side of the aircraft runway to flank the position and attack from the rear.
Sector 3[]
The battle continues at the aircraft Hangar, around which the two objectives are closely positioned. Objective A is inside the Hangar, set up against the west wall midway along the structure's length. The adjacent shelving and sandbag fortifications, as well as the other large clutter objects throughout the Hangar, obfuscate sightlines within the objective zone, although after blasting out sections of the roof the interior can be clearly surveyed from above. Objective B is between a number the tin shacks near the western perimeter fence.
At this point, both teams receive one tank. The heavy vehicles can be useful in escorting infantry across the open ground surrounding the Airfield, as well as knocking out destructable panels of the Hangar and nearby structures to grant easier access.
Sector 4[]
Moving across the northern arm of Wake, combat is rejoined at the Barracks area. Objective A is found on the small docking area south of the position, while objective B is located in the middle of the settlement. By this point, the primary route of advance for attackers is across one of the thinnest parts of the island, across generally exposed ground to assault a well built-up area. In spite of the lack of boats, US players may consider swimming across the lagoon as a means of avoiding this particular piece of terrain.
Sector 5[]
The final sector takes place at the dilapidated Hotel on the northwestern tip of the island. Both M-COM stations are found on the ground floor of the Hotel building itself - objective A is at the end of the east wing and B in the west. The main terrain obstacles in this area are the single road bridge onto Peale Island and the lack of substantial cover surrounding the Hotel, which offers strong elevated fighting positions befitting of a final defense. The US team should be aware that by breaching the wooden walls of the Hotel they can deny the enemy cover and open up new infiltration points into the building.
All support for armor is dropped. With vehicle resupply stations spontaniously exploding, unable to be rebuilt.
Gallery[]
")
")
")
")
")
")
")
")
")
")
")
")
")
")
")
")
| ||||||||||||||||||||||||||
Trivia[]
- The map's internal name is MP_WakeIsland.
- North-west of the airfield on Wake Island there is a monument from DICE that says: To those who fought here in 1942 - BF2 - 2142 - 1943 - BF3 - BFV We are grateful. This is an updated version of the same easter egg that appeared in the Battlefield 3 version of the map.
- An elaborate easter egg can be discovered at the "We are grateful" plaque. The full instructions are as follows:[3]
- A crab is located in front of the plaque. Hidden around the map are multiple crabs. Approaching the crabs will cause them to make a clicking sound, burrow into the ground, and reappear in front of the plaque. If five crabs are found, the six crabs will form a circle, and a pair of headphones and a gramophone will appear in the middle of the circle.
- After picking up the headphones, the player can head to an M-COM located at D Flag, and hear morse code coming from the M-COM. The morse code decrypts to a string of code, which, when Googled, will direct to a coordinate located near the real Wake Island. By heading to the corresponding location in-game, the player can find a vinyl record hidden under the water.
- With the vinyl record, if the player interacts with the gramophone, the Battlefield 1942 theme will start to play. The M-COM morse code will also change, pointing to a new set of coordinates, and another vinyl record can be picked up at the corresponding in-game location. Interact with the gramophone again, and the song will change to a song from Battlefield 2. The process can be repeated several times, changing the song to Battlefield 2142, Battlefield Heroes, Battlefield 1943, and Battlefield 3 songs.
- After the Battlefield 3 song, one more vinyl record can be found. By interacting with the gramophone again, crabs will begin to appear next to the plaque, and an EDM remix of the Battlefield theme, accompanied with crab clicks, will start playing. When the song reaches the climax, the crabs will begin to dance with the beat, and pyrotechnics will be fired from the plaque.
- The crab dancing, combined with the EDM music and the tropical setting, is likely a reference to the music video of EDM song Crab Rave by Noisestorm, which depicts crabs dancing on a tropical island, and is also an internet meme.
- The silos at Fuel Tanks originally did not explode. This functionality was added with the 6.2 patch on March 5th, 2020.[4]